Having trouble getting your security cameras to connect to your T-Mobile internet? It can be a real headache. In this guide, we’ll look at the typical problems and show you how to fix them.
From sorting out your wireless settings to dealing with signal issues, we’ll cover everything you need to know.
By the end, you’ll have the knowledge to solve these connection problems and get your security cameras up and running smoothly on T-Mobile internet.
Details About T-Mobile Internet and Security Camera Compatibility
When you switch to T-Mobile Internet, you might find that setting up your home security cameras requires some adjustments. T-Mobile Internet, which may be provided by devices like an Arcadyan Gateway, has both 2.4GHz and 5GHz Wi-Fi networks. Your cameras need to be compatible with these frequencies to connect successfully.
For instance, some users have experienced difficulties when trying to connect cameras like Blink and Panasonic over T-Mobile’s Wi-Fi. It’s essential to ensure that your security cameras support the network settings provided by T-Mobile’s gateway/router.
Here’s a quick guide to assess compatibility:
| Feature | Requirement |
|---|---|
| Wi-Fi Frequency | 2.4GHz and 5GHz (make sure your cameras support these) |
| Settings Adjustment | May be necessary for TMHI gateway/router |
| Camera Brands | Ring, Nest, Simplisafe are known to work |
Remember, if your cameras are designed to connect out to an intermediate gateway or need open incoming IPv4 ports, they may encounter difficulties with connection. It’s crucial that you verify the network requirements of your security systems and adjust the Wi-Fi settings on your T-Mobile gateway/router accordingly to ensure they are set up for optimal performance.
Cameras like the Arlo Go 2 LTE/Wi-Fi Security Camera are not compatible for connectivity with a network like T-Mobile’s, boasting the ability to connect via LTE or direct Wi-Fi.
What are the Reasons For Security Cameras Not Connecting to T-Mobile Internet
1. Compatibility Issues
Your security cameras may not be compatible with the newer Wi-Fi 6 technology used by some T-Mobile gateways. This can prevent cameras, especially older models, from establishing a connection.
2. Frequency Mismatch
Many security cameras only connect over 2.4GHz networks, while some T-Mobile gateways may default to a combined 2.4GHz and 5GHz setting. As a result, your cameras may struggle to connect if they can’t find the appropriate frequency.
3. Advanced Settings Configuration
Incorrect configuration in the advanced settings of your router can avoid the connection. Ensure that settings within your T-Mobile Internet setup are appropriately configured to allow devices such as security cameras to connect.
4. Signal Strength and Interference
Weak signal strength or interference by physical barriers between your camera and the gateway may be an issue. Position your cameras and router optimally to improve the signal quality.
5. Gateway and Camera Software
Ensure your gateway and cameras are running the latest firmware. Outdated software can lead to connectivity problems.
How To Fix Security Cameras Not Connecting to T-Mobile Internet
1. Create a Separate 2.4 GHz Wi-Fi Network
To ensure compatibility with Lorex cameras and other similar security devices, you can set up a new 2.4 GHz Wi-Fi network distinct from your primary network.
Follow these steps:
- Access your router’s settings.
- Configure the 2.4 GHz band with a unique SSID.
- Set security to WPA/WPA2 (not WPA2/WPA3).
- Ensure the network is not hidden.
- Save settings and allow the router to restart.
2. Reset and Reconnect Your Security Camera
If your camera fails to connect, a reset may be necessary. Steps include:
- Power cycle the camera.
- Use your mobile app close to the router.
- Attempt reconnection.
- Ensure advanced settings on the router are appropriate.
Remember to check the camera’s distance to the router as this impacts connection quality.
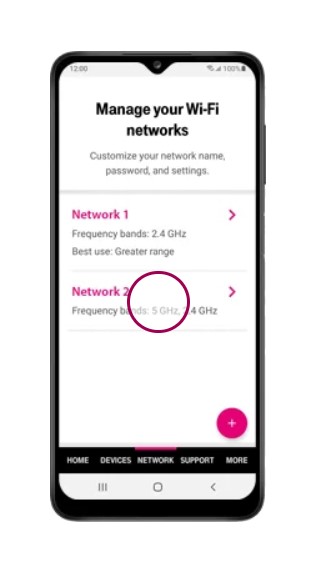
3. Split 2.4 GHz and 5 GHz SSIDs
If your security camera won’t connect to a 5 GHz gateway, splitting your Wi-Fi networks might resolve the issue:
steps to split the 2.4GHz and 5GHz networks on a T-Mobile gateway by accessing the wireless settings options:
1. Log into the T-Mobile gateway admin page (default IP 192.168.1.1)
2. Go to Setup > Wireless
3. Under Wireless Network, click the edit icon next to the existing SSID
4. Uncheck the box next to “Use single SSID“
5. Click Save
6. Now two new options will appear – 2.4GHz Wireless Network and 5GHz Wireless Network
7. Click the edit icon for 2.4GHz Wireless Network
8. Change the SSID name (e.g. CameraNetwork24)
8. Click Save
9. Click the edit icon for 5GHz Wireless Network
10. Change the SSID name (e.g. HomeNetwork5G)
11. Click Save
12. Connect cameras to the new 2.4GHz SSID for setup
13. Once setup is complete, other devices can use the 5GHz SSID.
4. Try To Use The Wired Connection Between Camera and T-Mobile Router/Gateway
When wireless methods fail, a direct wired connection might work:
- Connect the camera directly to the router via Ethernet.
- Ensure proper configuration in the router’s settings.
- Test for connectivity and adjust settings if necessary.
5. Adjust Your T-Mobile Gateway’s Security Settings Compatible to Security Camera
Choose a WPA type that’s compatible with your cameras, preferably WPA/WPA2. Also, Ensure the Hidden switch for your WiFi network is set to OFF, making the network visible to your devices.
steps to adjust your T-Mobile gateway’s security settings:
- Access the T-Mobile gateway’s admin page using the default IP address (usually 192.168.1.1).
- Navigate to the wireless security settings or Wi-Fi settings.
- Select the WPA/WPA2 encryption type from the security options.
- Save the changes.
- Locate the “Hidden Network” or “Hide SSID” setting and ensure that it is set to “OFF” to make the network visible to your devices.
- Save the settings and apply the changes.
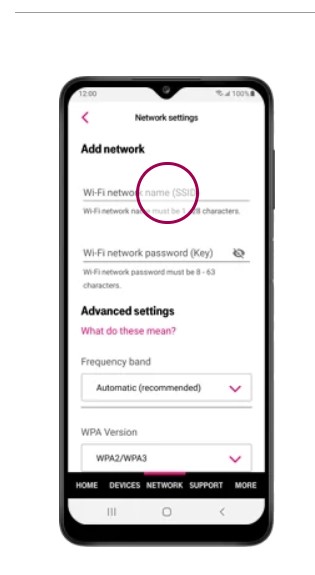
To change the WPA version and encryption mode of a Wi-Fi network using the T-Mobile Internet app, follow these steps:
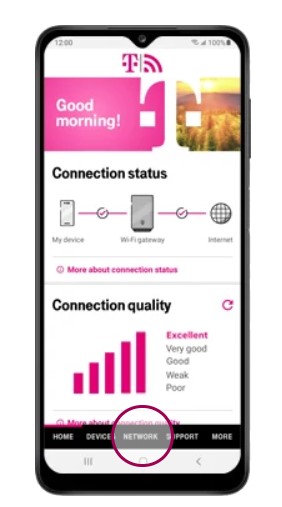
1. Go to the Home screen.
2. Choose T-Mobile Internet.

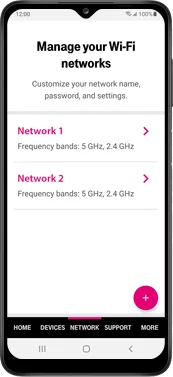
3. Select NETWORK.
4. Choose a network.
5. Under WPA Version, choose the drop-down menu and select an option.

6. Under WPA Encryption Mode, choose the drop-down menu and select an option.
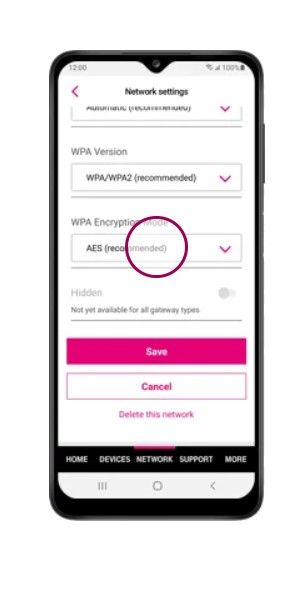
7. Click “Save” to apply the changes.
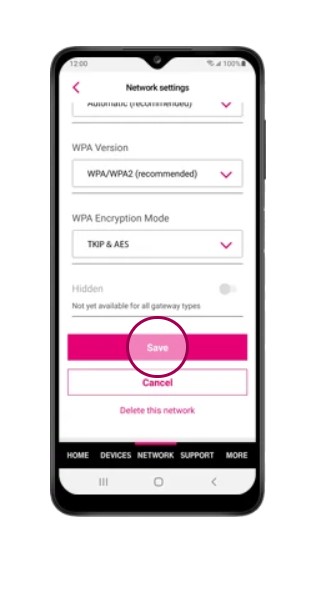
8. The encryption mode has been successfully changed.
Note: Please ensure to use the separate/dedicated SSID for setting up the weak encryption algorithm for T-mobile gateway to connect with security camera. As, using the weak encryption algorithm leads your security camera to gets hacked and look into it.
6. Set Up a Guest Network To Customise SSID Settings Compatible To Security Camera
You can utilize the T-Mobile gateway’s feature to set up a guest network with a customized SSID to ensure compatibility with security cameras.
You can customize the guest network’s SSID settings to align with the requirements of your security cameras, providing a secure and dedicated connection for these devices.
- Log in to your T-Mobile gateway’s admin page using the default IP address.
- Look for the option to set up a guest network.
- Customize the SSID (network name) and other settings for the guest network to align with the requirements of your security cameras.
- Save the changes.
By following these steps, you can create a separate guest network with customized settings that are compatible with your security cameras, ensuring a dedicated and secure connection for these devices.
How To Best Optimize The T-Mobile Internet for Security Cameras
To ensure your security cameras maintain a stable connection to your T-Mobile Internet, follow these technical steps:
Restart Your Gateway Periodically:
- If you face connectivity issues, a simple gateway restart can clear the problem.
- Press the power button.
- Disconnect the power cable.
- Wait for one minute before reconnecting and powering on.
Position Your Router and Cameras Strategically:
- The placement of your router and cameras can impact the signal strength. Try to reposition your devices to areas with fewer obstructions between them.
Enable Encryption on Your Network:
To protect your camera data, you should activate WPA or WPA2 encryption on your wireless network. Many cameras only support WPA/WPA2 encryption for connecting to the network.
You can activate WPA/WPA2 encryption by logging into your T-Mobile gateway settings or using the T-Mobile app.
Steps to set up WPA2 encryption on a T-Mobile network gateway:
- Find gateway IP (usually 192.168.1.1)
- Login to gateway admin page at IP address
- Go to Wireless Settings
- Select WPA2-Personal under Security Mode
- Enter passphrase of 8+ characters in Pre-Shared Key field
- Click Save
- Connect cameras and devices to network using SSID and passphrase
- Ensure devices are set to use WPA2 encryption
- Optional: Change default admin credentials for added security
steps to change the encryption settings on a T-Mobile gateway by editing the configuration file directly:
- Find the IP address of your T-Mobile gateway (usually 192.168.1.1)
- SSH into the gateway using the default username and password (often admin/password)
- Use the vi or nano editor to open the configuration file – typically /etc/config/wireless
- Find the network section with your SSID
- Change the ‘encryption’ setting to ‘psk2’ for WPA2 encryption
- Set the ‘key‘ setting to your new passphrase
- Save and exit the file
- Run the command ‘sysctl -p /etc/config/wireless‘ to apply changes
- Reboot the gateway with the ‘reboot‘ command
- Connect devices using the new SSID and passphrase
- Verify they are now using WPA2 encryption for secure connectivity
By taking these steps, you’ll provide your security cameras with a reliable network connection, enhancing the overall security of your system.