Closed captioning is a valuable feature for many, providing a text version of the audio within a program. However, there are times when you might prefer to watch content without these captions.
Whether you’ve accidentally enabled them or simply wish to turn them off for a distraction-free viewing experience, Xfinity Stream makes it easy to disable closed captions.
Here’s a step by step guide to turn off closed caption on the Xfinity Stream platform.
How To Turn Off Closed Caption On Xfinity Stream
What You’ll Need:
- Xfinity TV and Xfinity Internet service
- Access to the Xfinity Stream portal
Method 1: Turning Closed Caption On or Off While Watching a Program
Direct Toggle Using Keyboard
- While watching a program, simply press the letter ‘‘C’‘ on your keyboard to toggle Closed Caption on or off.
Method 2: Turn Off Closed Caption Through Language Settings
Step 1: Access Language Settings
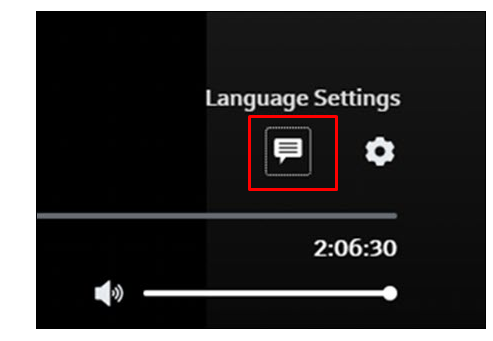
- On the program playback page, hover over the “Language Settings icon” (the chat box icon) and click on it, or press “G” on your keyboard while inside the player.
Step 2: Enable/Disable CC
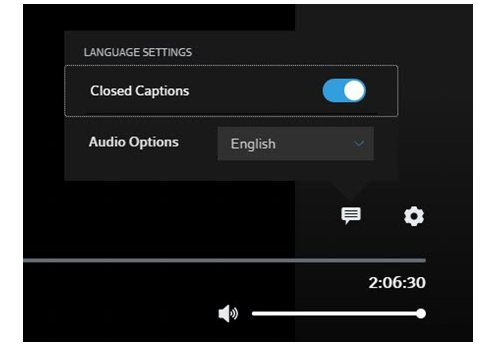
- Click the “OFF switch” to turn Closed Caption on or off for all programs, not just the current one.
How To Setting Up Closed Caption and Customize Appearance
1. Setting Up Closed Caption On Xfinity Stream
Step 1: Open Settings
- Click the “Settings Icon” (gear icon) on any Xfinity Stream portal page.
Step 2: Navigate to Accessibility
- Select “Accessibility” from the menu.
Step 3: Activate Closed Caption
- “Toggle the ON/OFF” switch to enable Closed Caption.
2. Customize Appearance Of Closed Caption
Step 1: Closed Captioning Options
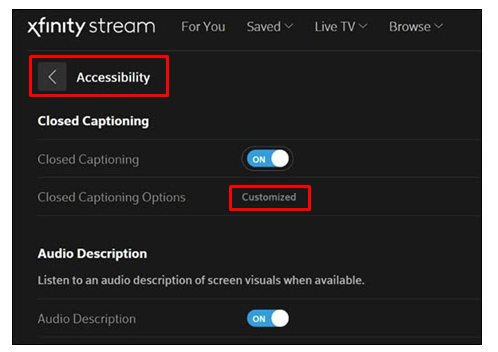
- Click the “Settings Icon” (gear icon), navigate to “Accessibility“
- On the Accessibility page, click “Closed Captioning Options“
- Click the “Customize” button.
Step 2: Customize Text
- Choose your desired text options such as “Font Size, Font Style, and Font Color.“
Step 3: Preview Changes
- Use the “Preview” at the bottom of the window to see how the captions will look.
Step 4: Reset or Update
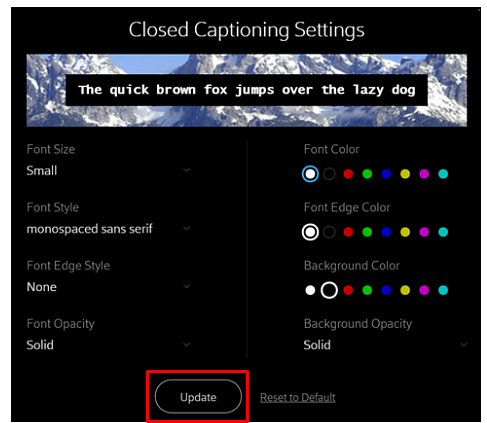
- Click “Reset to Default” if needed, or “Update” to save the new settings.
How To Turn Of Audio Description On Xfinity Stream
Here’s how to enable this feature both during viewing and from the Xfinity Stream portal settings.
Method 1: Turn Off Audio Description During Viewing
To deactivate audio description while actively watching a program, follow these steps:
Step 1: Accessing Language Settings
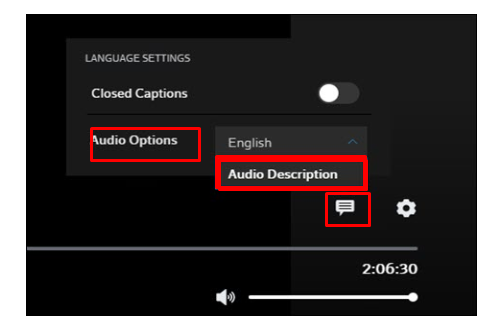
- Hover over the “Language Settings “icon, which looks like a chat box, or press ‘‘G’‘ on your keyboard to access it.
Step 2: Selecting Audio Description
- Click to expand the “Audio Options” drop-down menu.
- Look for and select the “Audio Description” option if it’s available. This will disable audio description for all programs that offer it.
Method 2: Deactivating Audio Description in Settings
If you prefer to set up audio description from the main settings menu for consistent use across all content, here’s what to do:
Step 1: Accessing the Settings Menu
- Click the “gear icon” on any page within the Xfinity Stream portal to open the Settings menu.
Step 2: Navigating to Accessibility Options
- Within the Settings menu, find and select “Accessibility.“
Step 3: Enabling Audio Description
- “Toggle OFF” the switch next to Audio Description to disable it.