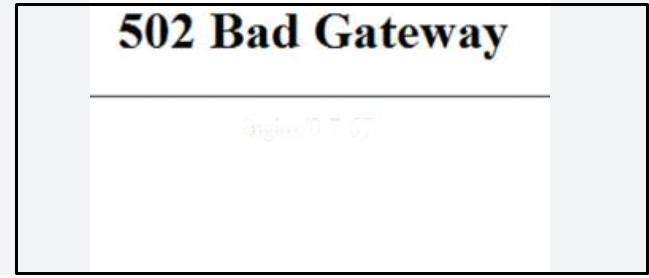
Are you getting a Ticketmaster 502 Bad Gateway error and looking for a fix?
It would be frustrating if you’re in the middle of purchasing tickets for an event you’ve been eagerly awaiting and face an error message stating “502 Bad Gateway“.
This error message is a sign that communication between the server hosting the Ticketmaster site and the gateway or proxy through which the request was routed has hit a snag.
In this blog post, we will walk you through the potential troubleshooting steps to help you quickly resolve the issue and get back to securing your tickets with ease.
What Causes The Ticketmaster 502 Bad Gateway Error?
The Ticketmaster 502 Bad Gateway error is typically caused by server-related issues.
- Heavy Traffic: When the server reaches its memory capacity or there are too many connections to the database, it can cause a bottleneck, resulting in the dreaded 502 error.
- Network Issue: The error can ALSO occur due to network connectivity issues between different servers on the internet, including DNS problems, or issues with a proxy server through which requests are being sent.
How to Fix Ticketmaster 502 Bad Gateway

To fix the Ticketmaster 502 Bad Gateway error, first, verify your internet connection and refresh the respective browser. If the error persists, clear the browser cache, try with a different browser or device, disable VPN if it is enabled and change the DNS Setting. If nothing helps, try after some time will fix the error.
1. Check Your Internet Connection
A poor or unstable internet connection can lead to a 502 error. Check your connection and try restarting your modem or router.
- Check the wifi or ethernet icon on your computer. If you see the connected symbol, you are likely connected to the network. If not, you may have become disconnected.
- Reset your network devices. Turn your modem and router off and back on by pressing the power button at the back of the Modem. This refreshes the connection and may resolve transient issues.
- Check your cables, power, and lights on your modem and router. Solid indicator lights mean the devices are functioning properly.
- Try to connect to Ticketmaster using a different network, like a mobile data connection.
2. Refresh the Page
If the server was momentarily down or overloaded, it might have recovered by the time you attempt to refresh. This could allow you to access the page without the error.
- Start with the refresh your Ticketmaster page.
- You can click the “Refresh button” in your browser located at the top-left to the search bar.
- or press “F“5 or “Ctrl+R” on your keyboard. Sometimes, the issue is temporary and a quick refresh can solve it.
3. Clear Your Browser Cache
Over time, your browser accumulates cached data, which can occasionally cause issues with loading websites. Clearing your browser cache might resolve the 502 error. Most browsers allow you to clear the cache from the settings or history menu.
Google Chrome
- Open “Chrome.“
- Click on the “three dots” in the upper-right corner to open the menu.
- Go to “More tools” > “Clear browsing data.”
- Choose a time range. To delete everything, select “All time.”
- Check the boxes for “Cookies and other site data” and “Cached images and files.”
- Click on “Clear data.”
For a quick shortcut, you can press “Ctrl + Shift + Delete” on Windows or “Command + Shift + Delete” on Mac.
Mozilla Firefox
- Open “Firefox.“
- Click on the menu button “(three horizontal lines) “in the upper-right corner.
- Select “Options” (or “Preferences” on Mac).
- Go to the “Privacy & Security” panel.
- In the “Cookies and Site Data” section, click “Clear Data.”
- Remove the checkmark in front of “Cookies and Site Data.”
- With “Cached Web Content” checkmarked, click the “Clear” button.
The keyboard shortcut for this action is the same as Chrome: “Ctrl + Shift + Delete” on Windows or “Command + Shift + Delete” on Mac.
Safari (for macOS):
- Open “Safari.“
- Click on “Safari” in the menu bar at the top of the screen and select “Preferences.”
- Go to the “Advanced” tab and check the box at the bottom that says “Show Develop menu in the menu bar.”
- Now the “Develop” menu will appear in the menu bar. Click on it.
- Select “Empty Caches” from the drop-down menu.
To clear the entire browsing history, cookies, and other site data:
- Click on “Safari” in the menu bar.
- Select “Clear History.”
- Choose the “time range” you want to clear.
- Click “Clear History.”
4. Try a Different Browser
If clearing the cache doesn’t work, switch to a different browser. Sometimes, browser-specific issues can cause problems with accessing websites.
- If you are using Chrome or Safari you can use Internet Explorer or Firefox.
5. Switch Devices
If you’re still encountering the error, try accessing Ticketmaster on a different device. This can help determine if the issue is with your device or your network.
If you are using the PC try connecting with an alternate PC Mobile device or Tablet if you have.
6. Disable VPN or Proxy Services
If you’re using a VPN or proxy, it could be causing connectivity issues with Ticketmaster’s servers. Try disabling it and accessing the site again.
On Windows:
- Open the Network Connections window (press “Windows Key + R” and type “ncpa.cpl”)
- Right-click on the VPN connection and select “Disable.“
On Mac:
- Go to System “Preferences” > “Network“
- Select the VPN connection and click the “minus (-) button.“
In browsers:
- Click the “extension icon” next to the address bar.
- Select your VPN extension and “turn off” the enabled toggle switch.
7. DNS Issue
A DNS problem could be preventing your computer from reaching Ticketmaster’s servers. You can try changing your DNS to a public DNS service like Google DNS or OpenDNS.
Here are the steps to change your DNS servers to Google DNS or OpenDNS on Mac and Windows:
On Mac:
- Go to “System Preferences” > “Network“
- Select your active network connection (Wi-Fi or Ethernet)
- Click on the “Advanced button“
- Go to the “DNS tab“
- Click the “+ button” to add a new DNS server
- For Google DNS, enter “8.8.8.8” and “8.8.4.4“
- For OpenDNS, enter “208.67.222.222” and “208.67.220.220“
- Drag the new “DNS servers” to the top of the list
- Click “OK and Apply” to save the changes
On Windows:
- Open “Control Panel” > “Network and Internet” > “Network and Sharing Center“
- Click on your “active network connection“
- Go to “Properties” and Select “Internet Protocol Version 4 (TCP/IPv4)“
- Click “Properties” and Select Use the following DNS server addresses
- For Google DNS, enter “8.8.8.8” and “8.8.4.4“
- For OpenDNS, enter “208.67.222.222” and “208.67.220.220“
- Click “OK” to save changes
8. Wait It Out
If Ticketmaster’s servers are overwhelmed due to high traffic, and you might be accessing the Ticketmaster at its peak hour. the best course of action might be to wait a while before trying again.
9. Contact Support

If you’ve tried all the above steps and still can’t resolve the issue, it’s time to reach out to Ticketmaster’s customer support for further assistance.
You can also check community forums and other platforms and confirm whether the other users also facing the same issue. If so the issue lies with the Ticketmaster server and you have to wait until the error gets fixed.
