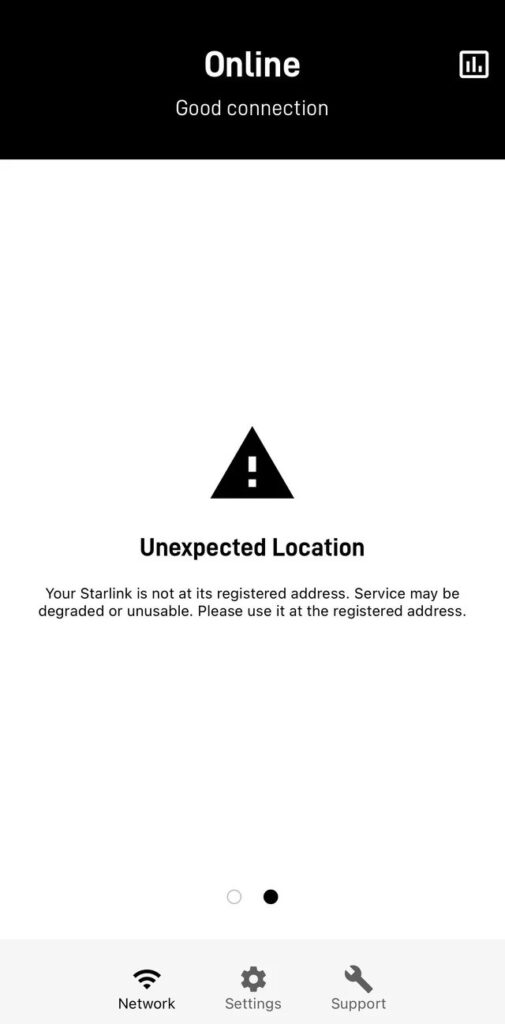
Are you puzzled by Starlink indicating an unexpected location despite being in the correct place?
In this article, we will delve into why Starlink may display this error and provide you with practical steps to troubleshoot and resolve this issue.
Why Does Starlink Say “Unexpected Location”?

When Starlink users encounter an “unexpected location” warning, it typically indicates that the system perceives the user’s terminal to be outside the registered service address.
Various factors might trigger this error message; such as GPS signal issues can be a common culprit.
The Starlink dish affectionately nicknamed “Dishy” depends on GPS signals to determine its precise location.
If the signal is weak or if the dish is obstructed, for instance by trees or buildings, it might not be able to pinpoint its location accurately, leading to the unexpected location warning as discussed in Starlink Troubleshooting & Questions.
Another potential cause is a mismatch between the account details and the actual service address.
Errors can occur during the initial setup or due to subsequent system glitches, resulting in discrepancies between the registered service location and the dish’s actual position.
Users on Reddit have shared experiences where the registered address did not match their actual location, prompting the warning.
Lastly, the hardware itself may be in need of a firmware update. If the user’s Starlink equipment has not received a necessary update, it may not function properly, which includes failing to recognize the correct location.
Ensuring that the system is up-to-date with the latest firmware is crucial for accurate location tracking and optimal performance.
What to Do If Starlink Says “Unexpected Location”?
To resolve the issue of the unexpected location, you should check the GPS signal and try rebooting the device.
Down below, we have discussed the solution in step-by-step detail.
1. Check GPS Signal on Starlink application

Ensure that your Starlink dish has a clear line of sight to the sky. Obstructions such as trees, buildings, or other structures can block the GPS signal that the dish relies on to determine its location.
Adjust the placement of your dish to avoid these obstructions and ensure it has an unobstructed view.
Steps to check the GPS Signal on Starlink application:
- Access your account in the Starlink app by tapping the user icon.
- In SETTINGS, tap ADVANCED, then DEBUG DATA to review GPS status.
2. Update Your Service Address
If you believe there may be a discrepancy with your registered service address, it’s essential to verify and update this information.
You can do this by contacting Starlink support through the Starlink app or the website. They can assist in confirming the address on file and make any necessary corrections.
steps to update Update Your Service Address on Starlink:
- Log into your account on the Starlink website or open the Starlink app.
- Navigate to the account settings or service address section.
- Update the location of your service address with the correct details.
- Save the changes to ensure your service address is updated in the system.
3. Reboot the Starlink System
If the issue persists try rebooting the Starlink system.
This can be done by unplugging the router, waiting for about 30 seconds, and then plugging it back in.
A reboot can clear certain errors and force the system to re-establish a connection, which may resolve the “unexpected location” warning.
4. Perform a Factory Reset
In some instances, performing a factory reset on your Starlink hardware can resolve technical issues.
Before doing this, disable the portability feature if you’ve enabled it.
After the factory reset, leave the system on to allow it to complete any pending firmware updates, which might fix the location discrepancy.
To perform a factory reset on the Starlink router:
- The router to view the bottom side.
- Use a paper clip or small screwdriver to press the reset button.
- Wait for the router to reboot and connect to the new STARLINK Wifi network.
5. Contacting Starlink Support

If the above steps do not alleviate the problem, the best course of action is to reach out to Starlink support for assistance.
The support team can provide guidance and help resolve issues that might be specific to your account or equipment.
