Are you facing connectivity issues with your Starlink Ethernet adapter?
Starlink is a satellite internet service that provides reasonably stable internet connections in most areas.
However, many users encounter hiccups when setting up or maintaining their internet connection. The issue usually occurs because the Internet signal is interrupted and it is not working properly.
In this blog post, we’ll walk you through a comprehensive guide on how to diagnose and resolve the Starlink Ethernet Adapter Not Working issue.
Why Starlink Ethernet Adapter Not Working
1. Physical Connection Issues
Loose or improperly connected cables can disrupt the connection between the Starlink dish, Ethernet adapter, and your device.
2. Damaged Cables
Ethernet cables can become damaged over time, which might prevent them from transmitting data effectively.
3. Defective Adapter
The Ethernet adapter itself may be faulty, either due to manufacturing defects or wear and tear over time.
4. Software/Firmware Glitches
Outdated or corrupted firmware can cause connectivity issues with electronic devices, including Ethernet adapters.
How To Fix Starlink Ethernet Adapter Not Working Issue
First inspect the physical connections, restart the router, replace the ethernet cables and reset the Starlink router. If the issue sustains, you need to replace the Starlink Ethernet adapter.
Step 1: Inspect Physical Connections
Start by checking all the physical connections related to your Starlink setup.
- Ethernet Adapter to Dish: Ensure the Ethernet cable from the dish to the adapter is securely connected.
- Ethernet Adapter to Device: Check the cable running from the adapter to your computer or router is firmly plugged in.
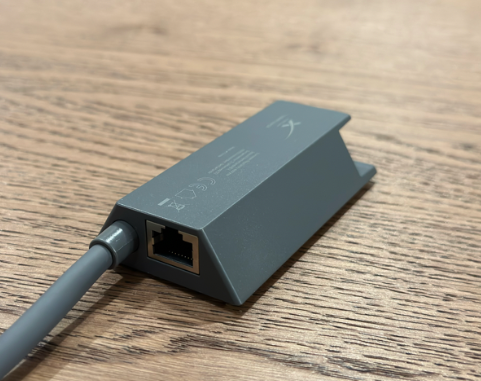
- Adapter’s Condition: Examine the Ethernet adapter for any visible damage.
- Cable Condition: Look at the Ethernet cables for signs of wear or damage. If you notice any issues, replace the cable.
Step 2: Power Cycle Your Starlink Router
Power cycling can resolve temporary glitches by refreshing the system.
- Turn Off Devices: Power down your router, computer, and the Starlink terminal.
- Unplug: Disconnect all devices from their power sources.
- Wait: Leave everything unplugged for at least one minute.
- Reconnect: Plug back in and power on your devices.
You can also Reboot the Router Via App

- Open the Starlink App and click on “Settings“
- Click on the “ROUTER” tab and swipe the arrow mark to the right on “SLIDE TO REBOOT“
- Again Click on “STARLINK” and repeat the previous step.
Step 3: Check for Debris or Damage
Sometimes, the issue can be as simple as a blocked or bent pin in the Ethernet port.
- Unplug the Cable: Remove the Ethernet cable from the adapter.
- Inspect for Debris: Look for any debris that might be obstructing the connection and carefully remove it.
- Examine the Pins: Ensure none of the pins inside the Ethernet port are bent. If they are, you might be able to gently straighten them with a small tool, but be cautious not to cause further damage.
Step 4: Test with a Different Ethernet Cable
Faulty cables are a common culprit in connectivity issues.
- Replace Cable: Use a different Ethernet cable to see if the connection improves.
- Test Each Cable: Test the new cable with both the dish and your device to isolate the issue.
Step 5: Update the Starlink firmware
Starlink will update the firmware automatically and there is no option to update it manually. Also, note that not all Starlink devices will get the update same time. The Starlink pushes the update in batches and the devices get updated overnight.
To find out the current firmware or software version of your Starlink dish,
- Open the Starlink App and scroll down to the bottom to access the “Advanced” section.
- Here, you’ll see the software version detailed under the Starlink section, specifically marked as “Software.“
- To determine when the last firmware update took place, check the Uptime statistic. Since the Uptime counter resets with each firmware update, this will indicate the last update time
Step 6: Factory reset the Firmware router And Dish
When you perform a factory reset on the Starlink router, the router is restored to its original factory settings, erasing all customized configurations and returning it to the state it was in when it was first purchased. This process clears the cache and can potentially improve the router’s performance
To factory reset your Starlink router, follow the instructions in the Starlink app:
- Open the “Starlink App” and make sure you are online
- Go to “Settings“
- Scroll down and Select “Factory Reset“
- Swipe the “SLIDE TO FACTORY RESET” arrow to the right.
- Click “OK” to confirm the action.
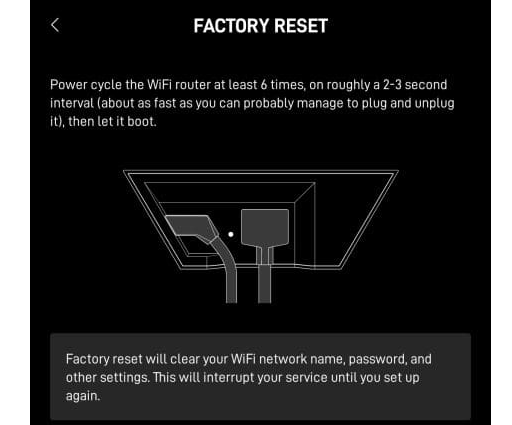
- Now unplug and plug the power cord six times continuously with a time interval of 2 to 3 sec. The action will reset the power flow inside the router.
- Click on “Starlink Wifi” and click on “Starlink Network” on the app. Configure the WiFI by setting the name and Password.
To reset the Starlink Circular Dish
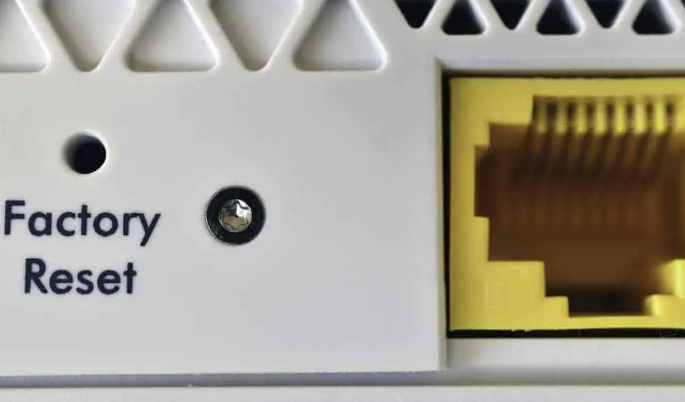
- You will find a Reset button at the bottom of the dish.
- Press and hold the button on the bottom of the router until the adjacent light turns blue, then release the button.
- Wait some time, until the process to complete and boot up again.
- Now open the app and set up the new connection.
To reset the Starlink Mesh Node
If you are using a mesh node as well, follow the steps to factory reset the mesh node.
- Unplug the power cable from your Starlink router.
- Wait for about 10 seconds.
- Plug the power cable back into the router.
- Repeat steps 3 more times, for a total of six power cycles.
- After the final cycle, leave the router unplugged for 15 minutes.
- Reconnect the power cable and allow the router to boot up, which may take a few minutes.
- On your phone, go to WiFi settings and connect to the network named as “STARLINK.“
- Open the Starlink app and use it to set your preferred WiFi name and password.
Step 7 :Buy New Ethernet Adopter
If nothing above method, the issue is with the Starlink Ethernet adaptor. The adapter itself may be faulty.

Here’s what you can do next:
- Try an Alternate Adapter: If you have access to another Ethernet adapter, try using it with your setup. This can help confirm whether the issue lies with the original adapter.
- Purchase a New Adapter: If the alternate adapter works or you don’t have one available, you will likely need to replace the faulty adapter. You can purchase a new Starlink Ethernet adapter from the official Starlink website or a reputable electronics retailer.
- Contact Starlink Support: Before making a new purchase, it may be worthwhile to contact Starlink customer support. They can provide additional troubleshooting assistance and, if the adapter is deemed defective, they may offer a replacement, especially if it’s under warranty.