Are you looking to tailor your audio experience while diving into the virtual realms of the Meta Quest 3?
This article will guide you through the intuitive steps to effortlessly increase or decrease the volume on your Meta Quest 3, ensuring that every sound is just right for your immersive adventures.
How To Increase/Decrease Volume On Meta Quest 3?
Here’s how you can easily increase or decrease the volume to meet your needs during gameplay or media consumption:
1. Using Physical Volume Buttons
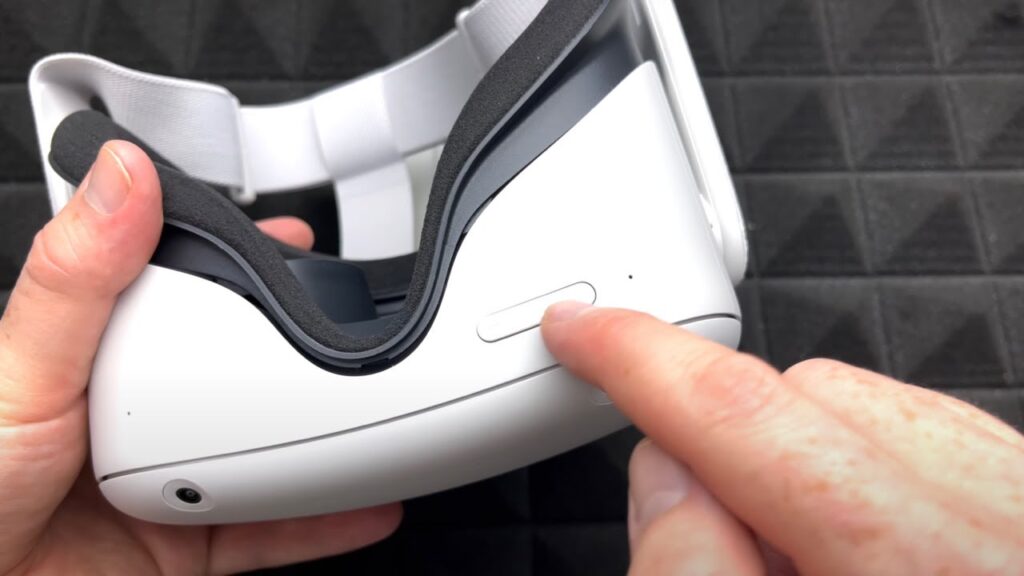
The most straightforward method to adjust the volume on your Meta Quest 3 is by using the physical volume buttons.
These are conveniently located at the bottom of the headset. Here’s what you need to do:

- To increase the volume, press the button with the plus (+) sign.
- To decrease the volume, press the button with the minus (-) sign.
This method allows for quick adjustments, ensuring you can keep your focus on the virtual environment without the need to navigate through software menus.
2. Using In-Game or App Settings
Many VR games and applications have their own audio settings that can be accessed through their respective menus.
Within these settings, you can often find sliders or controls that allow you to adjust the volume levels of the game or app independently of the headset’s master volume.
This is particularly useful for fine-tuning the audio experience to your liking.
For example, in a VR game like VTOL VR, you might navigate to the options menu and find a section dedicated to audio settings.
Here, you could encounter sliders that let you control different aspects of the game’s sound, such as the volume of the music, sound effects, and dialogue independently.
Adjusting these settings allows you to personalize the audio mix to enhance your immersion or improve clarity without altering the overall volume set on your Meta Quest 3 headset.
3. Limitations in the Home Environment and 2D Apps
It’s important to note that while the physical buttons allow for general volume control, there might be limitations when it comes to certain scenarios.
For instance, adjusting the background sound specifically in the home environment or managing audio levels for 2D apps overlayed into games may not be directly supported on Quest 3.
This could affect users who want to multitask within VR, blending game audio with other media sources.
what to do if Meta Quest 3’s volume button is not working?
If the volume button on your Meta Quest 3 is not working, you can try several troubleshooting steps to resolve the issue:
1. Restart the Headset
Sometimes, a simple restart can resolve temporary glitches that may be causing the volume button to malfunction.
To restart your Meta Quest 3, hold down the power button on the side of the headset until you see the power off screen, then select “Restart.”
2. Check for Obstructions
Make sure nothing is blocking the volume buttons.
Clean any dust or debris that might be preventing the buttons from being pressed properly.
3. Check for Software Updates
Ensure your Meta Quest 3 firmware is up to date.
Software updates can fix bugs that might be causing the volume buttons to not work correctly.
Here are the steps to update Meta Quest 3 Quest :
- Put on your headset and open the Settings menu.
- Select ‘System‘, then ‘Software Update‘ from the left menu.
- If there’s an update available, you should see an “Update Now” button. Select it to begin the update process.
4. Factory Reset Meta Quest 3
If the problem persists, consider doing a factory reset of your device. Be aware that this will erase all data on your device, so use this as a last resort.
To perform a factory reset on your Meta Quest 3, follow these steps:
- Power off the headset by pressing and holding the power button for 10 seconds.
- Enter the boot screen by holding the power and volume (-) buttons together until the boot screen appears.
- Use the volume buttons to select Factory Reset and confirm with the power button.
- Select Yes to confirm and start the factory reset process.
5. Contact Meta Support

If none of the above solutions work, the issue might be hardware-related.
In this case, contact Meta support for further assistance or to arrange a repair or replacement if necessary.
