Experiencing issues with SteamVR Home Not Loading can be a frustrating roadblock for any virtual reality enthusiast.
The common reason for the errors is an issue with the VR setting configuration and the game being unable to load the Home feature.
In this blog post, we’ll explore a variety of proven solutions to help you resolve the common “SteamVR Home Not Loading”.
From checking your system’s compatibility to updating drivers and adjusting settings, we’ll guide you through a step-by-step process to launch and run SteamVR smoothly.
Why is SteamVR Home Not Loading
When SteamVR Home fails to load, it can be due to a variety of reasons, which can range from software conflicts to hardware malfunctions.
Here are some common causes:
- Corrupted Files: If SteamVR or its related files are corrupted, it can prevent the application from launching properly. This can be resolved by verifying the integrity of the game files through Steam.
- Outdated Graphics Drivers: VR applications require up-to-date graphics drivers to function correctly. Out-of-date drivers can lead to performance issues and loading failures.
- Inadequate System Permissions: SteamVR might require administrative privileges to access certain system resources that are necessary for it to run.
- Power Plan Settings: On some systems, aggressive power-saving settings can interfere with the performance of VR applications, causing them to not load correctly.
- SteamVR Settings: Incorrect configuration within SteamVR’s settings can lead to issues with home environment loading.
- VR Headset Connection Issues: Problems with the VR headset’s connection to the PC, whether it’s through cables or wireless systems like Airlink, can cause loading issues.
- Steam Client Issues: Sometimes the issue might be with the Steam client itself, requiring a restart or reinstallation.
How To Fix SteamVR Home Not Loading Issue
To Fix SteamVR Stuck On the Loading Screen, first, update the Windows and Graphic Drive. If the error persists put headset on sleep mode and activate it, enable and re-enable SteamVR home button. Then try updating SteamVR on Beta. If nothing works consider reistalling the Steam.
1. Check Your Connections
Before diving into more complex solutions, ensure that your headset, internet and other external connections are properly connected to your PC if you use a link cable.
- For Wired Connection: Ensure your USB-C, HDMI, and LAN cables are properly connected to both your headset and your PC. The cable should be USB 3.0 or higher, in good condition, and not too long to avoid signal degradation.
- For Wireless Connection: Confirm that your PC, the link box, and the external connections are on the same Wi-Fi network, preferably a 5 GHz network for optimal performance. Also, ensure that the signal strength is strong and the router is not being obstructed.
- Verifying the Power Supply: The power supply to your VR headset and base stations should be consistent and uninterrupted. Check that all power cables are correctly connected and that there are no issues with the power outlets themselves.
2. Update Windows and GPU Drivers
Make sure your GPU drivers and Windows OS are up to date, as outdated drivers or OS may cause performance issues. You can
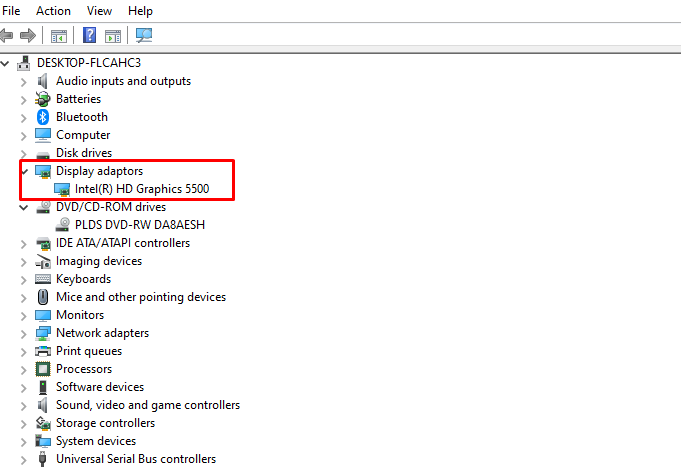
- Update your GPU drivers:
- Type “Device Manager” on Windows Start and click on it.
- Right-click on” Display Adopter” and click on “Install.”
- Follow the on-screen instructions to update it.
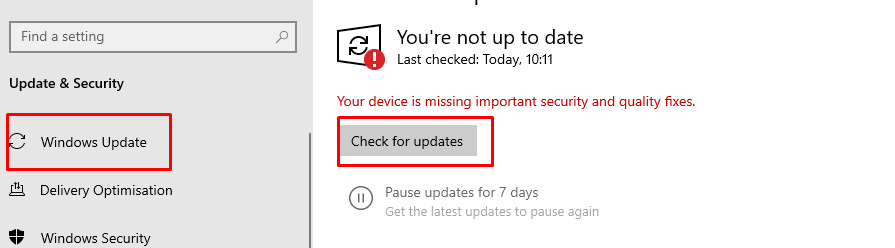
- Update Windows: “Settings” > “Update & Security” > “Windows Update.”
3. Disable and Enable the Home Button in SteamVR
Due to some technical glitches, Steam might not load the Home button. Turning off and turning on the Home button will fix the issue.
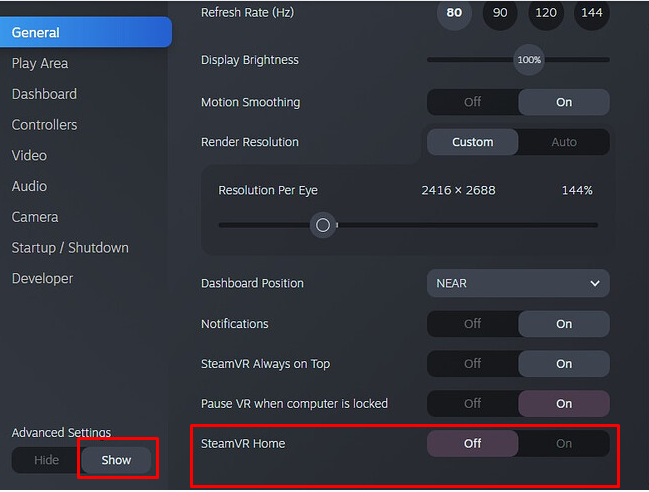
- Launch “SteamVR” and go to the “settings” menu.
- Scroll to the bottom of the settings menu and locate ‘Advanced Settings.
- Click on ‘‘Show’‘ to expand the advanced options.
- Look to the right-hand side for the ‘SteamVR Home’ option and turn it on.
- If it is already enabled, disable it and enable it again.
- SteamVR Home should now be activated and ready to load when you start SteamVR.
4. Enable and Re-enable Sleep mode in the headset
- Power up your VR setup and launch the SteamVR application.
- Put your headset into sleep mode. You can do this in one of two ways:
- Engage the passthrough mode on your headset if available.
- Simply take off the headset and set it down for a moment.
- After a short wait, put your headset back on or exit the passthrough mode.
- SteamVR Home should now load correctly when you reactivate the headset from sleep mode.
5. Restart SteamVR
First, you should attempt to simply restart SteamVR. This can often resolve temporary glitches:
- Close SteamVR and any VR applications that are running.
- Disconnect your VR headset from your computer.
- Wait for a few seconds, then reconnect your headset.
- Launch SteamVR again and check if the problem persists.
6. Run Steam as an Administrator
Running Steam as an administrator can solve the issue of SteamVR not launching.
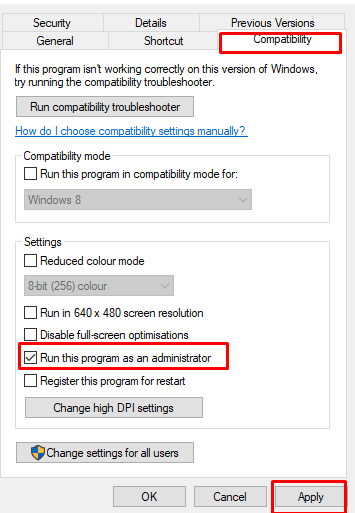
- Right-click on the Steam application and select ‘‘Properties’‘.
- Navigate to the ‘‘Compatibility’‘ tab.
- Check the box next to ‘‘Run this program as an administrator’‘.
- Click ‘‘Apply’‘ and then ‘‘OK’‘.
- Restart Steam and attempt to launch SteamVR again.
7. Verify the Integrity of SteamVR Tool Files
SteamVR may not function correctly if there are corrupted or missing files. Verifying the integrity of SteamVR tool files can replace any problematic files:
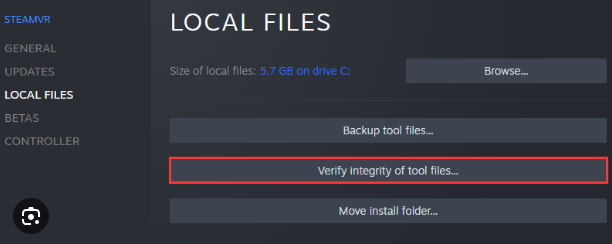
- Open the Steam client on your PC.
- Navigate to Library > Tools.
- Right-click on SteamVR, then select Properties.
- Go to the Local Files tab and click on Verify integrity of tool files.
- Wait for the process to complete, then relaunch SteamVR.
8. Reinstall The SteamVR
If the previous steps don’t work, reinstalling SteamVR can be an effective way to address issues:
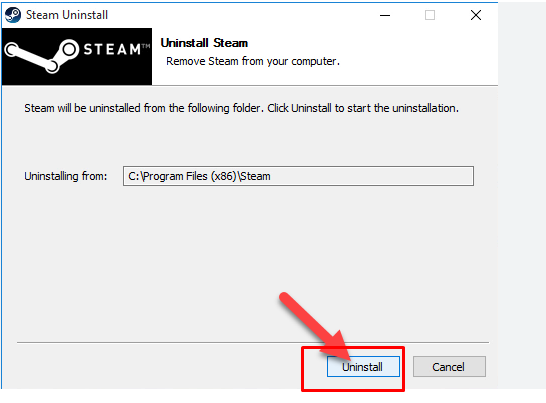
- Go to “Library > Tools” in the Steam client.
- Right-click on “SteamVR” and select “Manage > Uninstall.”
- After the uninstallation is complete, double-click on SteamVR in the tools library to reinstall it.
- Once the installation is finished, try running SteamVR again to see if the issue has been resolved.
9. Update The Steam Client
Ensure your Steam client is up to date, as updates often fix bugs and improve performance. To check for updates:
- Open the Steam client on your computer.
- Click on “Steam” in the top-left corner.
- Choose “Check for Steam Client Updates…” from the drop-down menu.
10. Clear Steam Download Cache
Clearing the download cache can solve issues that prevent SteamVR from loading, as it removes any corrupt files that might be causing the problem:
- Open the Steam client.
- Go to “Settings” or “Preferences” if you are using a Mac.
- Under the “Downloads” tab, click on Clear Download Cache.
- Confirm by clicking “OK,” then re-enter your login credentials as prompted.
11. Check For Steam Client Beta Participation
Sometimes, participating in the Steam Client Beta can cause compatibility issues with SteamVR:
- Open the Steam client.
- Head to “Settings” or “Preferences” on a Mac.
- In the “Account” tab, look for “Beta participation.”
- Click on the “Change” button.
- In the dropdown menu, select “NONE – Opt out of all beta programs.”
- Confirm by clicking “OK.”