
Experiencing issues with SteamVR refusing to launch can be a frustrating roadblock for any virtual reality enthusiast.
Fortunately, there are several troubleshooting steps you can take to get back into the virtual world. In this blog post, we’ll explore a variety of proven solutions to help you resolve the common “SteamVR Won’t Launch” or “Not Launching” problems.
From checking your system’s compatibility to updating drivers and adjusting settings, we’ll guide you through a step-by-step process to launch and run SteamVR smoothly.
Why Does SteamVR Doesn’t Launch/ Not Launching Issue Occur?
SteamVR might fail to launch due to various reasons, including:
- Outdated Software: Both Steam and SteamVR need to be up to date to function properly. Outdated software can lead to compatibility issues.
- Corrupted Files: If SteamVR’s files are corrupted or incomplete, it may fail to launch.
- Graphics Driver Issues: Outdated, missing, or corrupted graphics drivers can prevent SteamVR from launching, as it relies heavily on GPU performance. If your computer does not meet the minimum requirements for running VR content, SteamVR may fail to launch.
- Insufficient Permissions: SteamVR might require administrative privileges to run certain processes, and without these permissions, it may not launch.
- Improper Hardware Connections: Issues with the VR headset’s connection to the PC, such as loose cables or incorrect port usage, can cause detection problems, leading to launch failures.
- Application or Addon Conflicts: Other applications running on your computer may conflict with SteamVR, causing it not to launch. Outdated or corrupted addons within SteamVR can cause launch issues.
- Beta Version Bugs: If you’re using a beta version of SteamVR, it might have bugs or unstable features that can cause launching issues.
- Security Software Interference: Antivirus or firewall software may block SteamVR from launching due to false positives.
- DirectX Compatibility: SteamVR requires certain versions of DirectX, and if your system has outdated or incompatible DirectX installations, SteamVR might not launch.
- Misconfigured SteamVR Settings: Incorrect settings within SteamVR can prevent it from launching.
- Outdated VR Headset Firmware: The firmware on your VR headset may need updates to ensure compatibility with the latest version of SteamVR.
How To Fix SteamVR Doesn’t Launch/ Not Launching Issue
To Fix SteamVR Won’t Launch/ Not Launching, first, verify the System requirements and Update the OS. Then proceed to check the external connection, enable Administrator permission, run storage and memory test, check integerity tool files and update steam in beta.
1. Checking System Requirements
It is essential to ensure that your system meets the necessary requirements. Running VR games and applications on a PC with inadequate specifications can cause performance issues.
Minimum System Requirements:
- Processor: Intel Core i5-4590/AMD FX 8350 equivalent or better
- Memory: 8 GB RAM
- Graphics: NVIDIA GTX 960/AMD Radeon R9 290 equivalent or better
- DirectX: Version 11
- OS: Windows 10
Recommended System Requirements:
- Processor: Intel Core i5-4590/AMD Ryzen 5 1500X or better
- Memory: 16 GB RAM
- Graphics: NVIDIA GTX 1060/AMD Radeon RX 480 equivalent or better
- DirectX: Version 11
- OS: Windows 10
To find your system’s specifications, you can follow these steps:
- Right-click on the “Windows Start button.“
- Click on “System” in the context menu.
- Check the “Device specifications” section for your processor, installed memory (RAM), and system type.
To check your graphics card information, follow these steps:
- Right-click on the Windows Start button.
- Click on “Device Manager” in the context menu.
- Expand “Display adapters” and look for your GPU model.
2. Update Windows and GPU Drivers
Make sure your GPU drivers and Windows OS are up to date, as outdated drivers or OS may cause performance issues. You can
- Update your GPU drivers: Download drivers from NVIDIA or AMD website, depending on your graphics card model and install them.
- Update Windows: “Settings” > “Update & Security” > “Windows Update.”
3. Check Your Connections
Before diving into more complex solutions, ensure that your headset, internet and other external connections are properly connected to your PC if you use a link cable.
- For Wired Connection: Ensure your USB-C cable is properly connected to both your headset and your PC. The cable should be USB 3.0 or higher, in good condition, and not too long to avoid signal degradation.
- For Wireless Connection: Confirm that your PC, the link box, and the external connections are on the same Wi-Fi network, preferably a 5 GHz network for optimal performance. Also, ensure that the signal strength is strong and the router is not being obstructed.
4. Close The Background Application
Some processes and applications running in the background could potentially stop SteamVR from Launching due to high memory consumption.
To close Applications:

- Press “Ctrl+Shift+Esc“ to open the Task Manager and evaluate the list of running apps.
- Close any applications consuming significant CPU, GPU, or memory resources that are not essential for gaming or your VR session.
5. Update The SteamVR Software
To improve the performance of Game in SteamVR, always make sure your SteamVR application is up-to-date.
To Update Oculus Software(For Oculus Users):
- Connect the Headset and Controller
- Turn it by pressing the power button on the Headset near the USB C-type charging port and the Controller near the battery.
- Press the “Meta Button” on your right Touch controller and open your universal menu.
- Hover over to the left side of the universal menu and select ”Quick Settings” to open the ”Quick Settings” panel.
- Select ”Settings” in the top right corner.
- Select ”System,” then select ”Software Update” from the left menu.
- It will update the VR Firmware automatically with Software Update.
To Update Steam Software:
- Launch Steam and Click on “Steam” at the top left corner of the screen.
- Click on “Check For Steam Client Update” from the Drop Down list
- Steam will automatically search for an update and download it.
- Otherwise, you will see a message the Steam Client is already updated
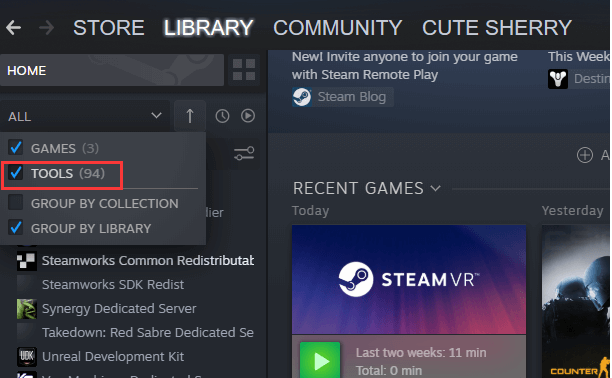
Set High Priority on Steam:
- Open “Steam” and navigate to your “Library“
- Locate and right-click on “SteamVR“
- Select “Properties “from the context menu
- Click on the “Updates” tab
- Choose “High Priority – Always auto-update this game before others“
6. Check SteamVR Installation Integrity
Steam provides a tool to verify the integrity of installed game files, including SteamVR.
- Right-click on “SteamVR” in your Steam library.
- Select “Properties.”
- Navigate to the “Local Files” tab.
- Click on “Verify the integrity of tool files.”
This process will check for corrupted or missing files and automatically replace them.
7. Run Steam as an Administrator
Running Steam as an administrator can solve the issue of SteamVR not launching.
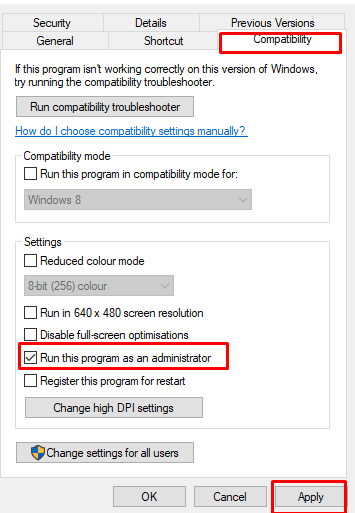
- Right-click on the Steam application and select ‘‘Properties’‘.
- Navigate to the ‘‘Compatibility’‘ tab.
- Check the box next to ‘‘Run this program as an administrator’‘.
- Click ‘‘Apply’‘ and then ‘‘OK’‘.
- Restart Steam and attempt to launch SteamVR again.
8. Beta Update Steam
Sometimes, the launching issues in SteamVR can be resolved by opting for the latest “beta updates“.
To access beta updates, follow these steps:

- Click on “Steam” in the upper left, then choose the “Settings” menu. (Preferences on Mac)
- On the “Interface” tab under “Client Beta Participation” select the dropdown menu
- Select the “Steam Beta Update” from the drop-down list and click “OK”
- You will be prompted to restart Steam, please select the “Restart Steam” button
- Use the dropdown menu to opt-in to the available beta updates.
- Close the window and let Steam download the updates.
9. Reinstall SteamVR
Sometimes, a fresh installation of SteamVR is required to clear up any issues that prevent it from launching.

- Uninstall SteamVR:
- Open the “Steam” client.
- Navigate to the ‘‘Library’‘ section.
- Right-click on ‘‘SteamVR’‘ in your list of games.
- Select ‘‘Uninstall’.‘
- Reinstall SteamVR:
- After the uninstallation completes, restart your computer.
- Open Steam and go to the ‘‘Store’‘
- Search for ‘‘SteamVR’‘ and select it from the list of results.
- Click on the ‘‘Install’‘ button to reinstall the application.
10. Inspect Hardware for Issues
Storage devices, including hard drives, are susceptible to data corruption, particularly when they are ageing or under considerable stress. It is advisable to consult with a professional to examine your hard drive for any potential problems.
1. Check Storage Errot: Navigate to ‘This PC’, right-click on the “C drive“, select ‘‘Properties’‘, go to the ‘‘Tools’‘ tab, and click on ‘‘Check’‘ under the Error checking section.
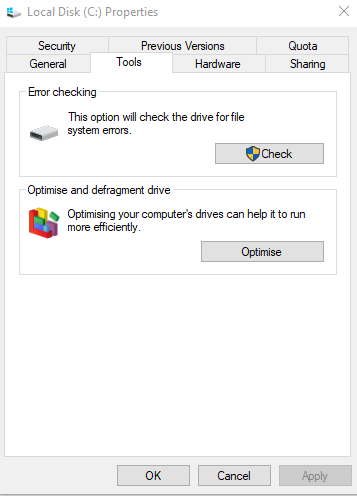
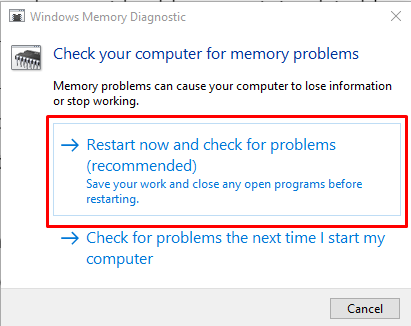
2. Check RAM for Errors: Access the” Start” menu, search for “mdsched” to find the Windows Memory Diagnostic tool, and Click on “Restart Now and Check for problems” to check your RAM for errors.
11. Reinstall The Entire Steam App
If you have recommended system specifications and nothing above steps works, then Reinstall Steam and Oculus. Remember that reinstalling will erase all data on the device, so you should back up any important data before proceeding
- Go to ‘‘Add or Remove Programs’‘ in Windows,
- Find the Oculus software and Stem, and click ‘Uninstall’.
- Download the latest Steam from the official website and install it on your PC.