Are you trying to figure out how to sync your Optimum remote with your TV?
It can be a hassle to juggle multiple remotes for different devices, but programming your Optimum remote to control your TV is a straightforward process.
In this article, we’ll take you step by step through the programming procedure, so you can start using a single remote for all your viewing needs.
how to program optimum remote to your TV?
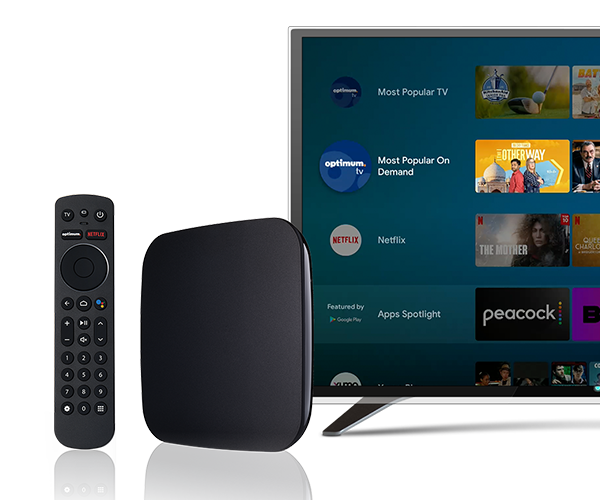
Step 1: Identify Your Remote Model
Before you start, you need to know which Optimum remote model you have.
Optimum provides different types of remotes, such as the Optimum One remote, and the programming process may vary slightly for each.
You can identify your remote model by checking the documentation that came with your Optimum service or by looking at the remote itself for any model identification.
Step 2: Find the Programming Code

Each TV brand has a specific code that you will need to input into the remote. These codes can usually be found in the remote’s manual or on the Optimum website.
For instance, Optimum’s remote control page allows you to choose your remote model and find the programming instructions and codes for your specific TV brand.
Step 3: Enter Programming Mode
With the TV turned on, press and hold the ‘TV‘ and ‘SEL‘ buttons on your Optimum remote simultaneously until the ‘iO‘ (Optimum) button lights up. The light should remain on, indicating that the remote is in programming mode.
Step 4: Enter the TV Brand Code
Using the number pad on the remote, enter the code for your TV brand. This should be a three-digit code that you found in the previous step.
If the code is entered correctly, the ‘iO‘ button will blink twice and then turn off.
Step 5: Test the Remote
Point your Optimum remote at the TV and press the ‘Power‘ button. If the TV turns off, the remote has been successfully programmed.
If the TV does not turn off, repeat the process with the next code for your TV brand until you find the correct one.
Step 6: Adjusting Settings and Using Additional Features
Once programmed, you can also use your Optimum remote to adjust settings and access features like the input selection or program info.
For example, when watching live TV, you can press up or down on the navigation pad to show the progress bar, then press Select to access more options.
Step 7: Programming Additional Functions
If your remote allows for it, you might be able to program additional functions such as controlling a soundbar or another audio device.
Refer to your remote’s manual or the Optimum support website for instructions on how to program these additional devices.
Step 8: Troubleshooting
If you encounter issues while trying to program your remote, ensure that you are entering the correct code for your TV brand.
Also, make sure that there are no obstructions between the remote and the TV and that the batteries in the remote are fresh. If the ‘iO‘ button does not blink twice after entering the code, start the process over and make sure you are entering the code correctly.
Step 9: Saving the Code
Once the correct code is entered and the TV responds to the remote, the code is automatically saved.
However, if you reset the remote or change the batteries, you may need to re-enter the code.
Step 10: Using Auto-Search Function
If you’re unable to find the correct code for your TV, some Optimum remotes offer an auto-search function.
To use this feature, turn on your TV, press and hold the ‘TV‘ and ‘SEL‘ buttons until the ‘iO‘ button lights up, then press the ‘CH+‘ or ‘CH-‘ buttons to auto-search for the code. When the TV turns off, press the ‘SEL’ button to save the code.