
The PSVR2 offers advanced features such as high-resolution displays, improved tracking, and new controllers designed to provide a more immersive and intuitive VR experience.
Despite its cutting-edge capabilities, users sometimes encounter issues with headset flickering, which can stem from various causes such as connectivity issues or hardware defects.
In this guide, we’ll explore the potential causes of this issue and provide step-by-step solutions to help you get back to a smooth VR experience.
Why Does PlayStation VR2 (PSVR2) Headset Flickering Occur?
- Loose Connections: The cables connecting your PSVR2 to the PS5 might not be fully secured.
- Software Bugs: Glitches in the system software or game can cause visual disruptions.
- Outdated Firmware: Running outdated firmware on your PS5 or PSVR2 can lead to compatibility issues.
- Interference: External factors like reflective surfaces or other electronic devices can interfere with the headset’s tracking.
- Overheating: The PSVR2 can overheat, causing performance issues like flickering.
How To Fix PlayStation VR2 (PSVR2) Headset Flickering
To xix the PlayStation VR2 (PSVR2) headset flickering issue, ensure the power source is secure and all cables are firmly connected. Next, review the camera settings for accuracy and make sure your games are up to date. Should these steps not rectify the issue, proceed to update the headset’s firmware.

1. Examine The Power Source
Before looking into more complex solutions, it’s crucial to ensure that the power source is stable. If you’re using an outlet, check if it’s delivering power at recommended voltage: 100‑127V, 4.5A 50/60Hz 200‑240V, 2.3A 50/60Hz; Output Voltage: +12V, 31A using a Voltage check meter.

2. Check All Connections
Ensure that all cables connecting the PSVR2 to the PS5 are firmly plugged in. Inspect the cables for any signs of damage or wear. If you find any, replacing the cables might be necessary.
- Make sure your PSVR2 Headset and console are powered on.
- Check for any physical damage to the controllers or USB ports that might be causing Flickering issues.
- Tighten the USB cable at both ends of the connections.
- Power of the Camera.
3. Try A Different USB Port
If you suspect The VR2 Headset worked fine previously but for some reason it is not working currently.
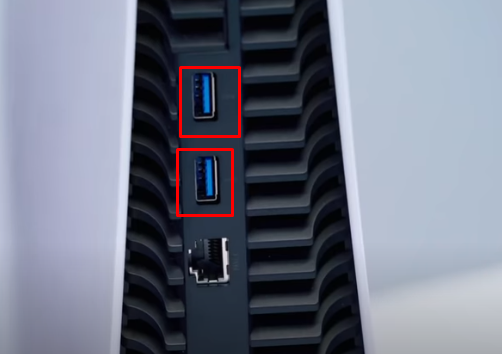
- Try connecting the USB with a different port.
- You can see a USB port at the back of the PS console.
- Plug your headset into one of the ports at the back side and turn on it.
- If you have an alternate cable, you can also check with that.
4. Restart Your System
Power down your PS5 and PSVR2 completely, then restart them to refresh the system and potentially clear any minor software issues.

- Press the power button at the back of the headset to turn off.
- Restart PS 5
- “Turn off” your PSVR2 Sense Controller and PlayStation console.
- Unplug the power cable from the console and wait for a couple of minutes.
- Reconnect the power cable and turn on both the console and the Headset.
- Attempt to pair the Headset again.
5. Update the Game
Sometimes the flickering happens due to an issue with the Game file. Updating the game file will fix any bugs or corrupted files.

- Go to “Home” and Select the “Game“
- Click on “Options” and click on “Check For Updates.“
- The game will Automatically search for updates and install it.
- Once installed, restart the PS5 and Headset.
6. Update PS4 Firmware
Updating system software will fix any issues related to hardware communication issues due to corrupted files and bugs in the software.
To update the system software on your PS5:
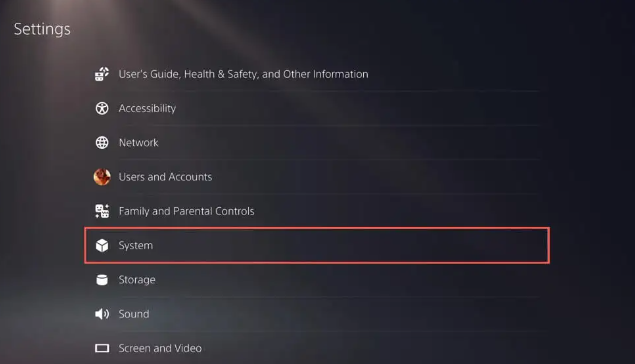
- From the PS5 home screen, go to the “Settings” icon in the top right corner.
- Scroll down and select “System”.
- Choose “System Software Update and Settings”.
- Select “Update System Software” and then “Update Using Internet”.
- If an update is available, download and install it following the prompts.
- Wait for the update to complete without turning off your PS5.
- Confirm the update by checking the ‘‘System Software Update and Settings’‘ menu.
7. Adjust the Camera
Position the PS5 camera so that it has a clear, unobstructed view of the headset. The camera should be at eye level when seated and should be able to track your movements without obstruction.
8. Allow for Adequate Ventilation
Make sure your PSVR2 and PS5 are in a well-ventilated area to prevent overheating. Avoid placing them in enclosed spaces or near heat sources.
9. Perform a Factory Reset (Last Resort)
Make sure your PS5 is connected to a stable Internet.
- Go to “Home “> Tab “Settings” icon at the right top of the screen > “System”
- Click on “Systems“
- Click on “Systems Software” and scroll down to click on “Reset Options”

- Click on “Reset Your Console” to factory reset the PS5.
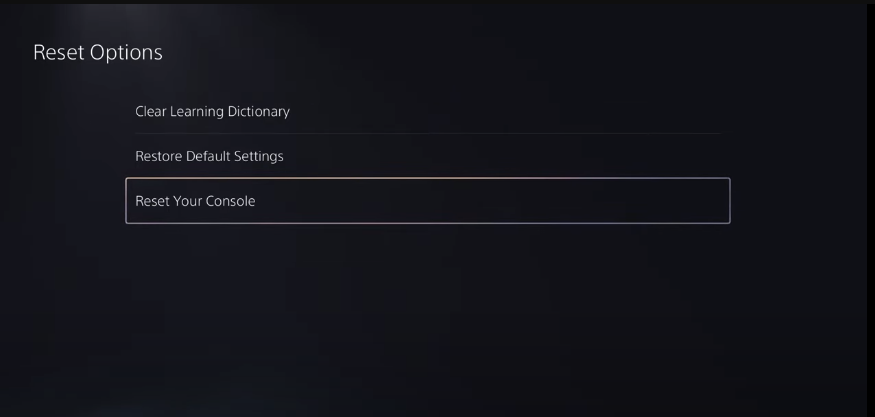
- The system will restart a few times during the process. Remember that the data and the content will be deleted forever.
10. Turn ON the Headset after Loading the Game
Sometimes, the camera doesn’t work if it is not registered properly on the PS5.
- Connect your PSVR2 to your PS5 but don’t immediately switch it on.
- Start the Game you want to play,
- A message prompting you to “Turn on your PlayStationVR2.”
- Now Turn On Your headset, and it works fine.
11. Reset Camera Calibration
If you face any issues with the play area, you can reset it by tracking the camera calibration.
To reset the camera calibration, Follow the below steps:

- Go to “Home” Screen
- Click on “Setting Icons” at the top right corner of the screen
- Scroll down and click on “Accessories“
- Power on your Headset and you will see “Playsatuon VR2”
- Click On “Playsatuon VR2”
- Move down and click on “Tracking Camera Calibration“
- Click on “X” button from your controller to reset it.

Now put your headset on, and pull the front lens cap to adjust the front panel of your headset to your comfort.
12. Contact Customer Support
If you’ve followed these steps and the flickering persists, it may indicate a hardware issue with your PSVR2 headset. In this case, the best course of action is to contact Sony’s customer support for further assistance or to discuss repair or replacement options.