Wondering how to fix PlayStation VR2 (PSVR2) Controller Charging Issue?
The PlayStation VR2 (PSVR2) controllers are key to an immersive virtual reality experience, but they can sometimes face charging issues that prevent them from working properly.
If your PSVR2 controller isn’t charging, it can be due to a variety of reasons, from simple oversights to more complex hardware problems.
In this guide, we’ll take you through a detailed step-by-step process to diagnose and fix the issue.
What Causes PlayStation VR2 (PSVR2) Controller Charging Issue
Before diving into solutions, it’s important to understand what might cause your PSVR2 controller to not charge:
- Faulty charging cables or adapters
- Damaged controller charging port
- Battery issues
- Software/firmware glitches
- Power source problems
How To Fix PlayStation VR2 (PSVR2) Controller Charging Issues
First check the power outlet, inspect the device ports and rest the devices. If all are fine, then drain the battery and recharge the controller. Finally, consider updating the controller software.
1. Check The Charging Cable And Adapter
- Inspect the USB-C cable and power adapter for any signs of damage, such as fraying or kinks.
- Try using a different USB-C cable and adapter that are known to work with other devices.
2. Validate The Controller’s Charging Port’s Physical Condition
- Look closely at the USB-C port on the controller for any debris, lint, or damage.
- Gently clean the port using a can of compressed air or a soft, dry toothbrush.
- Flip up the USB C charger and plug it into the Outlet.
- If you’re using a wall outlet, try a different one, or plug the controller into a USB port on your PS5 console to see if it charges.
3. Reset The PSVR2 Controllers
Resetting the controller will eliminate any technical glitches and refresh the device to a clean state.
- Power off your PS5 console.
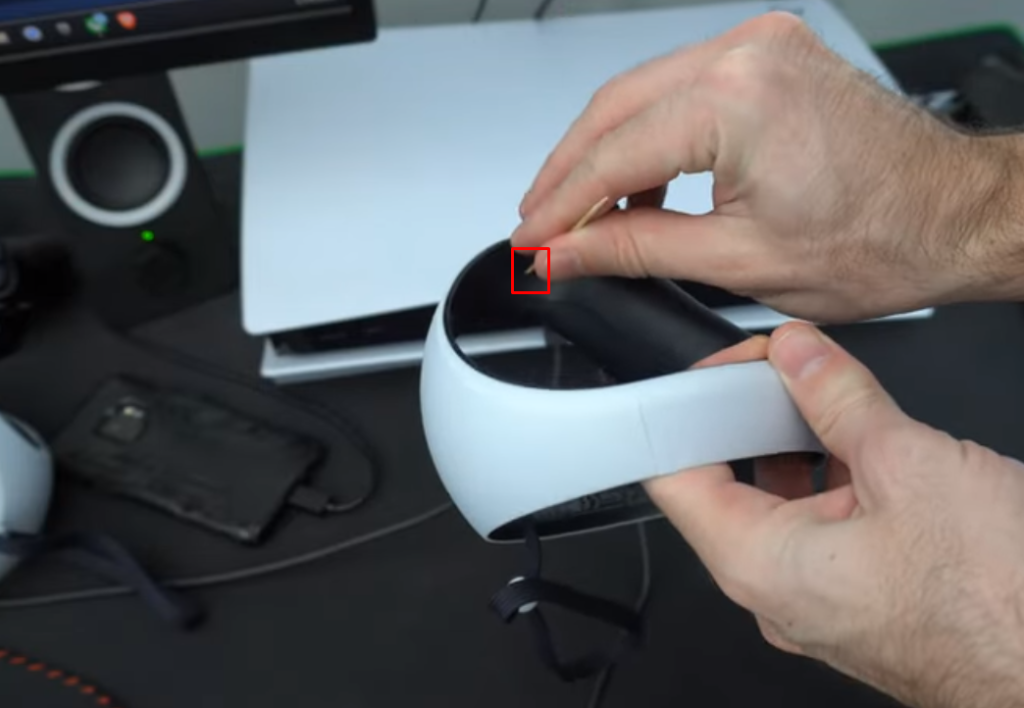
- Locate the small reset button on the back of the controller near the L2/R2/Headset shoulder button.
- Use a small tool (like a paperclip) to press and hold the reset button for about 5 seconds.
- Release the reset button.
- Connect the controller to the PS5 with a USB cable and press the PS button to pair it again.
4. Check For Controllers Software Updates
Connect your PS5 to the internet and check for any system or controller firmware updates. Install any available updates and try charging the controller afterwards.

To update the system software on your PS5:
- From the PS5 home screen, go to the “Settings” icon in the top right corner.
- Scroll down and select “System”.
- Choose “System Software Update and Settings”.
- Select the controllers and then “Update Using the Internet”.
- If an update is available, download and install it following the prompts.
- Wait for the update to complete without turning off your PS5.
- Confirm the update by checking the ‘‘System Software Update and Settings’‘ menu.
5. Drain and Recharge the Controllers
If the controller has some charge, sometimes the battery shows three bars even if it has 30% to 40%.
Use it until the battery is completely drained or leave it on for an extra one hour. Then try charging it again. This can recalibrate the battery.