
An eSIM is an embedded SIM that allows you to activate a cellular plan without the need for a physical SIM card.
Unlike traditional SIM cards, an eSIM can be reprogrammed as needed, enabling you to switch carriers or plans without swapping out a physical card.
If you want to travel abroad and are looking to activate your Orange eSIM, you have come to the right place. Activating an Orange eSIM for your mobile device streamlines the transition to a more versatile and efficient connectivity experience.
In this guide, we will take you through the step-by-step process of activating your Orange eSIM.
Orange eSIM Activation Guide: Pre-Activation Checklist
Before activating your Orange eSIM, complete the following pre-activation checklist to ensure a smooth and hassle-free activation process.
1. Device Compatibility
Firstly, ensure that your device is compatible with eSIM activation.
Not all devices support eSIM activation, so checking if your device is eSIM compatible is important.
See the Compatible Device List Below:
1. iPhone Device List: iPhone 15, iPhone 15 plus, iPhone 14, iPhone 14 Pro, iPhone 14 Pro Max, iPhone 13, iPhone 13 mini, iPhone 13 Pro, iPhone 13 Pro Max, iPhone 12, iPhone 12 mini, iPhone 12 Pro, iPhone 12 Pro Max, iPhone 11, iPhone 11 Pro, iPhone 11 Pro Max, iPhone XR,iPhone XS, iPhone XS Max, iPhone SE 2 (2020), iPhone SE 3 (2022), iPad Pro 11, iPad Pro 12.9, iPad Air (3rd Gen or later), iPad (7th Gen or later), iPad mini (5th Gen or later)
2. Fairphone Device list: Fairphone 4
3. Google Pixel Device List: Google Pixel 7a, Google Pixel 7, Google Pixel 7 Pro, Google Pixel 6a, Google Pixel 6 Pro, Google Pixel 5, Google Pixel 4, Google Pixel 4a, Google Pixel 4 XL, Google Pixel 3, Google Pixel 3 XL, Google Pixel 3a, Google Pixel 3a XL
4. Honor Device List: HONOR Magic 3, HONOR Magic 3 Pro, HONOR Magic 3 Pro+, HONOR 50, Honor Magic 4 Pro
5. Huawei Device List: Huawei P40, Huawei P40 Pro, Huawei Mate 40 Pro
6. Nokia Device List: Nokia X30 5G
7. Nuu Device List: Nuu X5
8. Oppo Device List: Oppo Find N2 Flip, Oppo Find X5, Oppo Find X5 Pro, Oppo Find X3 Pro, Oppo Reno 5 A, Oppo A55s, Oppo Reno 6 Pro 5G
9. Rakuten Device List: Rakuten Mini, Rakuten Big S, Rakuten Big, Rakuten Hand 5G
10. Samsung Device List: Galaxy Fold, Galaxy Z Fold 2, Galaxy Z Fold 3 5G, Galaxy Z Fold 4, Galaxy Note20, Galaxy Note20 Ultra, Galaxy S23, Galaxy S23+, Galaxy S23 Ultra, Galaxy S22, Galaxy S22+, Galaxy S22 Ultra, Galaxy S21 5G, Galaxy S21+ 5G, Galaxy S21 Ultra 5G, Galaxy S20, Galaxy S20+, Galaxy S20 Ultra, Galaxy Z Flip, Galaxy Z Flip 3, A54 5G
11. Sharp Device List: Sharp AQUOS sense4 lite, Sharp AQUOS wish
12. Sony Device List: Sony Xperia 10 III Lite, Sony Xperia 1 IV, Sony Xperia 10 IV
13. Xiaomi D evice List: Xiaomi 12T Pro, Xiaomi 13
2. Internet Connectivity
To activate your Orange eSIM, you need an active internet connection. Make sure your device is connected to the internet via Wi-Fi or cellular data. A stable internet connection is crucial to ensure successful activation.
3. Orange Network Coverage
Before activating your Orange eSIM, ensure that the Orange network has coverage in your area. You can check the network coverage map on the Orange website or by contacting their customer support.
If there is no coverage in your area, you may experience issues with activation or poor network connectivity after activation.
Step By Step Guide To Activate Orange eSIM
Step 1: Creating an Orange Account
Before you can activate your Orange eSIM, you will need to create an Orange account.

- Go to the Orange website and click on the “User Icon” at the right corner of the screen.
- Fill in your personal details and create a strong password.
Once you have created your account, you will receive a confirmation email.
Step 2: Purchasing an eSIM Plan
Once you have created your Orange account, you can purchase an eSIM plan that suits your needs.
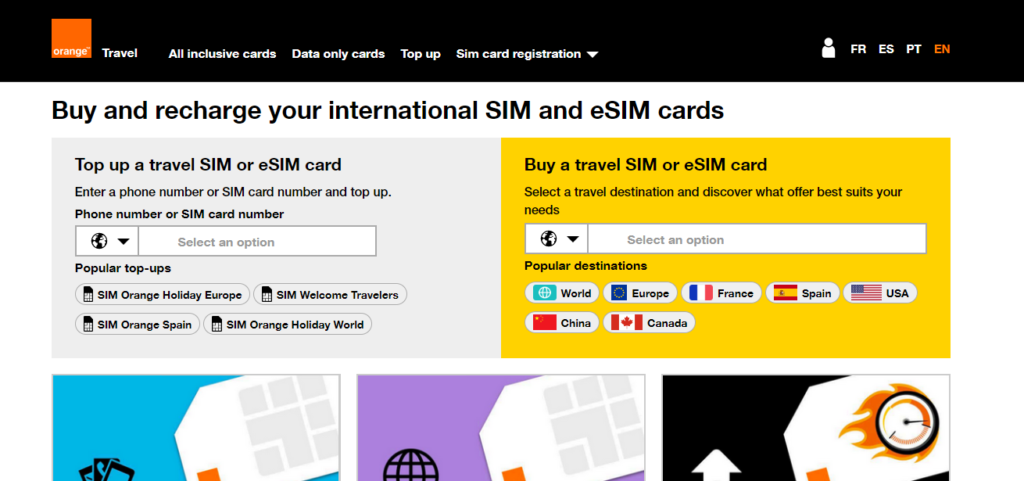
You can do this by visiting the Orange website, selecting the eSIM plan you want, and making the payment.
You can choose from numerous plans that fit all your needs. Visit the Orange Travel App to shop and activate your eSIM.
Once the payment is complete, you will receive an email with the activation code.
Step 3: Installing and Configuring the Orange eSIM
Once you have chosen your plan, follow the steps below to download and install your Orange eSIM:
Installing and Configuring the Orange eSIM For iOS devices,
Keep in mind that the QR Code scanning option is not available on iPhone. You have to enter the PIN to activate the Orange eSIM.
- Go to Settings > Mobile Data > Add Data Plan
- Locate your Orange Holiday eSIM profile, which should be labelled as “Secondary” by default.
- Tap on the “Secondary” to edit or change the label.
- Update the label to “Travel” or any other preferred name that helps you identify the eSIM’s purpose.
- Save the changes and ensure the new label is correctly displayed.
- Tap on ‘Default Voice Line’ at the bottom of the screen.
- Select ‘Primary’ to set your home SIM card as the default line for voice calls.
- Within the Cellular settings, tap on ‘iMessage & FaceTime’.
- Choose ‘Primary’ to set your home SIM card for these services as well.
- Press “Back” to go back to Cellular settings, and tap on the Primary plan.
- Look for an option to turn off this line, and toggle it off.
- Once the Primary SIM is disabled, a notification should appear confirming the switch to the Travel Cellular Plan.
- Press ‘OK’ to accept the switch.
- Turn Off Airplane Mode:
- Access the Control Center by swiping down from the top right corner of the screen (on an iPhone with Face ID) or swiping up from the bottom edge of the screen (on an iPhone with a Home button).
- Tap the Airplane Mode icon to turn it off. The icon should no longer be illuminated, indicating that the Airplane Mode is disabled.
- Again, Go to ‘Settings’ on your iPhone.
- Scroll down and tap ‘Cellular’.
- You will see a prompt to ‘Enter PIN for Digital SIM’.
- By default, the PIN is usually set to “0000” unless you have changed it.
- Tap ‘OK’ after entering the PIN to unlock and activate the eSIM.
- Now turn off the Airplane mode and restart your device. Now your Orange eSIM has been activated successfully.
After entering the PIN, your eSIM should be unlocked and ready to use. If you enter the wrong PIN three times, the eSIM will be locked, and you’ll need the PUK (Personal Unblocking Key) provided by Orange to unlock it. If you’ve changed the PIN previously and can’t remember it, you’ll also need to use the PUK to reset the PIN.
Installing and Configuring the Orange eSIM For Android Device:
- Go to “Settings App > Tap on Network or Connections > SIM Card Management”
- Tap on “Add mobile plan”. You might find this under ‘Mobile Network’ or directly in the ‘SIM card manager’ section.
- Select “Scan carrier QR code”. You may need to give your camera permission to scan if prompted.
- Position your phone’s camera to align with the QR code provided by your carrier. Once recognized, your phone should automatically process the QR code and initiate the installation of your eSIM.
- Restart your device and you can see the Orange eSIM is active.
To Access the QR Code, Open the email from Orange and locate the QR code. This code is what you will scan with your device to install the eSIM profile.
If you cannot find the QR code in your email, or if you are having trouble accessing your QR code, you should visit the Orange eSIM support page or contact Orange Customer Service for further assistance.
Step 4: Start Using Your eSIM
Once you have installed your eSIM, you can start using your plan immediately once you arrive at your destination.
If you’re unsure whether it’s working correctly, you can try to make a call or use data with the eSIM as the selected option for cellular data or calls. If the call goes through or you can use data without Wi-Fi, your eSIM is active. If you encounter any issues, you may need to contact Orange eSIM for support or further instructions.
How to Effectively Use the Installed Orange eSIM?
After activating your Orange eSIM, it’s crucial to manage your connection settings to ensure seamless international use and cost-effective data consumption.
1. Update Data Roaming Settings for Orange eSIM
To avoid high charges and maintain connectivity while travelling, turn on data roaming by going to
- For Android Devices, “Settings” > “Connections” > “Mobile Networks”> Toggle “Data Roaming” to ON.
- For iPhones, access “Settings” > “Cellular” > “Cellular Data Options” and activate “Data Roaming.“
Always confirm that your eSIM plan includes roaming services before this adjustment.
2. Checking Orange eSIM Data Usage
You can monitor your data consumption directly on your device. On Android, navigate to
- For Android, “Settings > Connections > Data Usage” to check your current data usage.
- For iPhone users, go to “Settings > Cellular” to view the breakdown of data consumed.
This helps you stay within your plan limits and manage costs efficiently.
How To Optimize Orange eSIM Data Consumption?
- Use Wi-Fi: Whenever possible, connect to Wi-Fi networks to reduce data usage on your eSIM.
- Limit background data: Restrict background data for apps that don’t need constant updates.
- Compress data: Use browsers that compress web pages, like Google Chrome, to save data.
- Download over Wi-Fi: Ensure to download music, videos, and large files when connected to Wi-Fi.