
Are you facing issues with the Steam Link app on your Meta Quest 2, Quest 3, or Quest Pro?
The Steam Link app is a popular choice for VR enthusiasts looking to stream PC games directly to their headset, but sometimes technical hurdles can disrupt this experience.
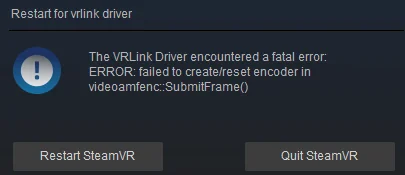
The full error message usually reads: “The VRLink Driver encountered a fatal error: ERROR: failed to create/reset encoder in videoamfenc::SubmitFrame()“
This article aims to provide you with effective solutions to common problems that may prevent the Steam Link app from working properly on your Meta Quest device.
How to Fix Steam Link App Not Working on Meta Quest 2, Quest 3, and Quest Pro?
If you facing an issue while linking Meta Quest to Steam then you should log out and then log back in, try enabling streaming on Steam, and check your antivirus or firewall settings.
Down below, we have discussed the solution in step-by-step detail.
1. Restart The Devices
A simple restart can sometimes fix connectivity issues.
Try restarting both your PC and your Meta Quest headset and attempt to reconnect through the Steam Link app.
2. Ensure Basic Requirements Are Met
Make sure that your PC and Meta Quest headset meet the minimum requirements for Steam VR and that they are both updated to their latest versions.
Also, ensure that your PC is on and that Steam is running with the latest updates installed.
To ensure that the basic requirements are met for running Steam VR on your Meta Quest headset, you will need to check the following:
For the PC:
- Operating System: Windows 10 or 11 is typically required for the best compatibility.
- Processor: At least an Intel Core i5-4590 or AMD Ryzen 5 1500X or better is recommended.
- Memory: 8 GB+ RAM is generally the minimum required for VR applications.
- Graphics Card: A card equivalent to an NVIDIA GTX 1060 6GB or AMD Radeon RX 480 or better is often the minimum for VR.
- Video Output: Compatible HDMI 1.3 video output.
- USB Ports: At least one USB 2.0 port or better for connecting the headset.
- Software: The latest version of Steam and SteamVR installed.
For the Meta Quest Headset:
- Firmware: The headset should be updated with the latest firmware available. To do this Open the Meta Quest app on your phone, tap Settings, select the headset you want to update, and tap More Settings
- SteamVR Compatibility: Ensure that the headset is compatible with SteamVR, which the Meta Quest 2, Quest 3, and Quest Pro are when using Link or Air Link.
3. Re-login to The Steam
Sometimes, the issue can be resolved by logging out of your Steam account and then logging back in.
This can help refresh your account’s connection to the Steam servers.
4. Check Network Connection
The Meta Quest headsets and the PC must be connected to the same router and preferably on a 5GHz Wi-Fi channel to ensure a stable and fast connection.
Interference or a slow connection can often be the culprit when it comes to streaming issues.
5. Enable Streaming on Steam
Go into the Steam settings on your computer and look for a choice that says something like ‘Enable Streaming’ or ‘Turn on Streaming.’
You need to make sure this is selected, or else your computer won’t send games to your Meta Quest headset, and the Steam Link app won’t work right.
Here are the steps to Enable Streaming on Steam:
- On your PC, launch Steam.
- Click on ‘Steam‘ in the upper left corner, then select ‘Settings’.
- Click on the ‘In-Home Streaming‘ or ‘Remote Play‘ tab.
- Ensure the ‘Enable streaming‘ checkbox is ticked.
6. Check Steam VR Settings
If Steam VR isn’t starting properly on your PC, it may prevent the Steam Link app from connecting.
Try starting Steam VR manually first, then connect through the Steam Link app in your headset.
Here are the steps to check Steam VR settings:
- Open the Steam application on your PC.
- Click on the “VR” icon in the upper right corner of the Steam interface to start SteamVR.
- If you don’t see the icon, make sure SteamVR is installed by going to your Library, selecting ‘Tools,’ and finding SteamVR in the list for installation.
7. Update Drivers and Software
Update Drivers and Software Ensure that your graphics card drivers are up to date, as outdated drivers can lead to performance issues with Steam VR.
Also, check for updates for your Meta Quest headset and install them if available.
Steps for Updating Graphics Card Drivers:
- On Windows, you can go to “Device Manager” > “Display adapters” to see what graphics card you have.
- Navigate to the official website of your graphics card manufacturer.
- Find the drivers section on the website, select your graphics card model, and download the latest driver.
- Open the downloaded file and follow the installation prompts.
- After the driver installation is complete, restart your computer to ensure changes take effect.
Steps for Updating Meta Quest Headset Software:
- Put on your headset, and from the universal menu, select “Settings.”
- Navigate to the “About” section to see if there are any updates available.
- If an update is available, you should see the option to “Download” or “Update.”
8. Check for Interferences
Other devices on the same network or physical obstacles that disrupt the Wi-Fi signal can cause connectivity problems.
Ensure that your play area is free from such interference.
9. Check Your Firewall and Antivirus Settings
Firewalls and antivirus programs are designed to protect your computer from unauthorized access, but sometimes they can be too protective and block legitimate applications like SteamVR from connecting to your VR headset.
Here’s how to check and adjust these settings:
Steps For Windows Firewall:
- Open the Control Panel, select “System and Security,” then choose “Windows Defender Firewall.” Alternatively, search for “Firewall” in the Start menu.
- Click “Allow an app or feature through Windows Defender Firewall” on the left sidebar.
- Select “Change settings”
- Find Steam-related entries and check both “Private” and “Public” boxes.
- If SteamVR isn’t listed, use “Allow another app” to add it from the Steam installation directory.
- Click “OK” to save and apply your settings.
Steps For Antivirus Software (might vary depending upon the antivirus):
- Launch your antivirus program’s dashboard.
- Find the section for “Quarantine” or “Blocked applications.”
- Allow Steam and SteamVR if they are blocked. The exact steps will depend on the specific antivirus software.
- If possible, add Steam and SteamVR to the exceptions or exclusions list.
- Save any changes before exiting the antivirus settings.
Here’s an example using Avast Antivirus, which is a well-known antivirus program:
- Open the Avast Antivirus dashboard by double-clicking the Avast icon in your system tray or finding Avast in your applications.
- Click on the Protection tab on the left side.
- Within the Protection tab, select Virus Chest (Avast’s term for quarantine).
- If you find Steam or SteamVR in the Virus Chest, you can typically select the option to Restore and Add to exclusions to prevent them from being quarantined again.
- To proactively add an exception, go back to the main dashboard and select Menu in the top-right corner.
- Choose Settings, then go to the General section.
- Find the Exceptions tab.
- Click Add Exception and then enter the file paths for Steam and SteamVR, or browse to their locations on your computer.
- Click Add Exception to confirm each addition.
- Save your changes and exit the settings. Your Avast Antivirus will now exclude Steam and SteamVR from its scans and shields.
Remember to restart Steam after making these changes to ensure they take effect. Note: The exact wording and layout might differ slightly depending on the version of Avast you’re using, but the general process will be similar.
If you’re using a different antivirus program, the steps will be similar but may have different terminology or menu layouts.
10. Contact Meta Quest Support

If none of the above steps work, it might be time to reach out to Steam or Meta Quest support for further assistance.
They can provide more in-depth troubleshooting based on the specifics of your issue.