When you encounter the “Not sent, tap to retry” error on Google Voice, it can be frustrating, especially if you rely on the service for communication.
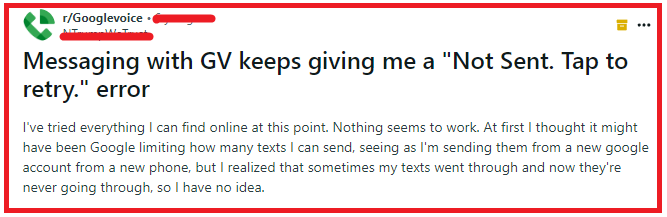
Many users of Google Voice have reported seeing the error message “Not sent, tap to retry” when trying ti send messages in Google Voice. This can be troublesome but there is no need to worry anymore as we are here to help you!
In this article, we will discuss the reasons why you are encountering the error message “Not sent, tap to retry” in detail and exactly how you can fix it with ease.
What are the reasons for Google Voice Not sent, tap to retry?
When you encounter the “Not sent, tap to retry” message in Google Voice, it could be due to several factors as we have discussed below.
1. Poor Internet Connection
Google Voice relies on an internet connection to send and receive messages. If you’re experiencing connectivity issues or your internet speed is too slow, Google Voice may not be able to process your message requests.
This can happen with both Wi-Fi and mobile data connections. Interruptions in service or weak signal strength can prevent the app from connecting to the servers, leading to messages not being sent.
2. Google Voice App Glitches
Like any software, Google Voice can encounter bugs or temporary glitches that affect its performance.
These can be due to conflicts with other apps, errors during an update, or random software malfunctions.
These glitches might prevent messages from being sent, causing the app to display the “tap to retry” message.
3. Outdated Google Voice App Version
Running an outdated version of Google Voice can lead to compatibility issues and bugs that have been fixed in later releases.
App developers regularly update their software to patch known issues and improve functionality.
4. Account Issues in Google
Problems with your Google account, such as sync issues or authentication errors, can also be the root cause of messages not being sent in Google Voice.
If there’s a problem with your account credentials or if your account needs a verification update, Google Voice may not be able to process sending messages until these issues are resolved.
5. Service Outages in Google Voice
Occasionally, the problem may not be on your end at all. Google Voice, like any online service, can experience outages due to server problems, maintenance, or other unforeseen issues that affect the service’s availability.
During such times, users may not be able to send or receive messages until the service is restored.
How To Fix Google Voice Not sent, tap to retry?
To fix Google Voice “Not sent, tap to retry“, you can check the internet connection, restart the Google Voice app and update it. Additionally, you can clear the cache and data of Google Voice to fix the issue.
1. Check Internet Connection
Google Voice requires a stable internet connection to function correctly. If your internet connection is weak or unstable, messages may fail to send.
Ensure that you are connected to a reliable Wi-Fi network or that your mobile data signal is strong.
- Test your internet speed using online speed test tools.
- Ensure Wi-Fi is connected and has a strong signal, or check that cellular data is turned on and you have good reception.
- You can also reset your modem by plugging it out from the power and then plugging it in again after 3 minutes.
2. Restart the Google Voice App
A simple yet effective method is to close the Google Voice app completely and then reopen it.
This can refresh the app’s connection to the servers and clear out any temporary glitches that may be causing the message to not be sent.
3. Update Google Voice App
Outdated apps can lead to a variety of issues, including sending errors. Make sure that you have the latest version of Google Voice installed on your device. Check the app store on your device for any available updates and install them.
- Open the Google Play Store or App Store on your device.
- Search for Google Voice and select it.
- Tap ‘Update’ if an update is available.
4. Clear Cache and Data of Google Voice
Sometimes the app’s cache can become corrupted, leading to sending errors. Clearing the cache and data can help to reset the app to its default state. Remember that clearing data will remove all app settings, so you will need to set it up again.
Clear Cache for Android
- Go to Settings on your device.
- Open Apps.
- Select Manage Apps.
- Navigate to Google Voice and tap on it.
- Tap on Clear Data or Clear Cache.
Clear Cache for iPhone
- Go to iPhone settings.
- Go to General.
- Find the Google Voice App and click on that.
- Tap on the Offload App button.
- Again Reinstall the Google Voice app.
5. Check for Do Not Disturb Mode
If “Do not disturb” mode is enabled, it may prevent messages from being sent. Check your device’s settings to ensure that this mode is not activated.
If it is, you can disable it or adjust the settings to allow Google Voice messages to go through.
For Android:
- Swipe down from the top of the screen to open the Quick Settings panel.
- Tap the “Do Not Disturb” icon to turn it off.
For iOS:
- Swipe down from the top-right corner of the screen (or up from the bottom edge on models with a Home button) to open Control Center.
- Tap the crescent moon icon to disable Do Not Disturb mode.
6. Remove and Re-add your Google Account
Sometimes the issue can be with your Google account. Try removing your Google account from your device and then adding it back again.
Go to your device’s Settings, tap on “Accounts,” select your Google account, and then remove it. Once removed, add it back again and try sending a message through Google Voice.
Steps for removing and re-adding your Google Account:
Remove Google Account:
- Go to Settings
- Tap Accounts
- Select your Google account
- Remove account
Re-add Google Account:
- Go to Settings
- Tap Accounts
- Tap Add account
- Select Google
- Enter your Google account details and sign in
- Try sending a message with Google Voice Now
7. Uninstall and Reinstall the Google Voice App
If none of the above steps work, uninstalling and then reinstalling the Google Voice app could resolve the issue.
Uninstall the app from your device, then go to the app store and download the latest version of Google Voice. This can help to fix any deeper issues with the app’s installation.
To uninstall and reinstall the Google Voice app on an Android device, follow these steps:
- Open the Settings app on your Android device.
- Scroll down and select Apps or Application Manager.
- Locate and select Google Voice from the list of apps.
- Tap Uninstall.
- Once the app is uninstalled, open the Google Play Store.
- Use the Search function to find Google Voice.
- Select the app and tap Install to reinstall it.
For an iOS device, use these steps:
- Press and hold the Google Voice app icon on your home screen.
- Tap Remove App or the minus sign (depending on your iOS version).
- Confirm by tapping Delete App.
- Open the App Store.
- Use the Search tab to find Google Voice.
- Tap the cloud icon or Get to reinstall the app.
8. Contact the Support Team of Google Voice

If you’ve gone through all the previous steps and still have issues, reaching out to Google Voice Support might be necessary.
You should tell them the fixes that you have tried till now and they will be able to provide you with a solution.