Meta Business Suite is a powerful tool that allows businesses to manage their social media presence across multiple platforms. One of the key features of Meta Business Suite is the ability to add administrators to your account.
Adding an admin can help you manage your social media presence more efficiently and effectively. In this article, we’ll show you how to add an admin to your Meta Business Suite account in just a few simple steps.
How to add admin to meta business suite?
Step 1: Log in to your Meta Business Suite Account
To add an admin to your Meta Business Suite account, you’ll need to log in to your account. Go to the Meta Business Suite website and enter your login credentials.

Step 2: Navigate to the “People” Section
Once you’re logged in to your Meta Business Suite account, Click on Settings and then navigate to the “People” section.
This is where you can manage the people who have access to your account.
Step 3: Click on the “Add Person” Button

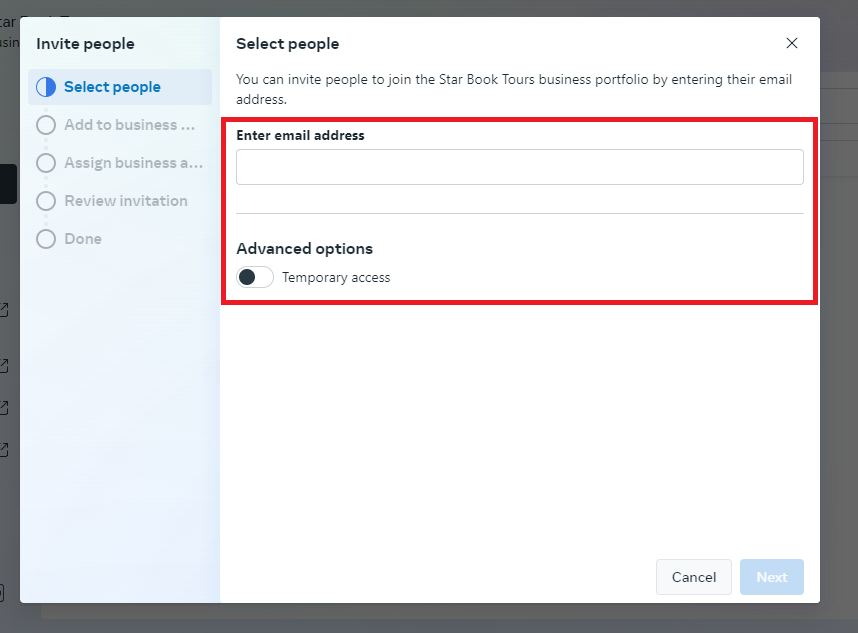
In the “People” section, click on the “Add People” button. This will open a dialog box where you can enter the information for the person you want to add as an admin.
Step 4: Enter the Person’s Information
In the dialog box, enter the email address of the person you want to add as an admin. You can also choose the type of access you want to give them.
You can give them full access to your account or limit their access to specific pages or features.

Step 5: Fill Out the Details
You will have to put their email address, choose their level of access and then use the “Next” button to fill out the next details required. This will send an invitation to the person you want to add as an admin.
Step 6: Wait for the Person to Accept the Invitation
After you’ve sent the invitation, the person you want to add as an admin will receive an email with instructions on how to accept the invitation.
Once they’ve accepted the invitation, they’ll be added as an admin to your Meta Business Suite account.
