Are you looking to disconnect yourself from a business or page on Meta Business Suite? Removing yourself is a simple process that involves accessing the suite’s settings and selecting the specific business or page you want to leave.
Whether you’re transitioning to a different role or simply no longer need access, we will show you how to remove yourself from Meta Business Suite in this article.
Preparation Before Removing Yourself From Meta Business Suite
Before removing yourself from Meta Business Suite, it is important to take a few preparatory steps to ensure a smooth transition.
1. Backup Important Information
Before removing yourself from Meta Business Suite, it is important to back up any critical information that you may need in the future.
This includes any files, documents, or other data that you have stored on the platform. You can download your data from Meta Business Suite by following these steps:
- Open Meta Business Suite and then Settings.
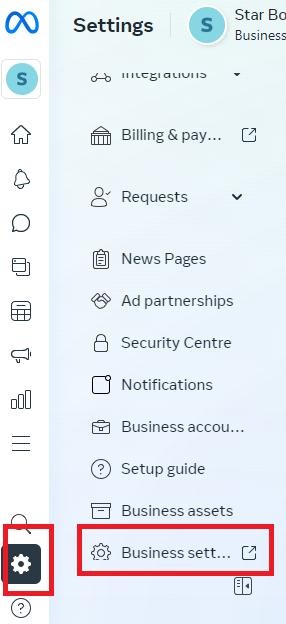
- Go to your Business Settings.
- Click on “Data Sources” from the left-hand menu.
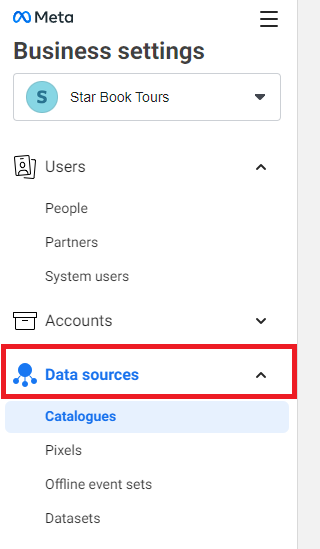
- Select the data source that you want to download.
- Click on the “Download” button next to the data source.
2. Inform Your Contacts
Before removing yourself from Meta Business Suite, it is important to inform your contacts that you will be leaving the platform.
This includes any team members, clients, or partners that you work with on the platform. You should let them know that you will no longer have access to the platform and provide them with alternative contact information if necessary.
Steps to Remove Yourself from Meta Business Suite
If you no longer want to be associated with a Meta Business Suite account, you can easily remove yourself from it. Here are the steps you need to follow:
1. Accessing Account Settings
Firstly, you need to access your account settings on Facebook. To do this, log in to your Facebook account and click on the arrow icon on the top right corner of the screen.
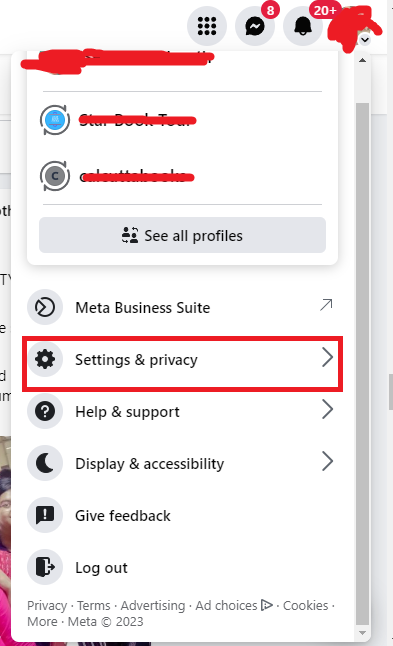
This will open a dropdown menu. From the dropdown menu, select “Settings & Privacy” and then select “Settings”.
2. Locating Meta Business Suite
Once you are in your account settings, scroll down until you see the “Business Integrations” section.
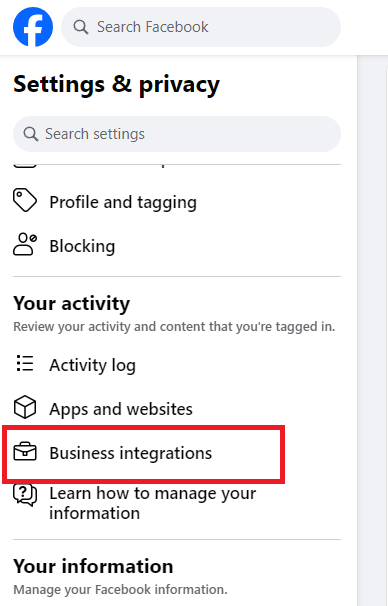
Here, you will see a list of all the business integrations that you have authorized to access your Facebook account. Find “Meta Business Suite” from the list.
3. Initiating Removal Process
To remove yourself from Meta Business Suite, click on the “View and edit” option next to it. This will take you to the Meta Business Suite settings page.
Here, click on the “People” tab from the left sidebar. This will show you a list of all the people who have access to this Meta Business Suite account.
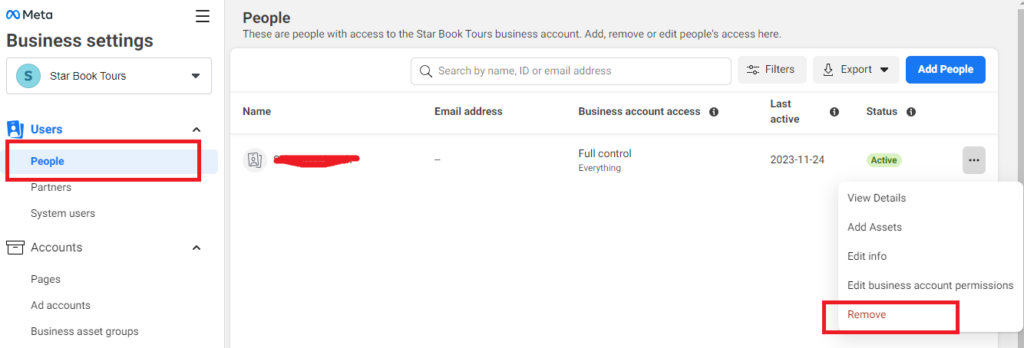
To remove yourself, click on the three dots icon next to your name and select “Remove”. Confirm your action by clicking “Remove” on the pop-up window.
