
Changing your page name in Meta Business Suite is a straightforward process that allows you to update and modify the name of your business page.
This feature is particularly useful if your business undergoes a rebranding or if you simply want to update the page name to better reflect your offerings.
In this article, we will be discussing how you can easily change the name of your Facebook page and what preparations you should take before and after you do that.

Preparation Before Changing Page Name
Before you change your page name in Meta Business Suite, there are a few things you should consider to ensure a smooth transition. In this section, we will discuss the three most important things you need to do before changing your page name.
1. Check Page Name Guidelines
Meta Business Suite has strict guidelines for page names. Before you change your page name, make sure it complies with their guidelines. Your page name should accurately reflect your business or organization and should not include any misleading information or use terms that are offensive or violate intellectual property rights.
To check if your page name complies with the guidelines, go to the Meta Business Help Center and review the guidelines. You can also use the Page Name Checker to see if your proposed name meets the guidelines.
2. Consider SEO Impact
Changing your page name can have an impact on your search engine rankings. If you have a well-established page with a good ranking, changing the name could negatively affect your SEO. To minimize the impact, you should consider updating your page’s meta title and description to reflect the new name.
You should also update any backlinks to your page with the new name. This will help ensure that your page continues to rank well in search results.
3. Notify Followers
If you have a large following on your page, it’s important to notify them of the name change. This will help avoid confusion and ensure that your followers can still find your page.
Step-by-Step Guide to Change Page Name In Meta Business Suite
If you want to change the name of your Facebook Page in Meta Business Suite, follow these simple steps:
1. Access The Meta Business Suite
First, log in to your Facebook account and access Meta Business Suite. You must be an admin of the Page to change its name.
2. Navigate To The Page Settings
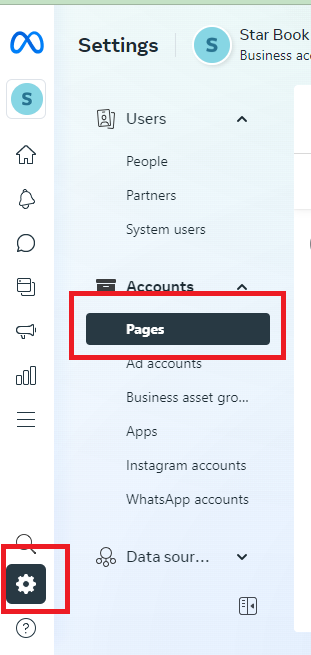
Once you are in Meta Business Suite, navigate to your Page by clicking on the “Pages” tab in the left-hand menu. Select the Page you want to change the name of and click on “Settings” in the top right corner.
3. Change The Page Name
In the “General” section of your Page settings, click on “Edit” next to the name of your Page. Enter your new Page name and click on “Continue”. Make sure that your new Page name complies with Facebook’s guidelines for Page names.
4. Submit for Review
After you have entered your new Page name, click on “Request Change”. Facebook will review your request and notify you of the outcome. If your request is approved, your Page name will be updated.
Note: Changing your Page name may affect its visibility and searchability on Facebook. It is recommended that you inform your followers of the name change and update any links or promotional materials that include your old Page name.
What to Do After The Name Change In Meta Business Suite?
After changing your Facebook Page’s name in Meta Business Suite, there are a few things you should do to ensure that your page is up-to-date and accessible to your audience.
1. Monitor Page Insights
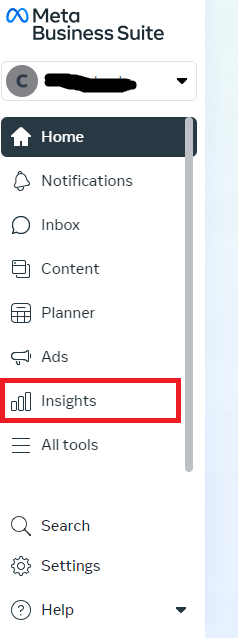
First, you should monitor your page insights to see how your audience is responding to the name change. You can access your page insights by clicking on the “Insights” tab on the left-hand side of your Meta Business Suite dashboard. From there, you can view data on your page’s reach, engagement, and demographics.
2. Update Page Links
Next, you should update any links to your Facebook Page that may be displayed on your website, business cards, or marketing materials. This will ensure that your audience can easily find your page and connect with your brand.
To update your page links, simply replace the old page name with the new page name wherever it appears. If you have a custom URL for your page, you may need to update that as well.