Porting your number to Google Voice for free is like moving your phone number into a new digital home without any cost.
It’s a way to keep your current number and use it with Google’s handy calling features.
This guide will explain in simple steps how you can take your existing phone number and bring it over to Google Voice at no charge.
You’ll learn how to start the process, what you need to have ready, and how to complete the move smoothly.
Google Voice is a telephony service that provides call forwarding and voicemail services, voice and text messaging, as well as U.S. and international call termination for Google Account customers.
This service gives you a phone number that lets you manage your communications across all your devices. It’s versatile, offering a variety of functions:
- Voicemail transcription: Your voicemails are automatically transcribed and sent to you via email or text.
- Personalized greetings: You can set up different greetings for different callers.
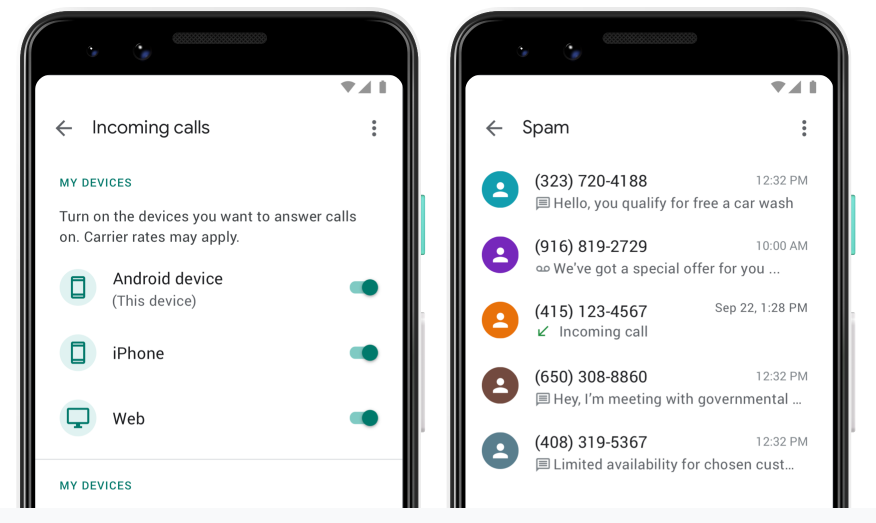
- Call screening: You have the power to screen calls before you answer them.
- Call forwarding: You can forward incoming calls to any of your devices or to voicemail.
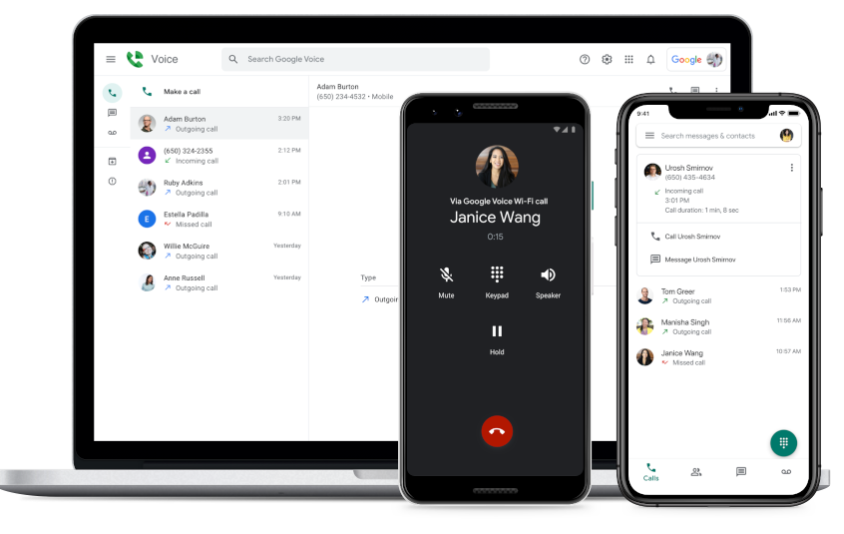
One of the compelling aspects of Google Voice is that it integrates with other Google services like Gmail and Google Contacts.
This means you can receive and make calls using your web browser or via the Google Voice app on your Android or iOS device.
For your convenience, Google Voice offers:
- Free calls and texts to U.S. and Canada.
- Affordable rates for international calls.
- A seamless way to send and receive SMS.
Remember, if you’re looking to use Google Voice, you need an existing U.S. phone number to sign up and will require an internet connection for making calls or sending texts via the Google Voice app.
What is the Eligibility for Porting Number to Google Voice?
Before initiating a port to Google Voice, ensure that your number qualifies under the service’s specific requirements. This is crucial for a successful transfer.
1. Supported Countries and Carriers
Your current mobile number must be from a carrier in the United States. As of now, Google Voice primarily supports porting of U.S. numbers.
Check with your specific carrier for any port-out policies or restrictions they may have.
2. Checking Number Portability
To determine if your number can be ported to Google Voice, use the Google Voice’s support team to check it.
You need to provide the number in question, and you’ll be quickly informed about the portability status.
Note that not all numbers are eligible for porting due to various regulatory and carrier limitations.
Preparing for Porting in Google Voice
Before initiating a number port to Google Voice, ensure you have the necessary details from your current service provider and that your number is eligible for transfer.
1. Billing Account Status
- Check Account Details: Secure your billing account information. You’ll need your account number and PIN from your current service provider.
- Billing Status: Confirm your account is in good standing; any outstanding balance could delay the porting process.
2. Unlocking Your Number
- Contact Your Carrier: Reach out to your current carrier to make sure your number is eligible to be ported and is not under any contractual obligations.
- Request Unlock: If necessary, ask your provider to unlock your number for porting. They may guide you through their specific procedures.
Creating a Google Voice Account
Before you can begin the process of porting your number to Google Voice for free, you must first create a Google Voice account. This involves signing up for the service and selecting a number.
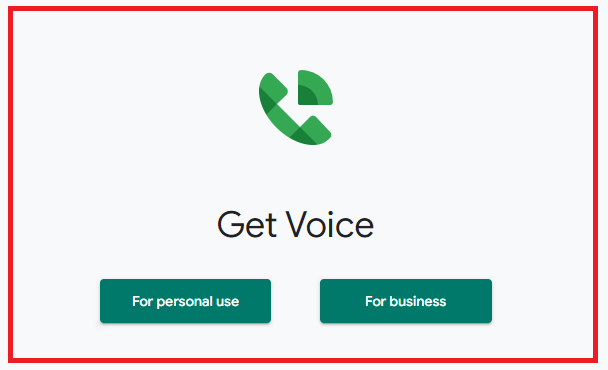
1. Signing Up for Google Voice
To register for Google Voice, navigate to the Google Voice website and sign in with your Google account credentials. If you do not have a Google account, you’ll need to create one.

After signing in, you’ll be prompted to review and accept the Terms of Service and Privacy Policy. Once accepted, you’re ready to choose your Google Voice number.
2. Selecting a Google Voice Number
During the sign-up process, you’ll have the opportunity to select your new Google Voice number. You can search for available numbers by city or area code to find one that suits your preferences.
Remember, your chosen Google Voice number will replace the number you port. If you just want to try out the service or need a secondary number, Google Voice also allows you to select a new number at no cost.
How to Port Your Number to Google Voice?
Porting your phone number to Google Voice gives you the flexibility of using your number with Google’s service.
This process involves a few specific steps, which once completed, allow your current number to be used with Google Voice.
1. Initiating the Port Request
To start the porting process, go to the Google Voice website and sign in. If you don’t have a Google Voice number yet, you will need to get a new one first.
This new number will later be replaced by the number you’re porting. Begin by clicking on ‘Settings‘ and then go to the ‘Phones‘ tab where you will find and select the Change/Port option.
2. Verifying Your Number
Google Voice needs to make sure that the number you wish to port is actually yours. You will enter your phone number and then choose how you want to receive a verification code—via text message or a phone call.
It’s essential to access your current phone during this step to retrieve and enter the 6-digit verification code correctly.
3. Providing the Required Information
You will be prompted to provide specific information during the porting process. This includes account details from your current carrier—like the account number and PIN.
You’ll also need to agree to the terms of service and pay a one-time porting fee, which is typically $20.
The port can take up to 48 hours to complete, so patience is required during this time. Once the process is done, your old number will now ring through Google Voice.
Can you port your number to Google Voice for free?
No, porting your number to Google Voice is a process that allows you to transfer your existing phone number to Google Voice, but it is not free. This service requires a one-time fee of $20.
It’s important to weigh the cost against the benefits that Google Voice provides, such as voicemail transcription, call screening, and the ability to use your number across multiple devices.
Before you begin, ensure that:
- Your number is eligible to be ported.
- You understand that your current phone service will be terminated once the porting process is complete.
- You have paid any outstanding balances with your current carrier to avoid porting issues.
Here’s a quick breakdown of the steps you’ll need to follow:
- Set up Google Voice: If you haven’t used Google Voice before, you’ll need to create an account and select a temporary number.
- Start the porting process: In the Google Voice settings, look for the option to port your number and get started.
- Enter and verify your number: You’ll need to provide the number you wish to port and verify that it’s yours.
- Complete the required information: Fill out the necessary forms and pay the porting fee.
Remember that porting typically takes several days to complete, and dues or contracts with your current carrier will still apply.
What are the Cost and Payment for Google Voice Porting?
When you decide to port your number to Google Voice, you’ll encounter a one-time fee. This is a standard charge set by Google for porting mobile numbers from most carriers.
Here’s what you should know about the costs:
- Google Voice Porting Fee: A fixed rate of $20 USD is required to port your number from your current carrier, such as Verizon or AT&T, to Google Voice.
- Method of Payment: The fee can be paid via Google Payments; you’ll need a credit or debit card ready before beginning the process.
The step-by-step payment process is straightforward:
- Go to the Google Voice website.
- Enter the phone number you want to port and select “Check for available options.”
- Choose “Port your number” after verifying that your number is eligible.
- Agree to all necessary terms and proceed to “Phone Verification.”
- Once you’ve verified your phone, proceed to the payment step, where you’ll be prompted to enter your payment details.
Note: Remember that porting can take up to 48 hours to complete, but many users report it being done much sooner.
Be aware that this fee is the same whether you’re porting to a personal or business Google Voice account.
However, there are no recurring charges for using Google Voice with your number—unless you choose to upgrade to a higher-tier plan for business purposes.
What is the Waiting Period for Finalization?
When you begin the process to port your number to Google Voice, there’s a phase known as the waiting period. This is the time between your porting request and the transfer’s completion.
Usually, the waiting period lasts up to 48 hours, although it might extend due to verification or processing delays.
During this timeframe, your original service provider and Google Voice are communicating to ensure a smooth transition.
You may experience temporary service disruptions. It’s crucial you do not cancel your current service during this period, as doing so could result in losing your number altogether.
Once the waiting period concludes, finalization occurs. Here’s what happens:
- Transfer Completion: Your number is officially active with Google Voice.
- Notification: You’ll receive a message from Google Voice confirming the port.
- Testing: It’s advisable to test calls and texts to confirm the port’s success.
Keep your current account active until you receive a confirmation to ensure you retain your number.
How to Set Up Voicemail and Personal Settings in Google Voice?
To set up your voicemail in Google Voice, follow these steps:
- Open the Google Voice app on your device.
- In the top-left corner, tap the three horizontal lines to access the menu.
- Select Settings from the menu to view various configurations.
In the Voicemail section, customize the following settings:
- Voicemail Greeting: Record a new greeting or use a default one.
- Voicemail Notifications: Toggle on to receive alerts for new voicemails.
- Transcription: Activate to get transcriptions of your voicemail messages.
To set up personal settings:
- Under the Account section in Settings, you can customize your Google Voice number.
- In the Linked Numbers area, add or remove phone numbers associated with your Voice account.
- Adjust the Do Not Disturb schedule to minimize interruptions during specific times.
Note: Remember to save your changes before exiting the settings.