Are you also wondering how to get the Poe AI proxy for OpenAI?
If you answered yes, you are not the only one!
Poe AI is a popular AI chatbot platform developed by Quora to provide users with access to a wide range of natural language AI chatbots to answer their questions and hold conversations with them.
OpenAI is amongst the most well-known artificial intelligence research labs, which has developed highly sophisticated AI chatbots like ChatGPT and GPT-4, and offers its API to its users to run other platforms and programs.
With recent changes to OpenAI’s policies, many are now wondering how to use Poe AI to get an API proxy of OpenAI.
If you are one of these people, you have come to the right place.
Read on to find out how you can get an OpenAI proxy from Poe AI!
How to Get OpenAI Proxy Using Poe AI
Getting an OpenAI API proxy from Poe AI is quite straightforward as long as you follow the steps thoroughly.
1. Install Git
To get the OpenAI API proxy from Poe AI, you will first have to have Git installed onto your device.
To install Git, follow the steps below:
Step 1: Visit the Git – Downloads page and click on the correct system option to download the file onto your device.

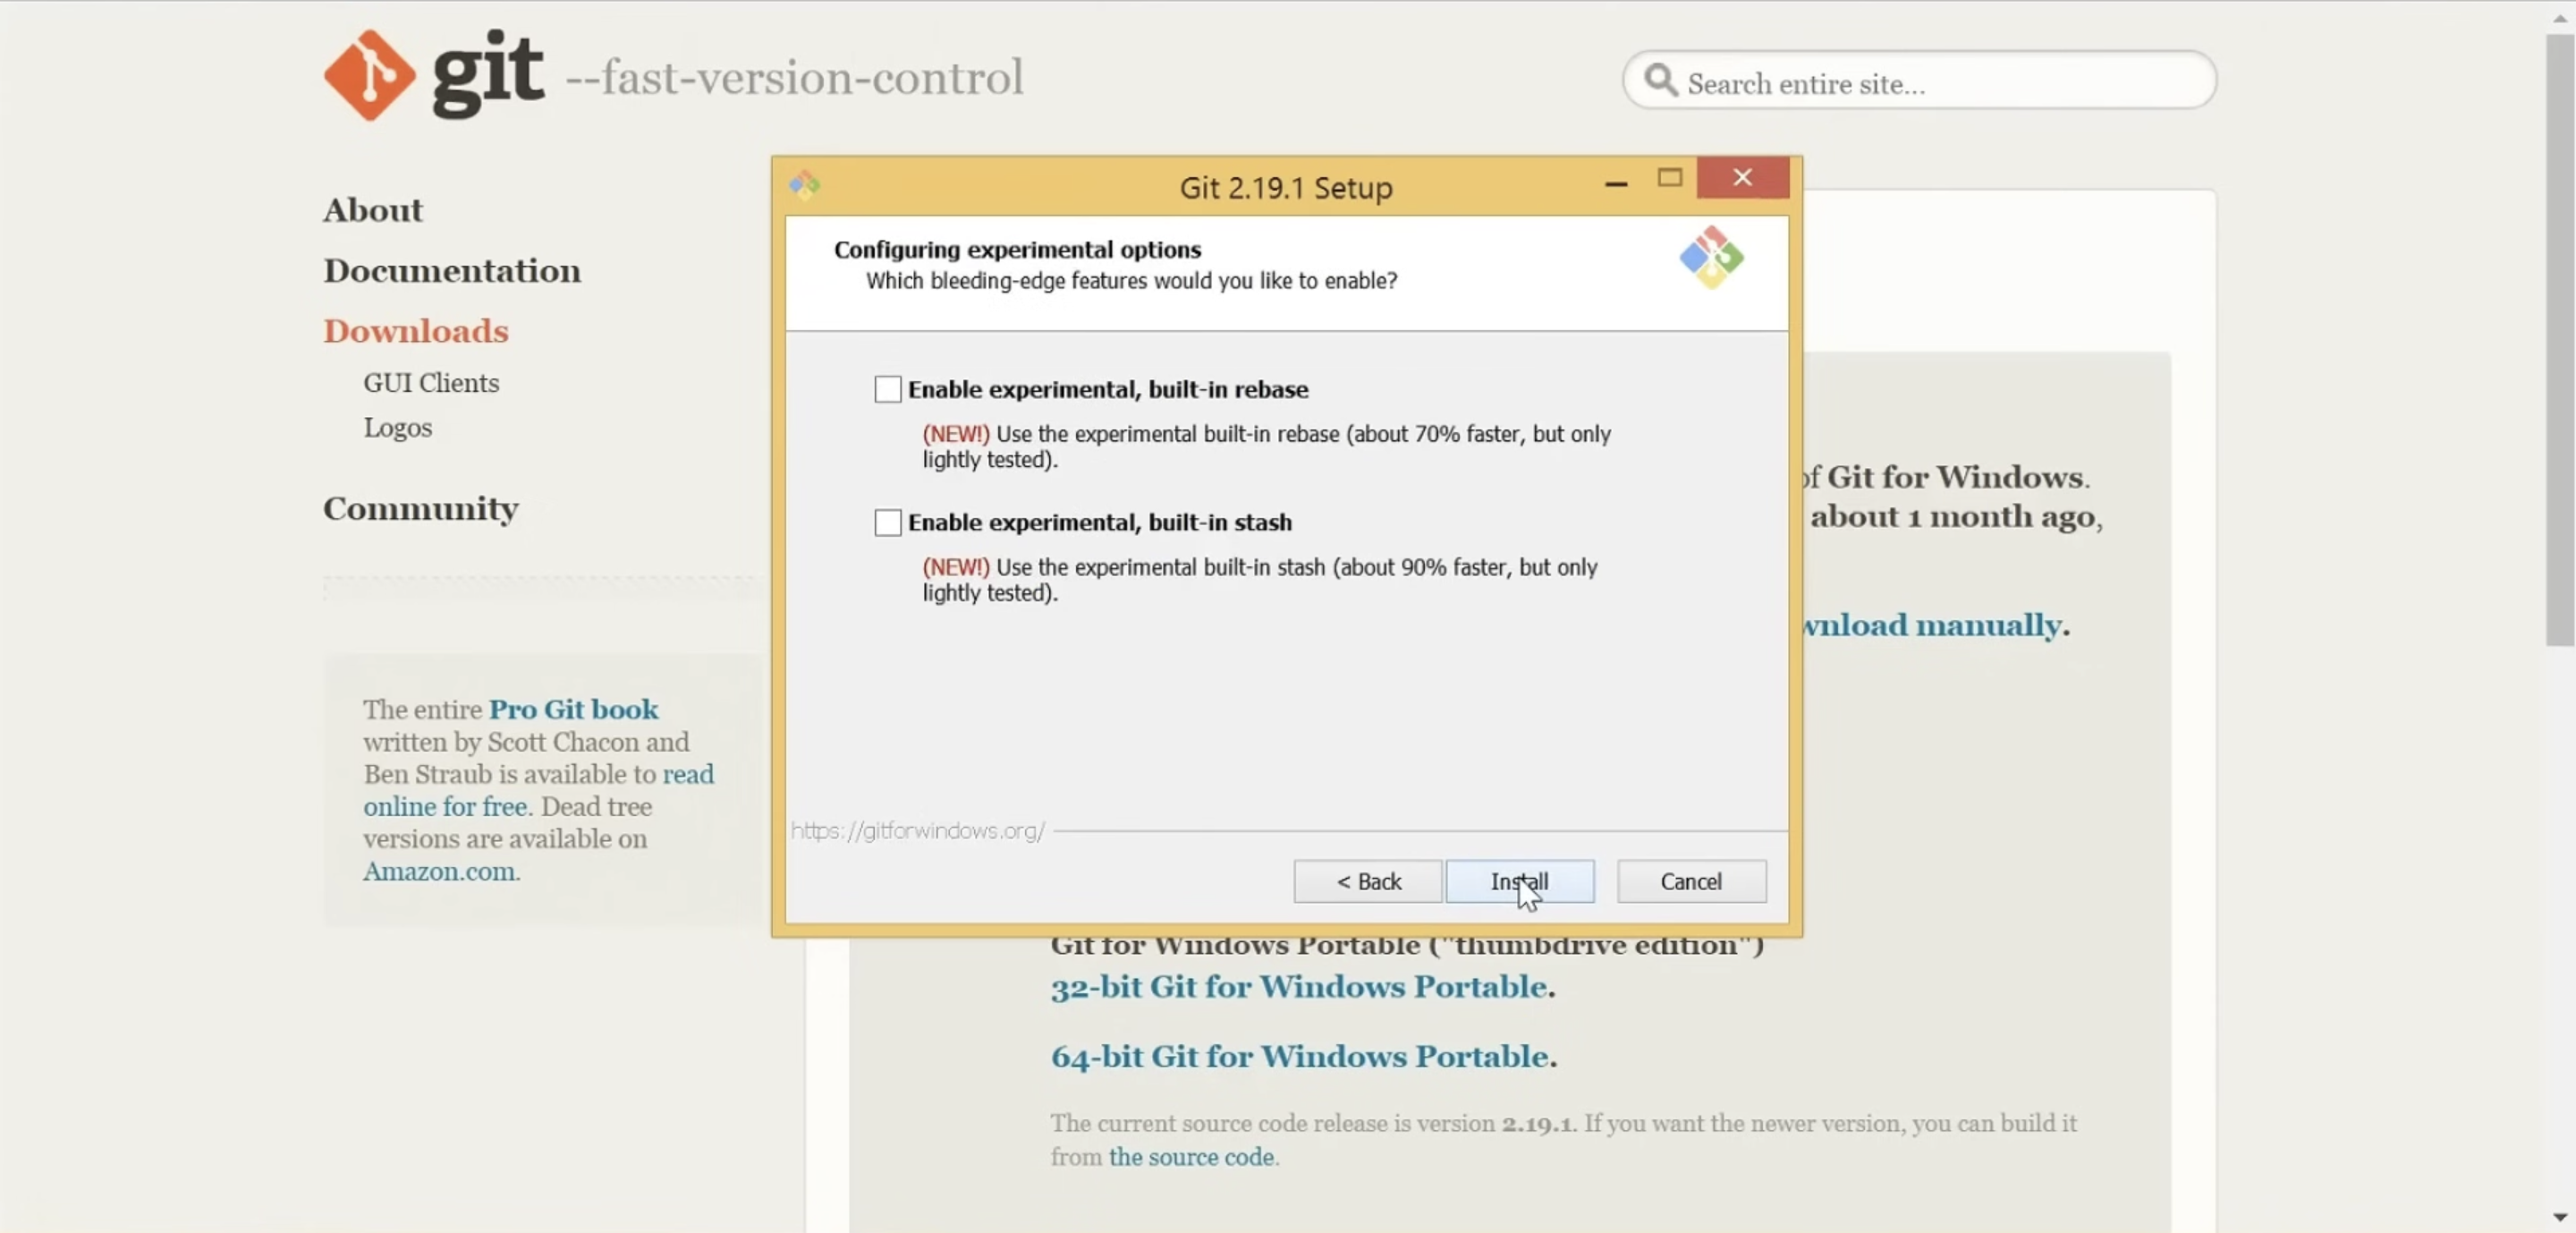
Step 2: Once the .exe file is downloaded, launch the application and provide permissions wherever necessary, and then click Install.
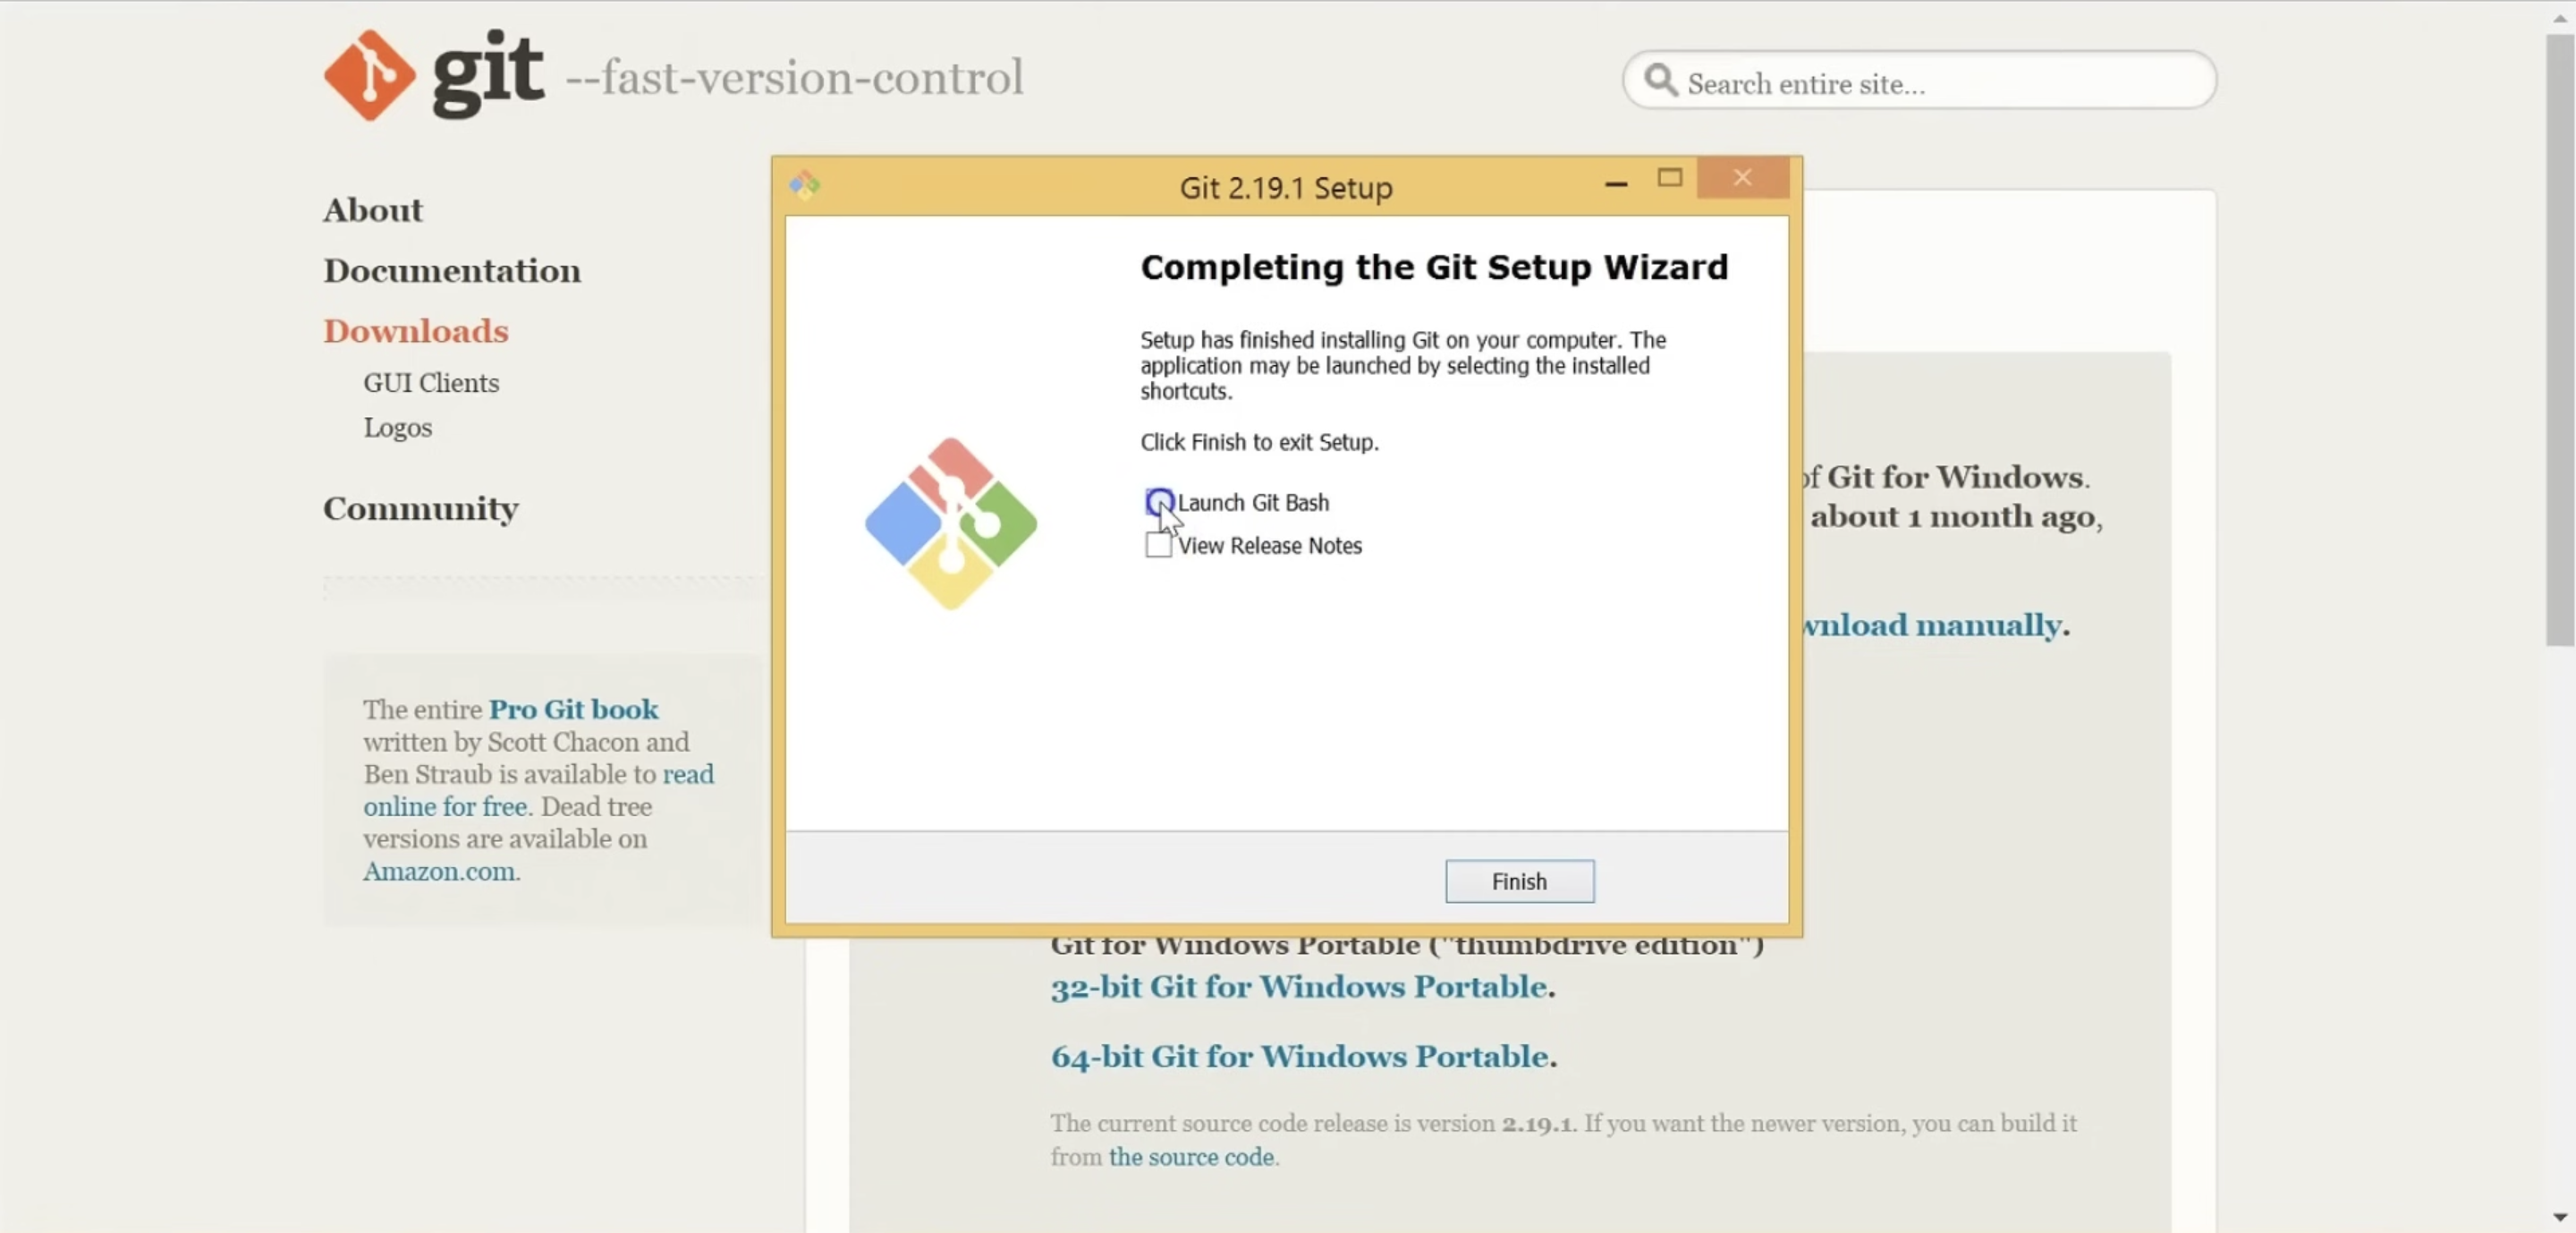
Step 3: After the installation is complete, click on Launch Git Bash on the Git Setup Wizard window and then click on Finish.
Step 4: On the Command Prompt window, type git –version and run the command.
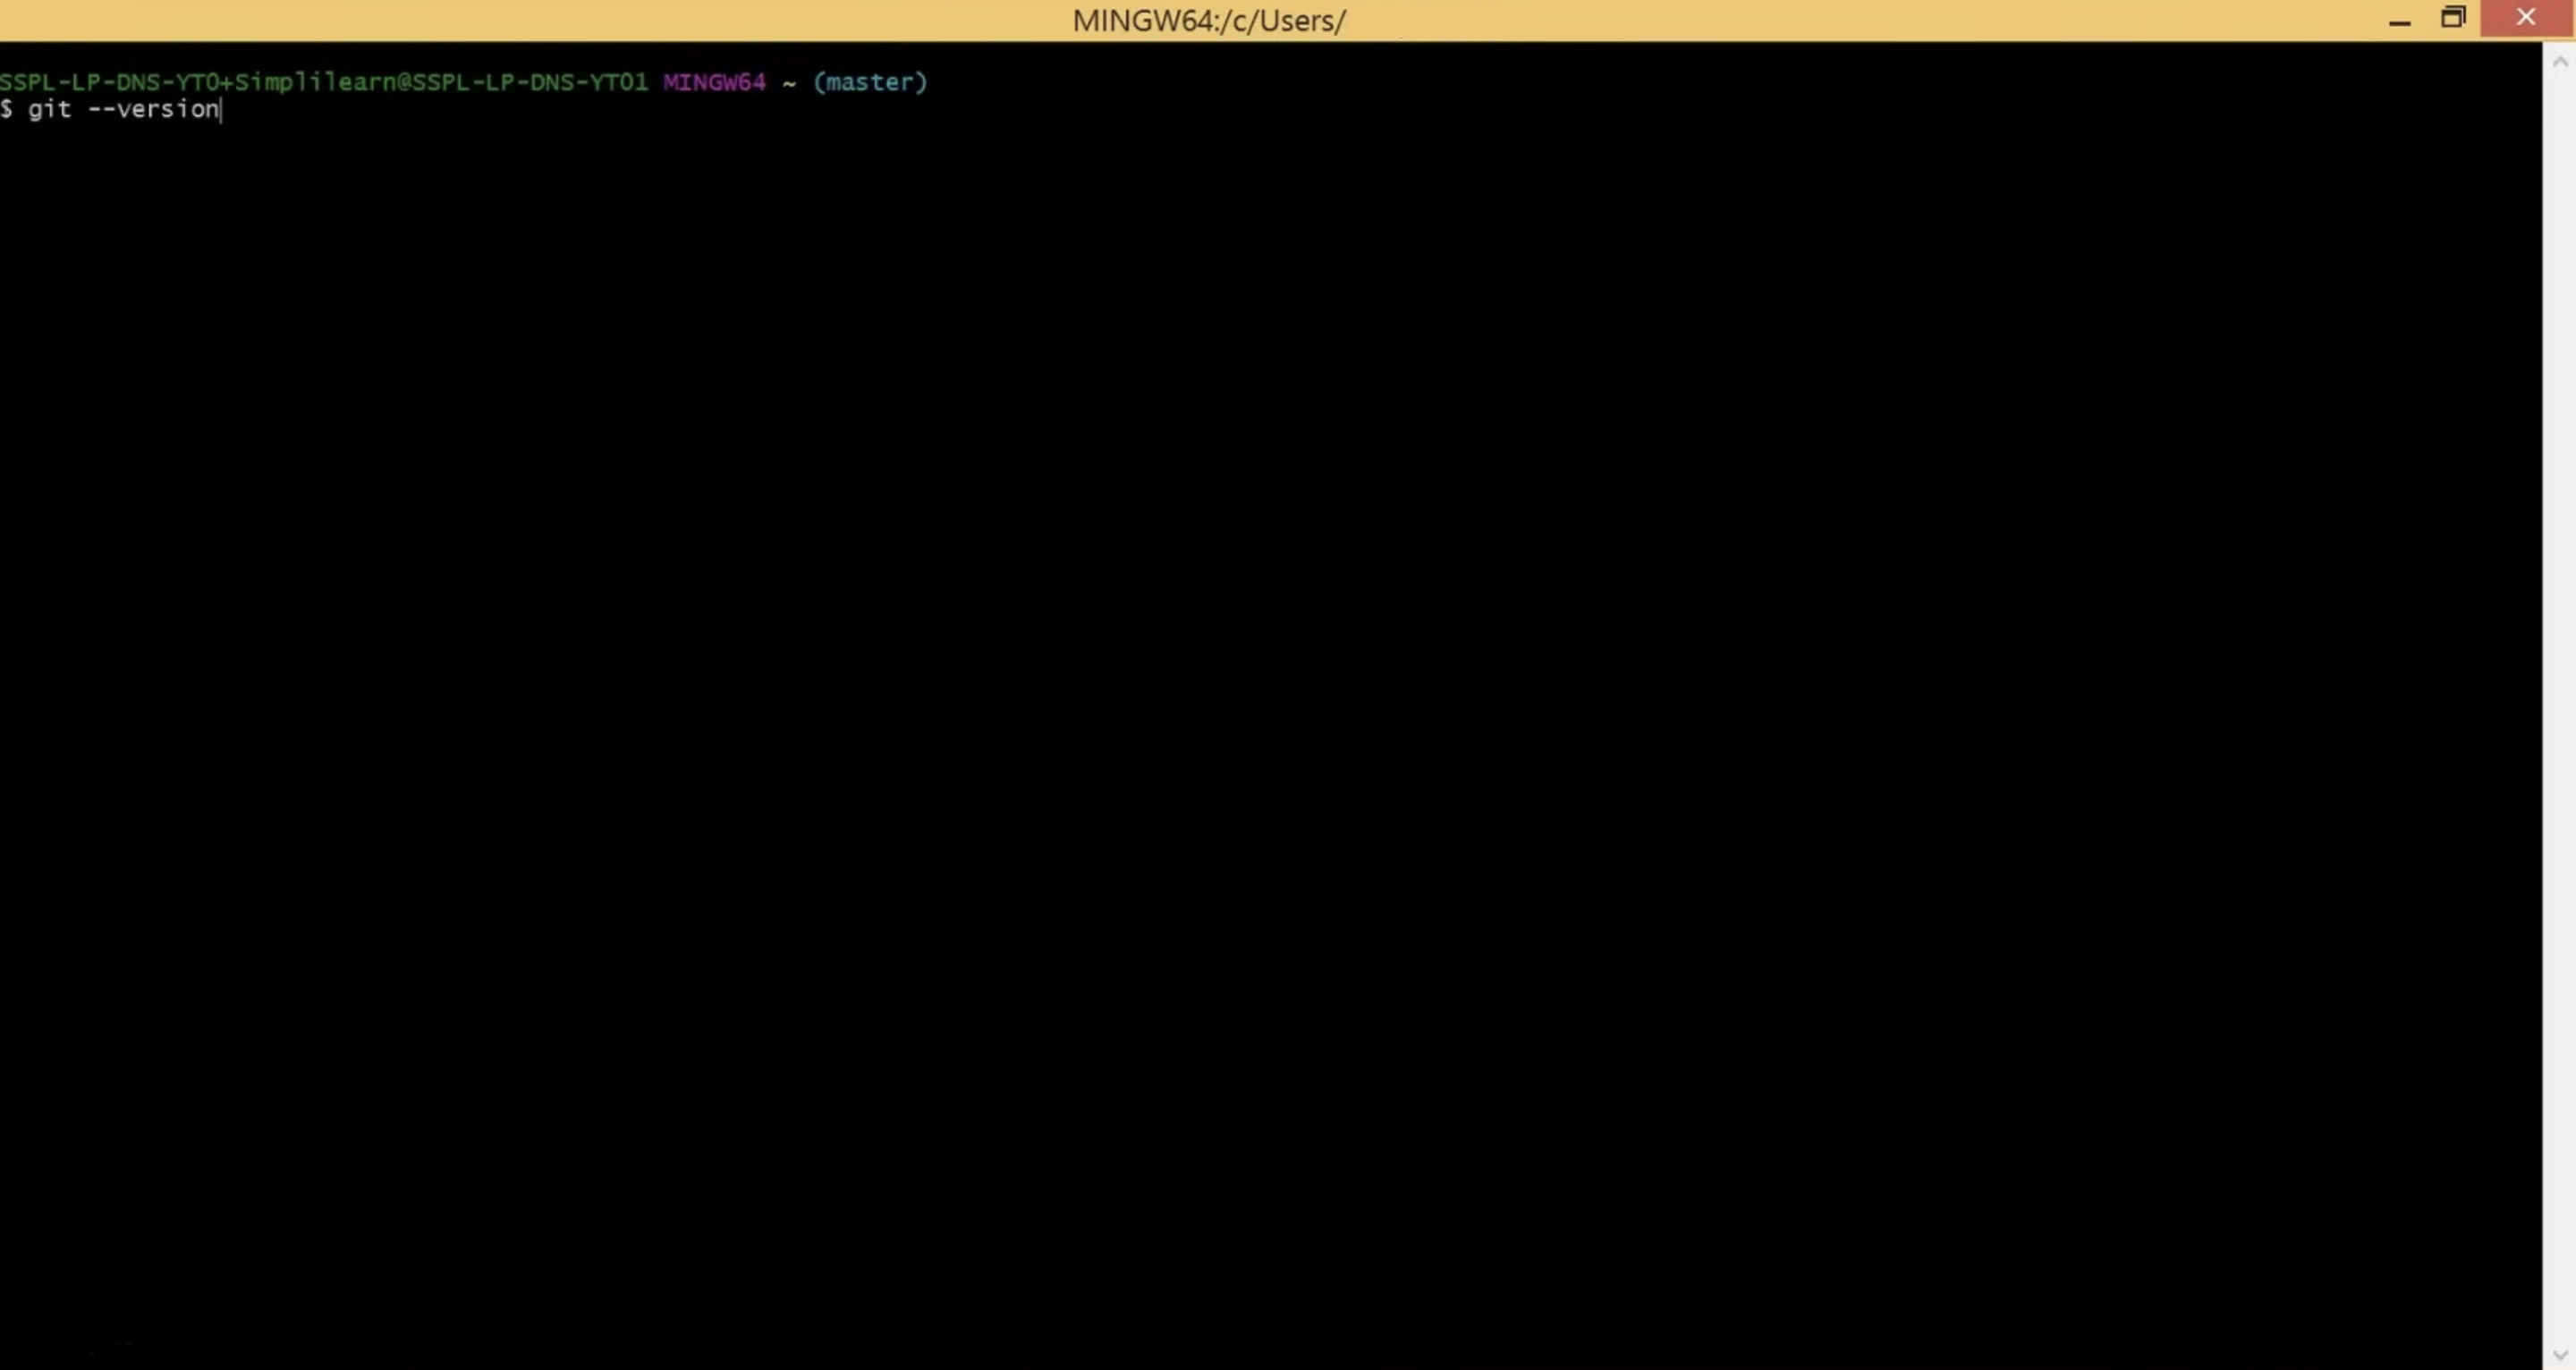
If your installation was done correctly, this command will produce a response indicating the version that was downloaded onto your system.
This will thus indicate that Git has been successfully installed.
2. Install Python
The next step after installing Git is to install Python on your system to get the OpenAI API proxy from Poe AI.
To install Python, follow the steps below:
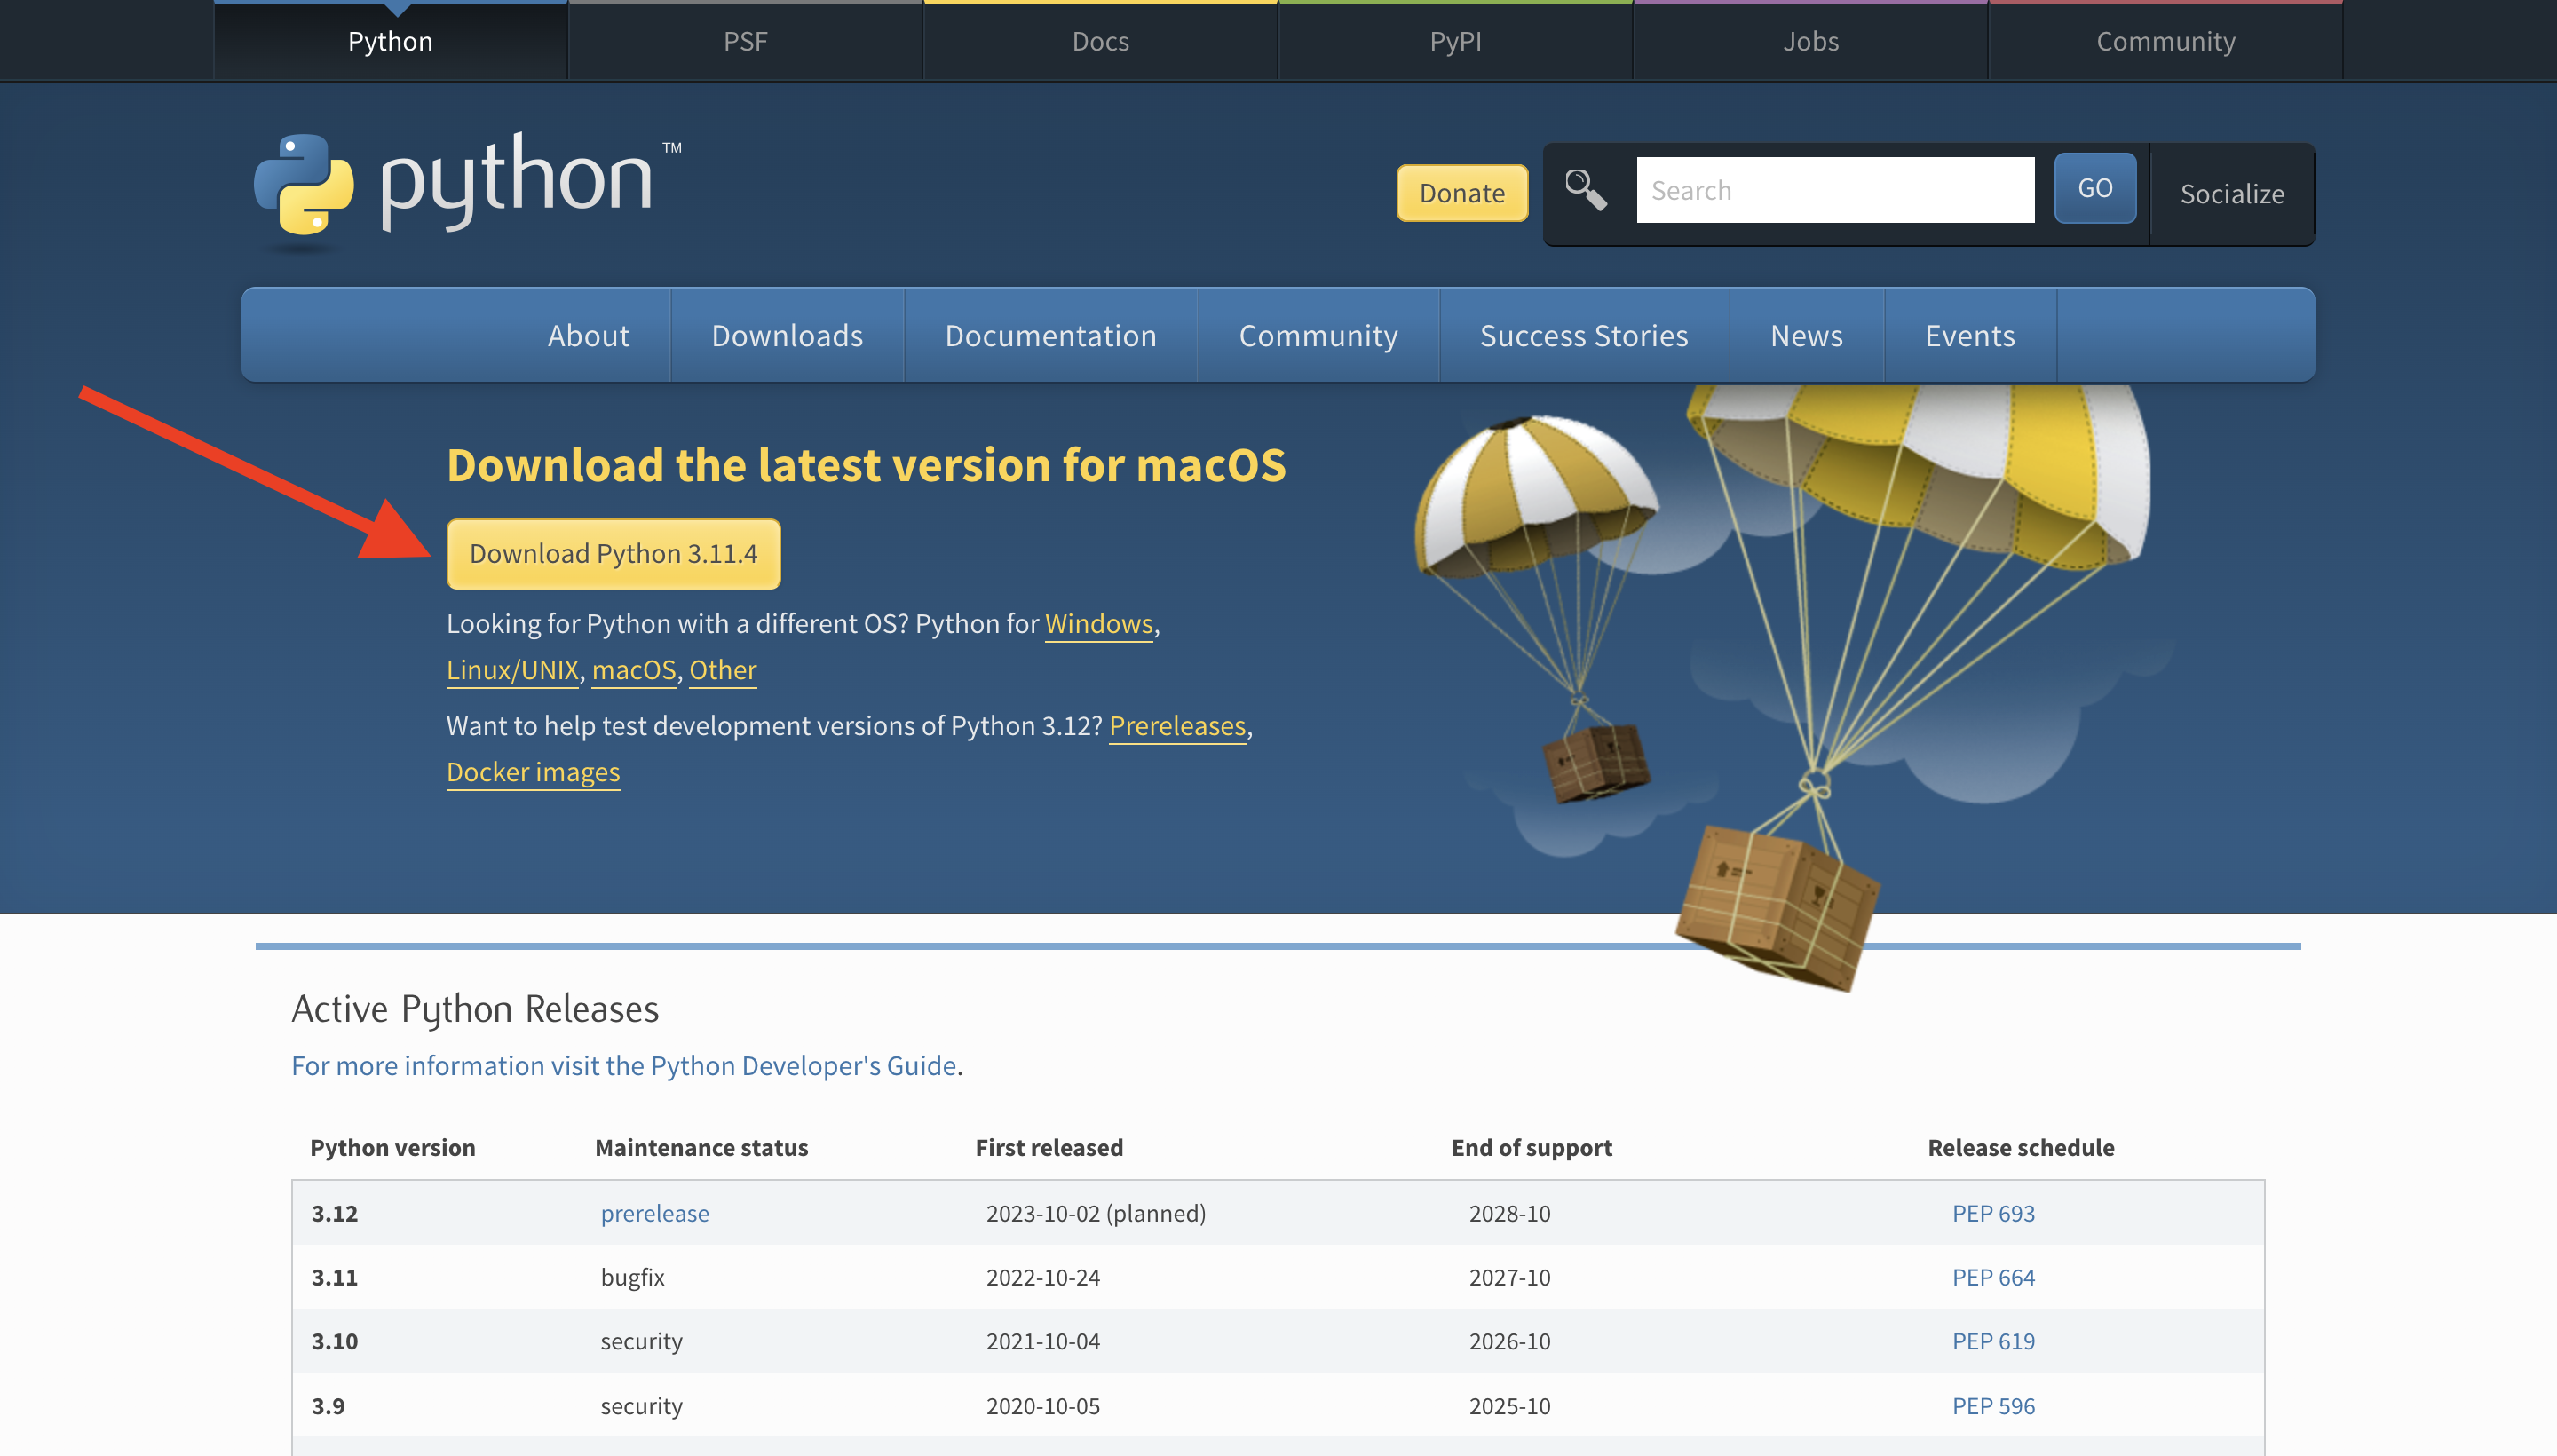
Step 1: Visit the Download Python page and click the download button, then launch the file once it is downloaded.
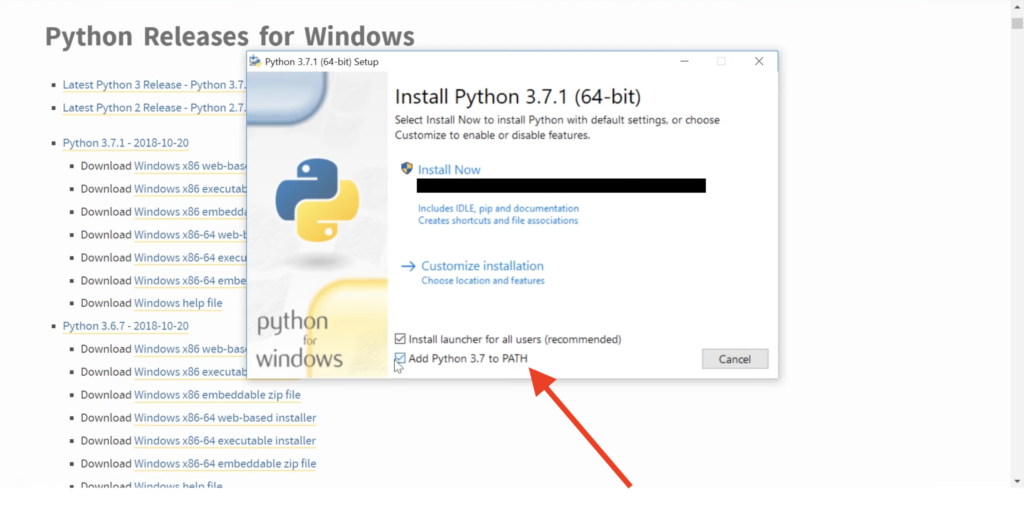
Step 2: Check the box next to the line that says Add Python to PATH, and then click on the Install Now option.
Step 3: Once installed, click on Disable path length limit.
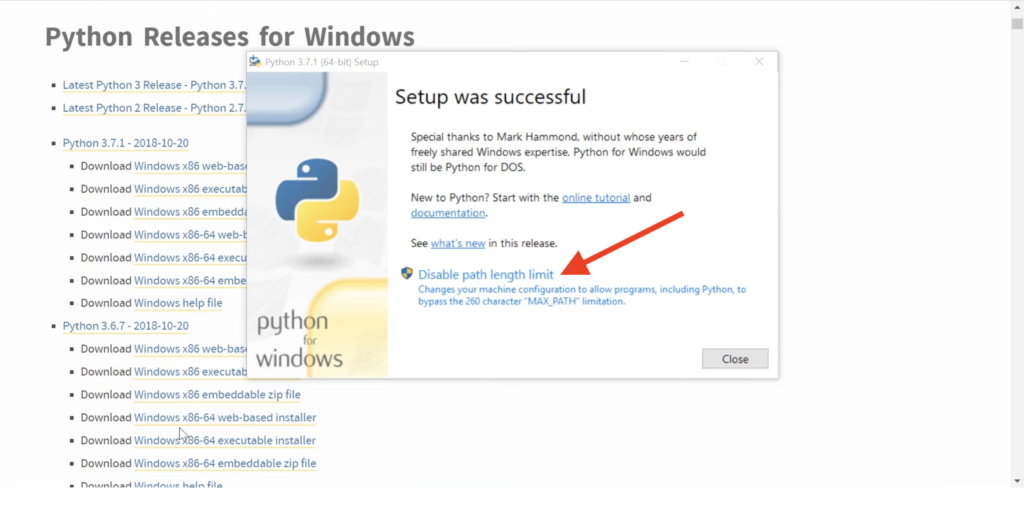
Congratulations!
Python is now installed onto your device and you can proceed further.
3. Install Cloudflared and Golang
The next step in getting an OpenAI API proxy from Poe AI is to install Cloudflared and Golang (also known as Go) onto your device.
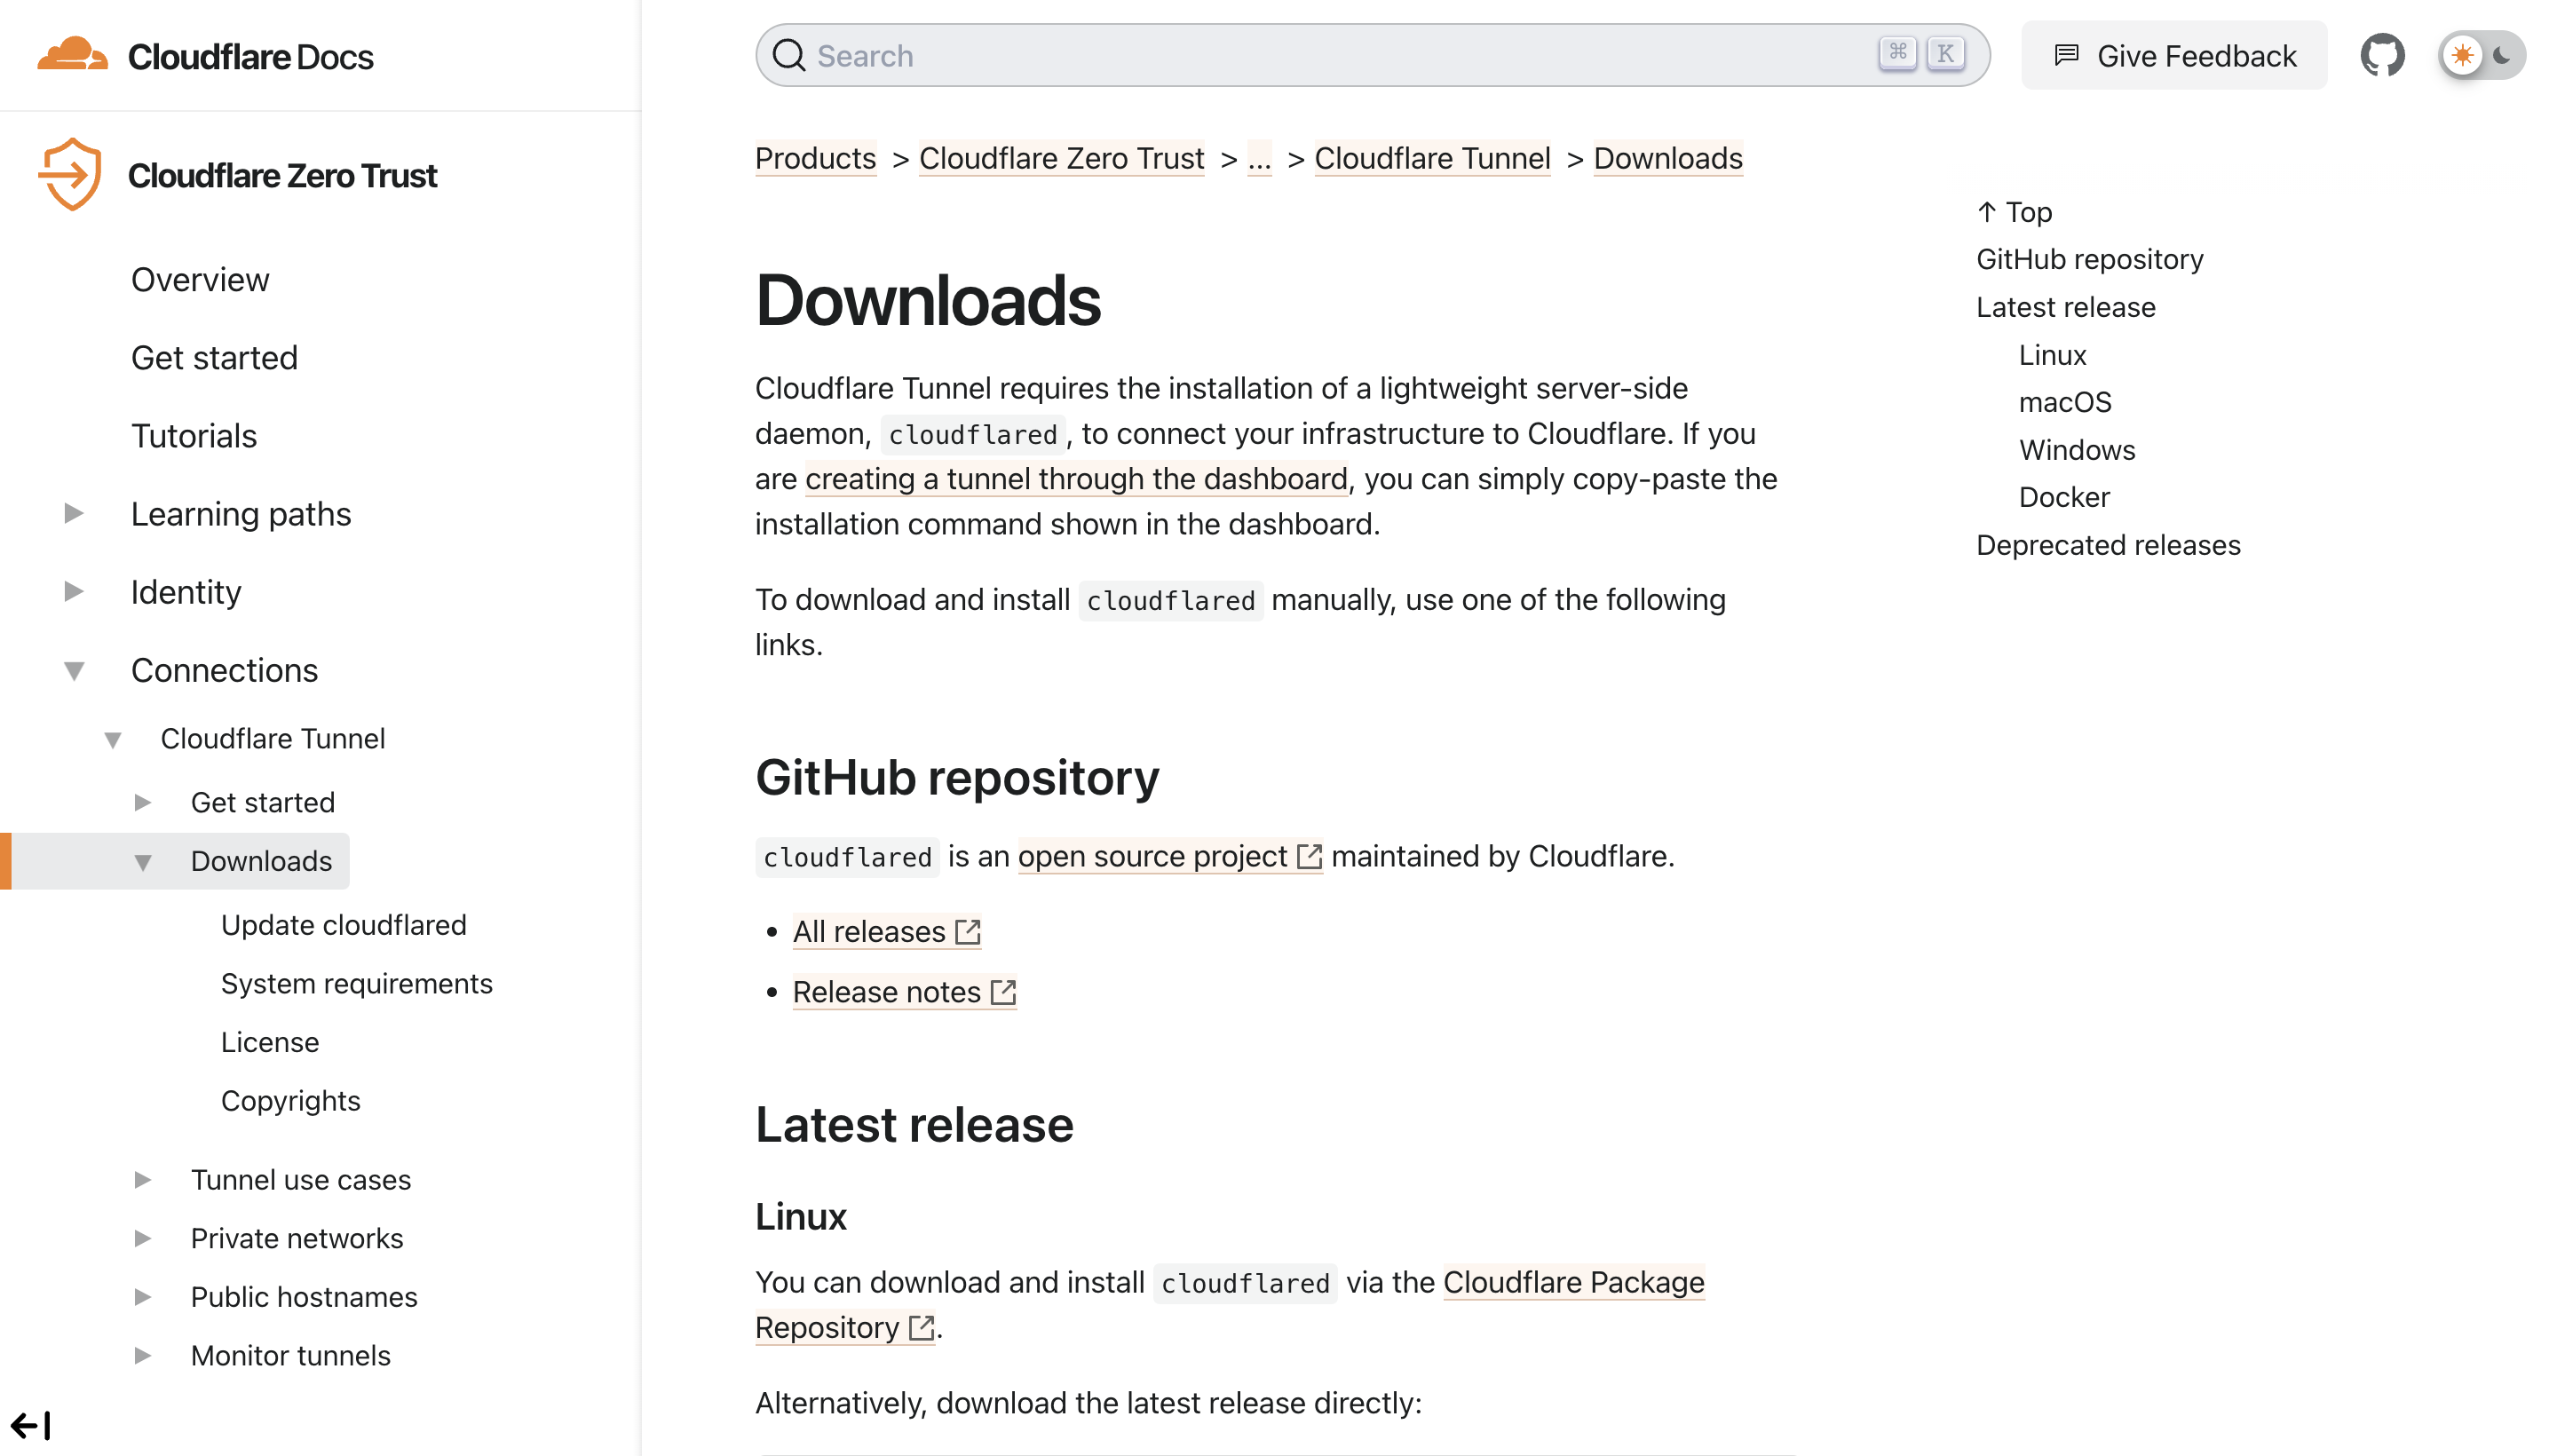
You can install Cloudflared, which is a network of servers that improve the security of your internet connection, by visiting their Downloads page and selecting the correct file to download depending on your system.
Golang (also known as Go) is a highly sophisticated language program that can be installed onto your device by visiting their Releases page and selecting the correct version to download depending on your system.
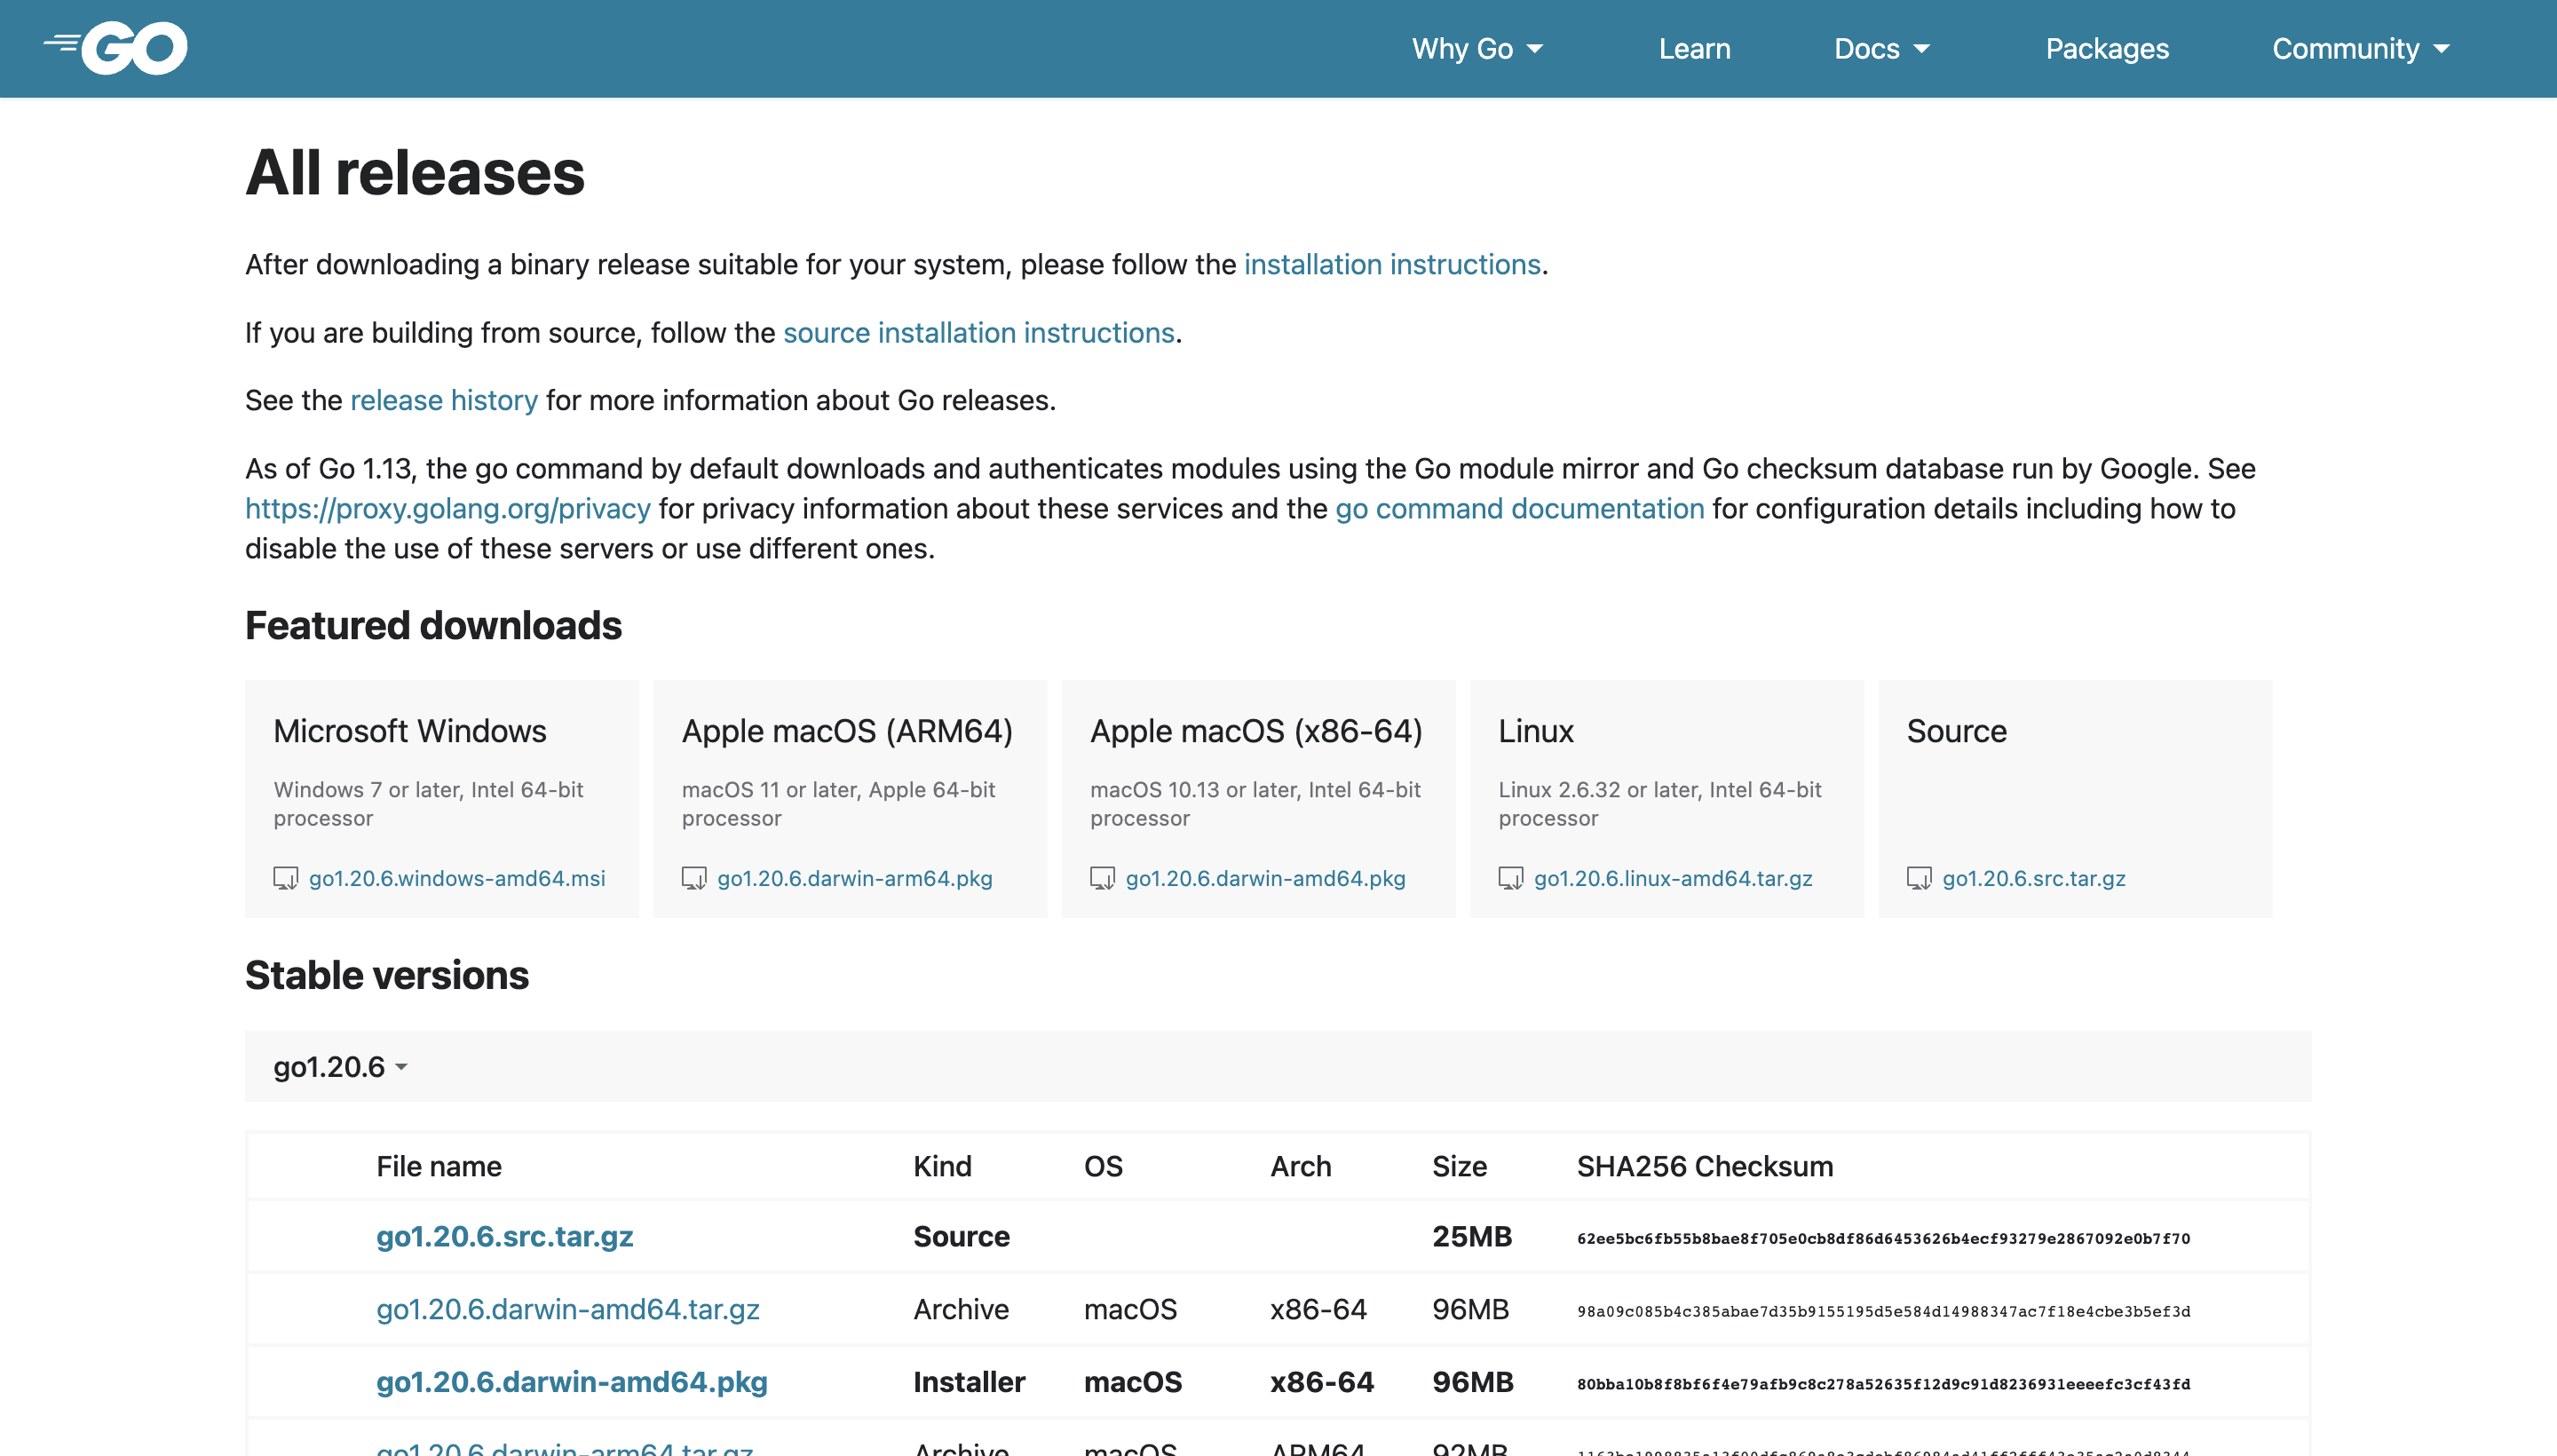
Make sure you have correctly installed both these programmes onto your device before you proceed any further, as these are needed to get the OpenAI API proxy from Poe AI.
4. Clone and Install OpenAI Proxy from Poe AI
You will first need to clone the OpenAI proxy to get an OpenAI API proxy from Poe AI:
Step 1: Open an empty command prompt window on Git and type the following command
git clone https://github.com/juzeon/poe-openai-proxy/
cd poe-openai-proxy/
pip install -r external/requirements.txt
Step 2: Search for the folder called “poe-openai-proxy” in your system, and open it.
Step 3: Duplicate the file that says “config.example.toml” and open the duplicated file with Notepad.
You have just cloned the proxy file, and now need to get the API key from Poe AI.
To get the Poe AI API key, follow the steps below:
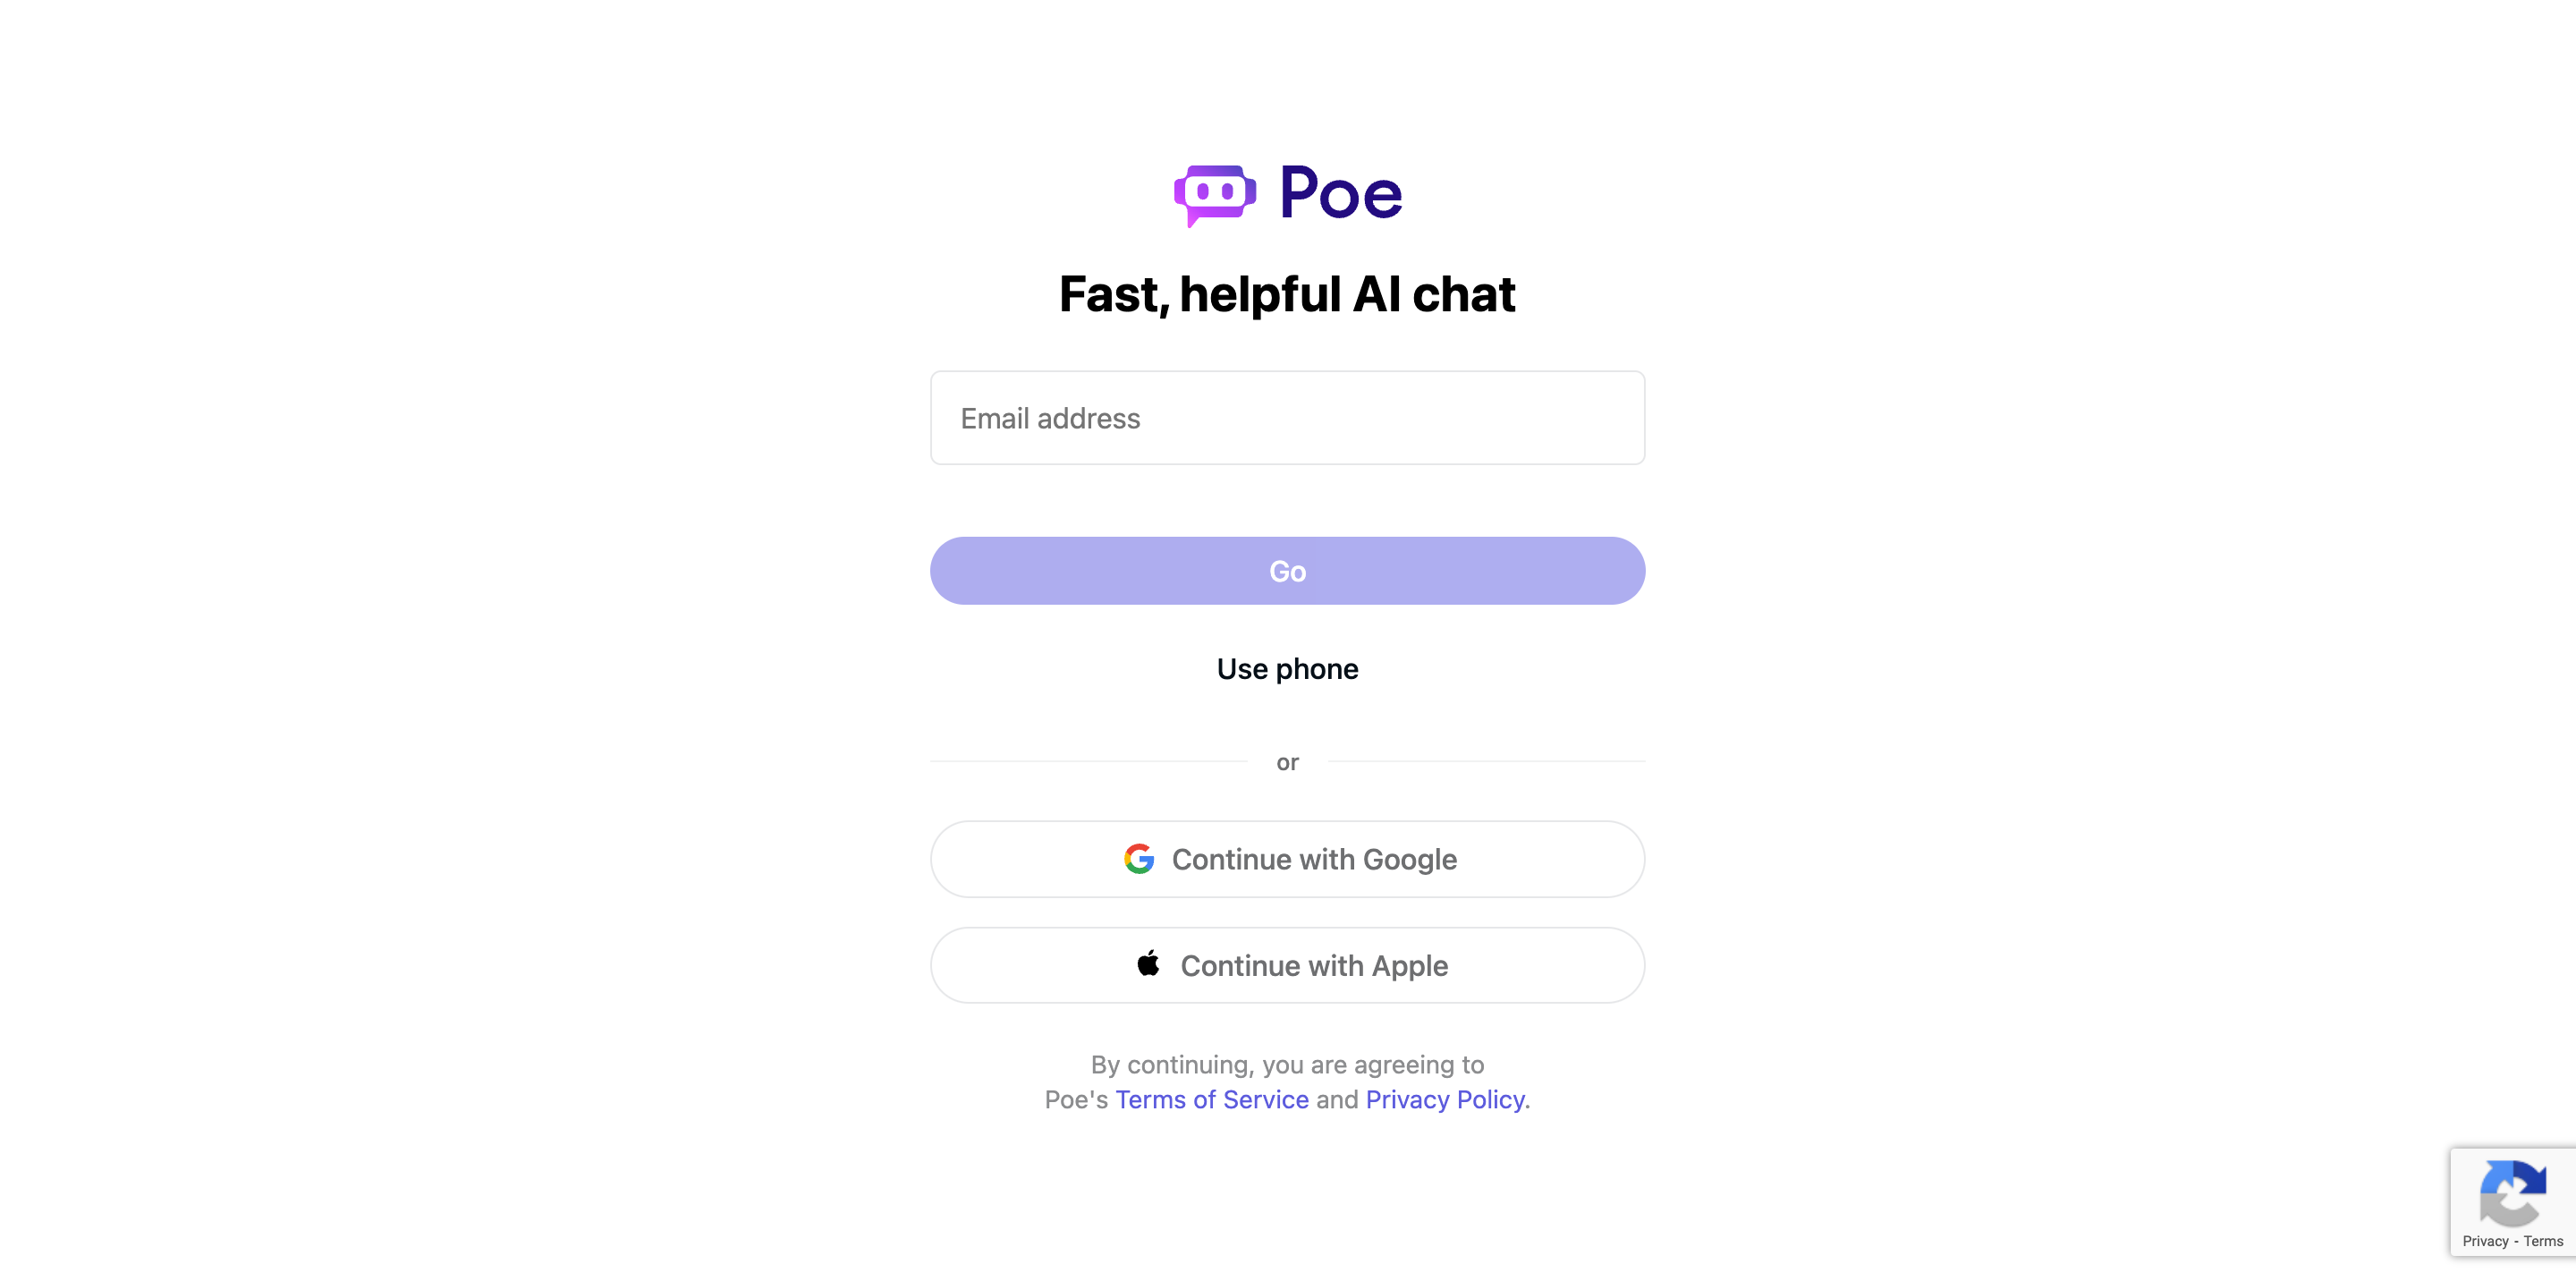
Step 1: Visit poe.com and create an account or log in to it if you already have one.
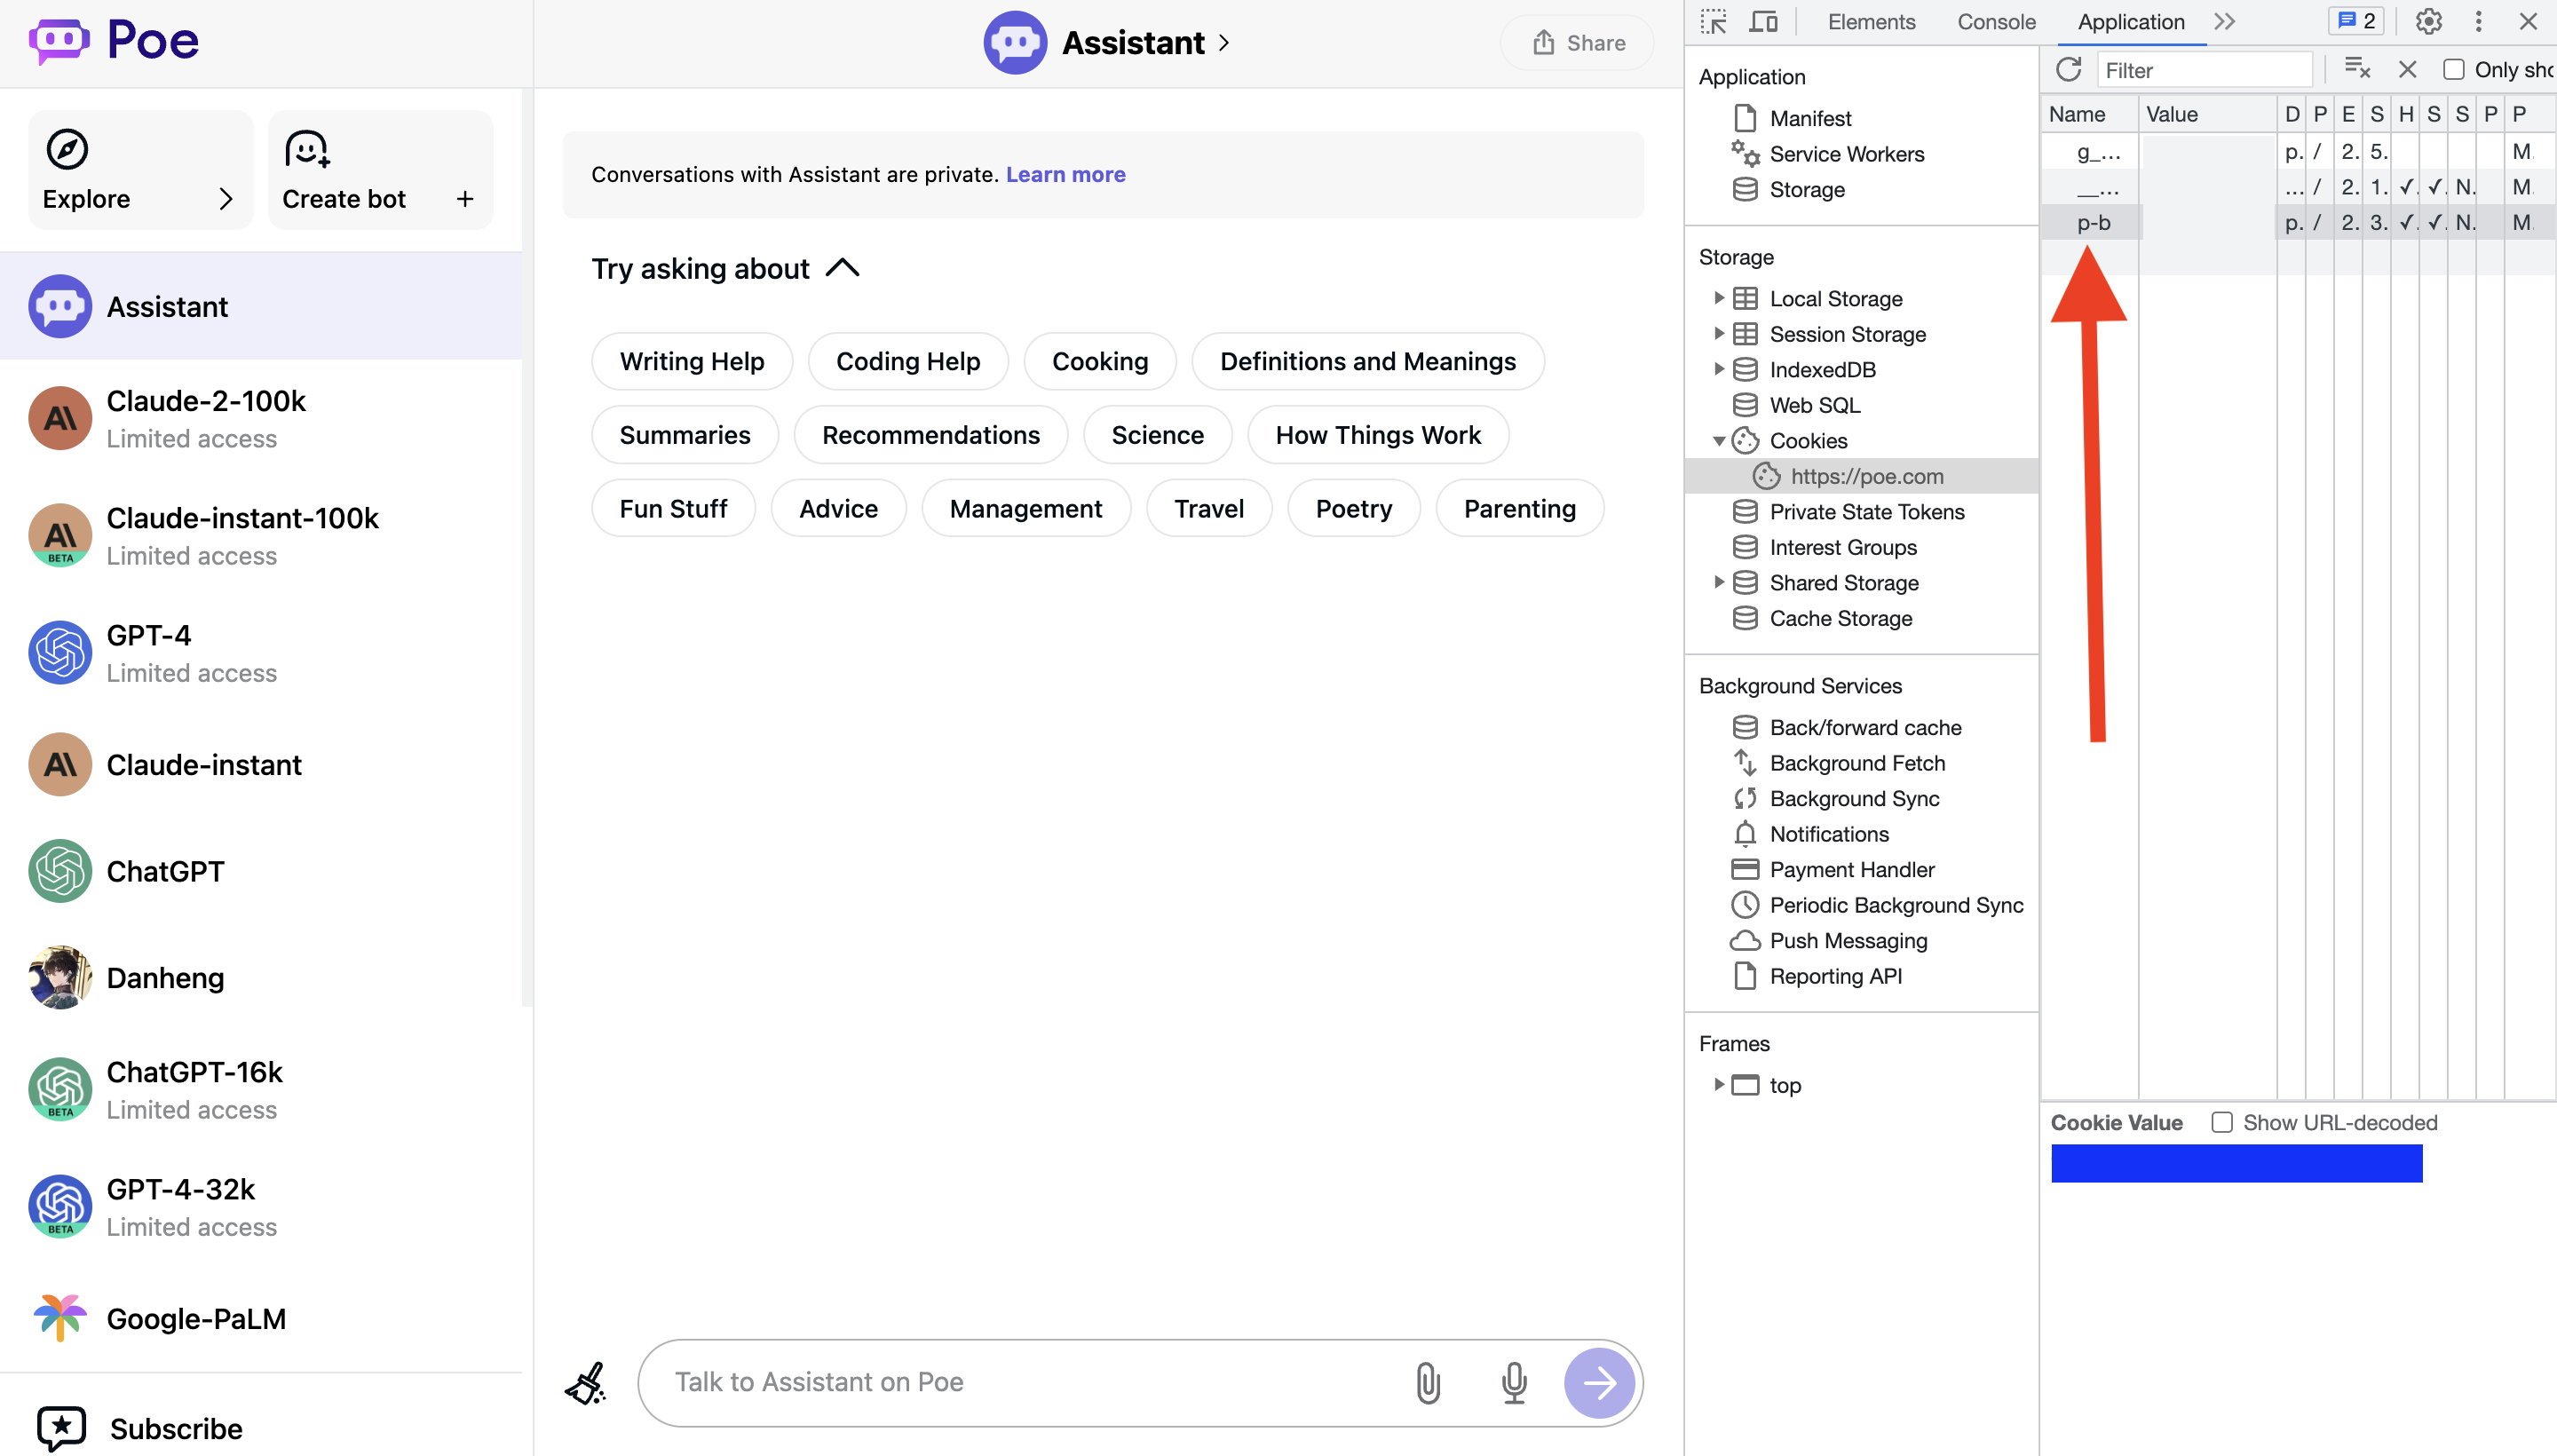
Step 2: Open HTML Web Developer Tools by pressing F12 on your keyboard.
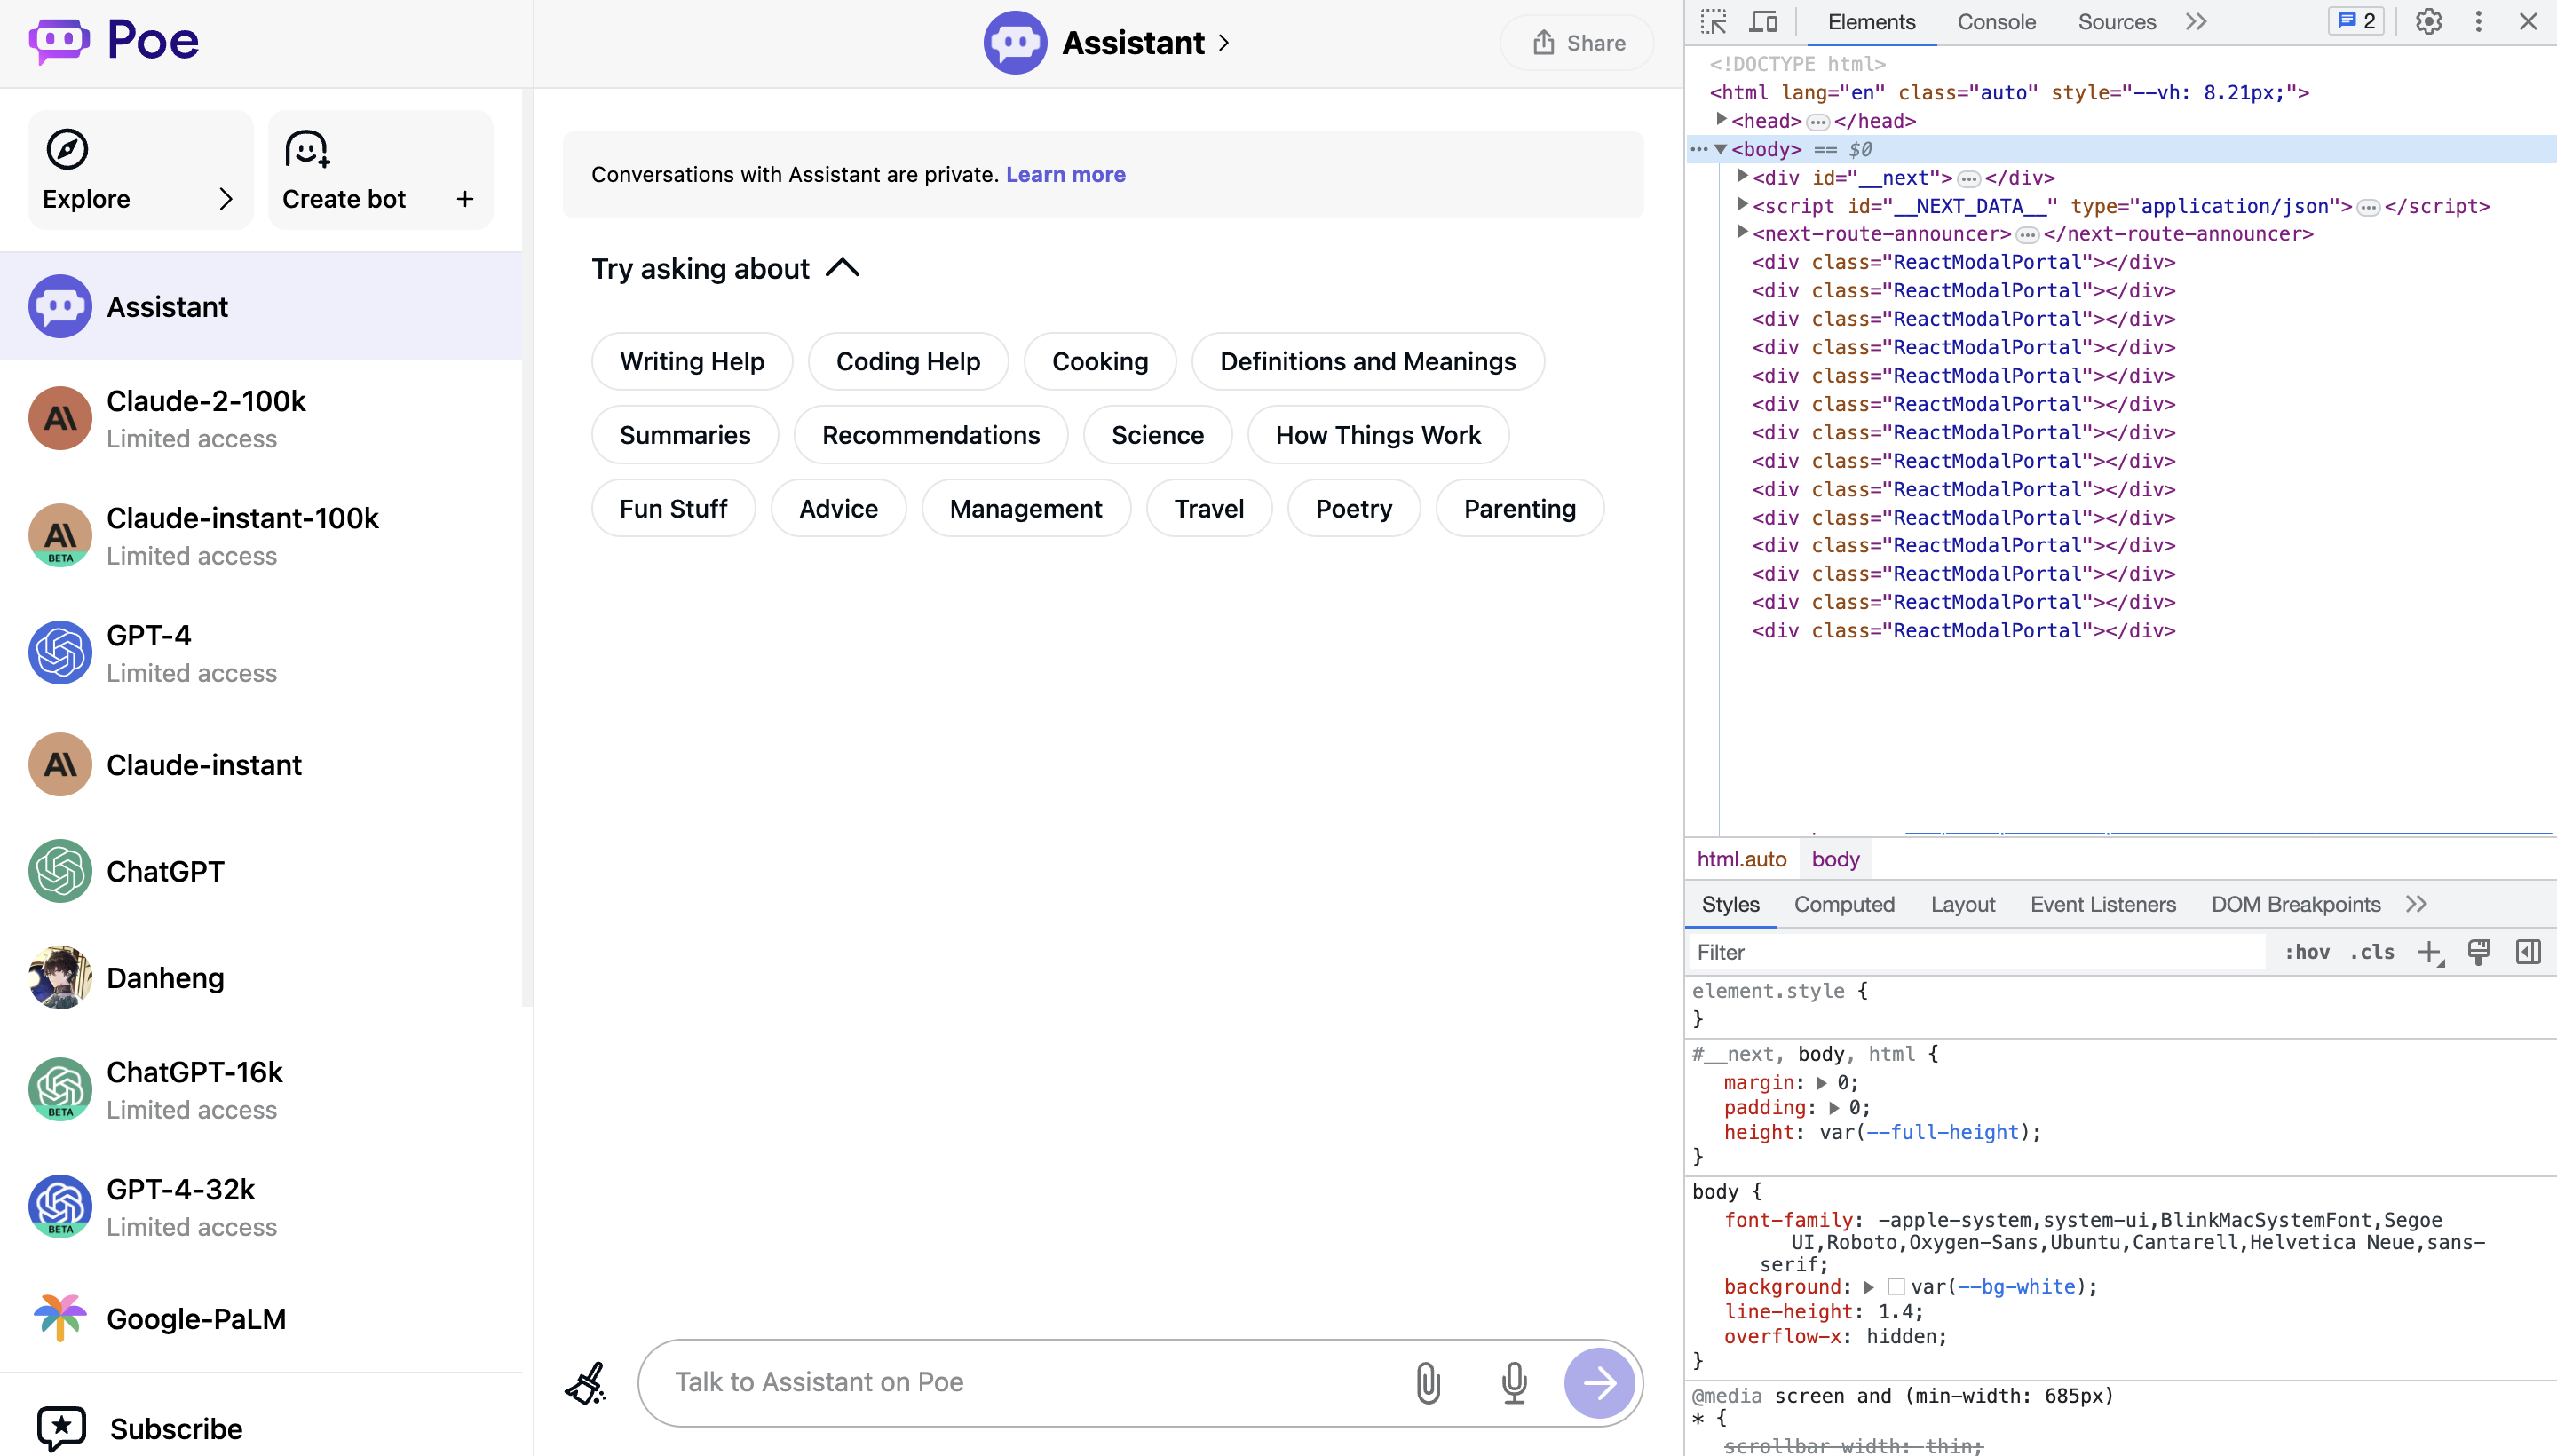
Step 3: Click on Applications from the Web Developer Tools menu bar, and then click on Cookies.
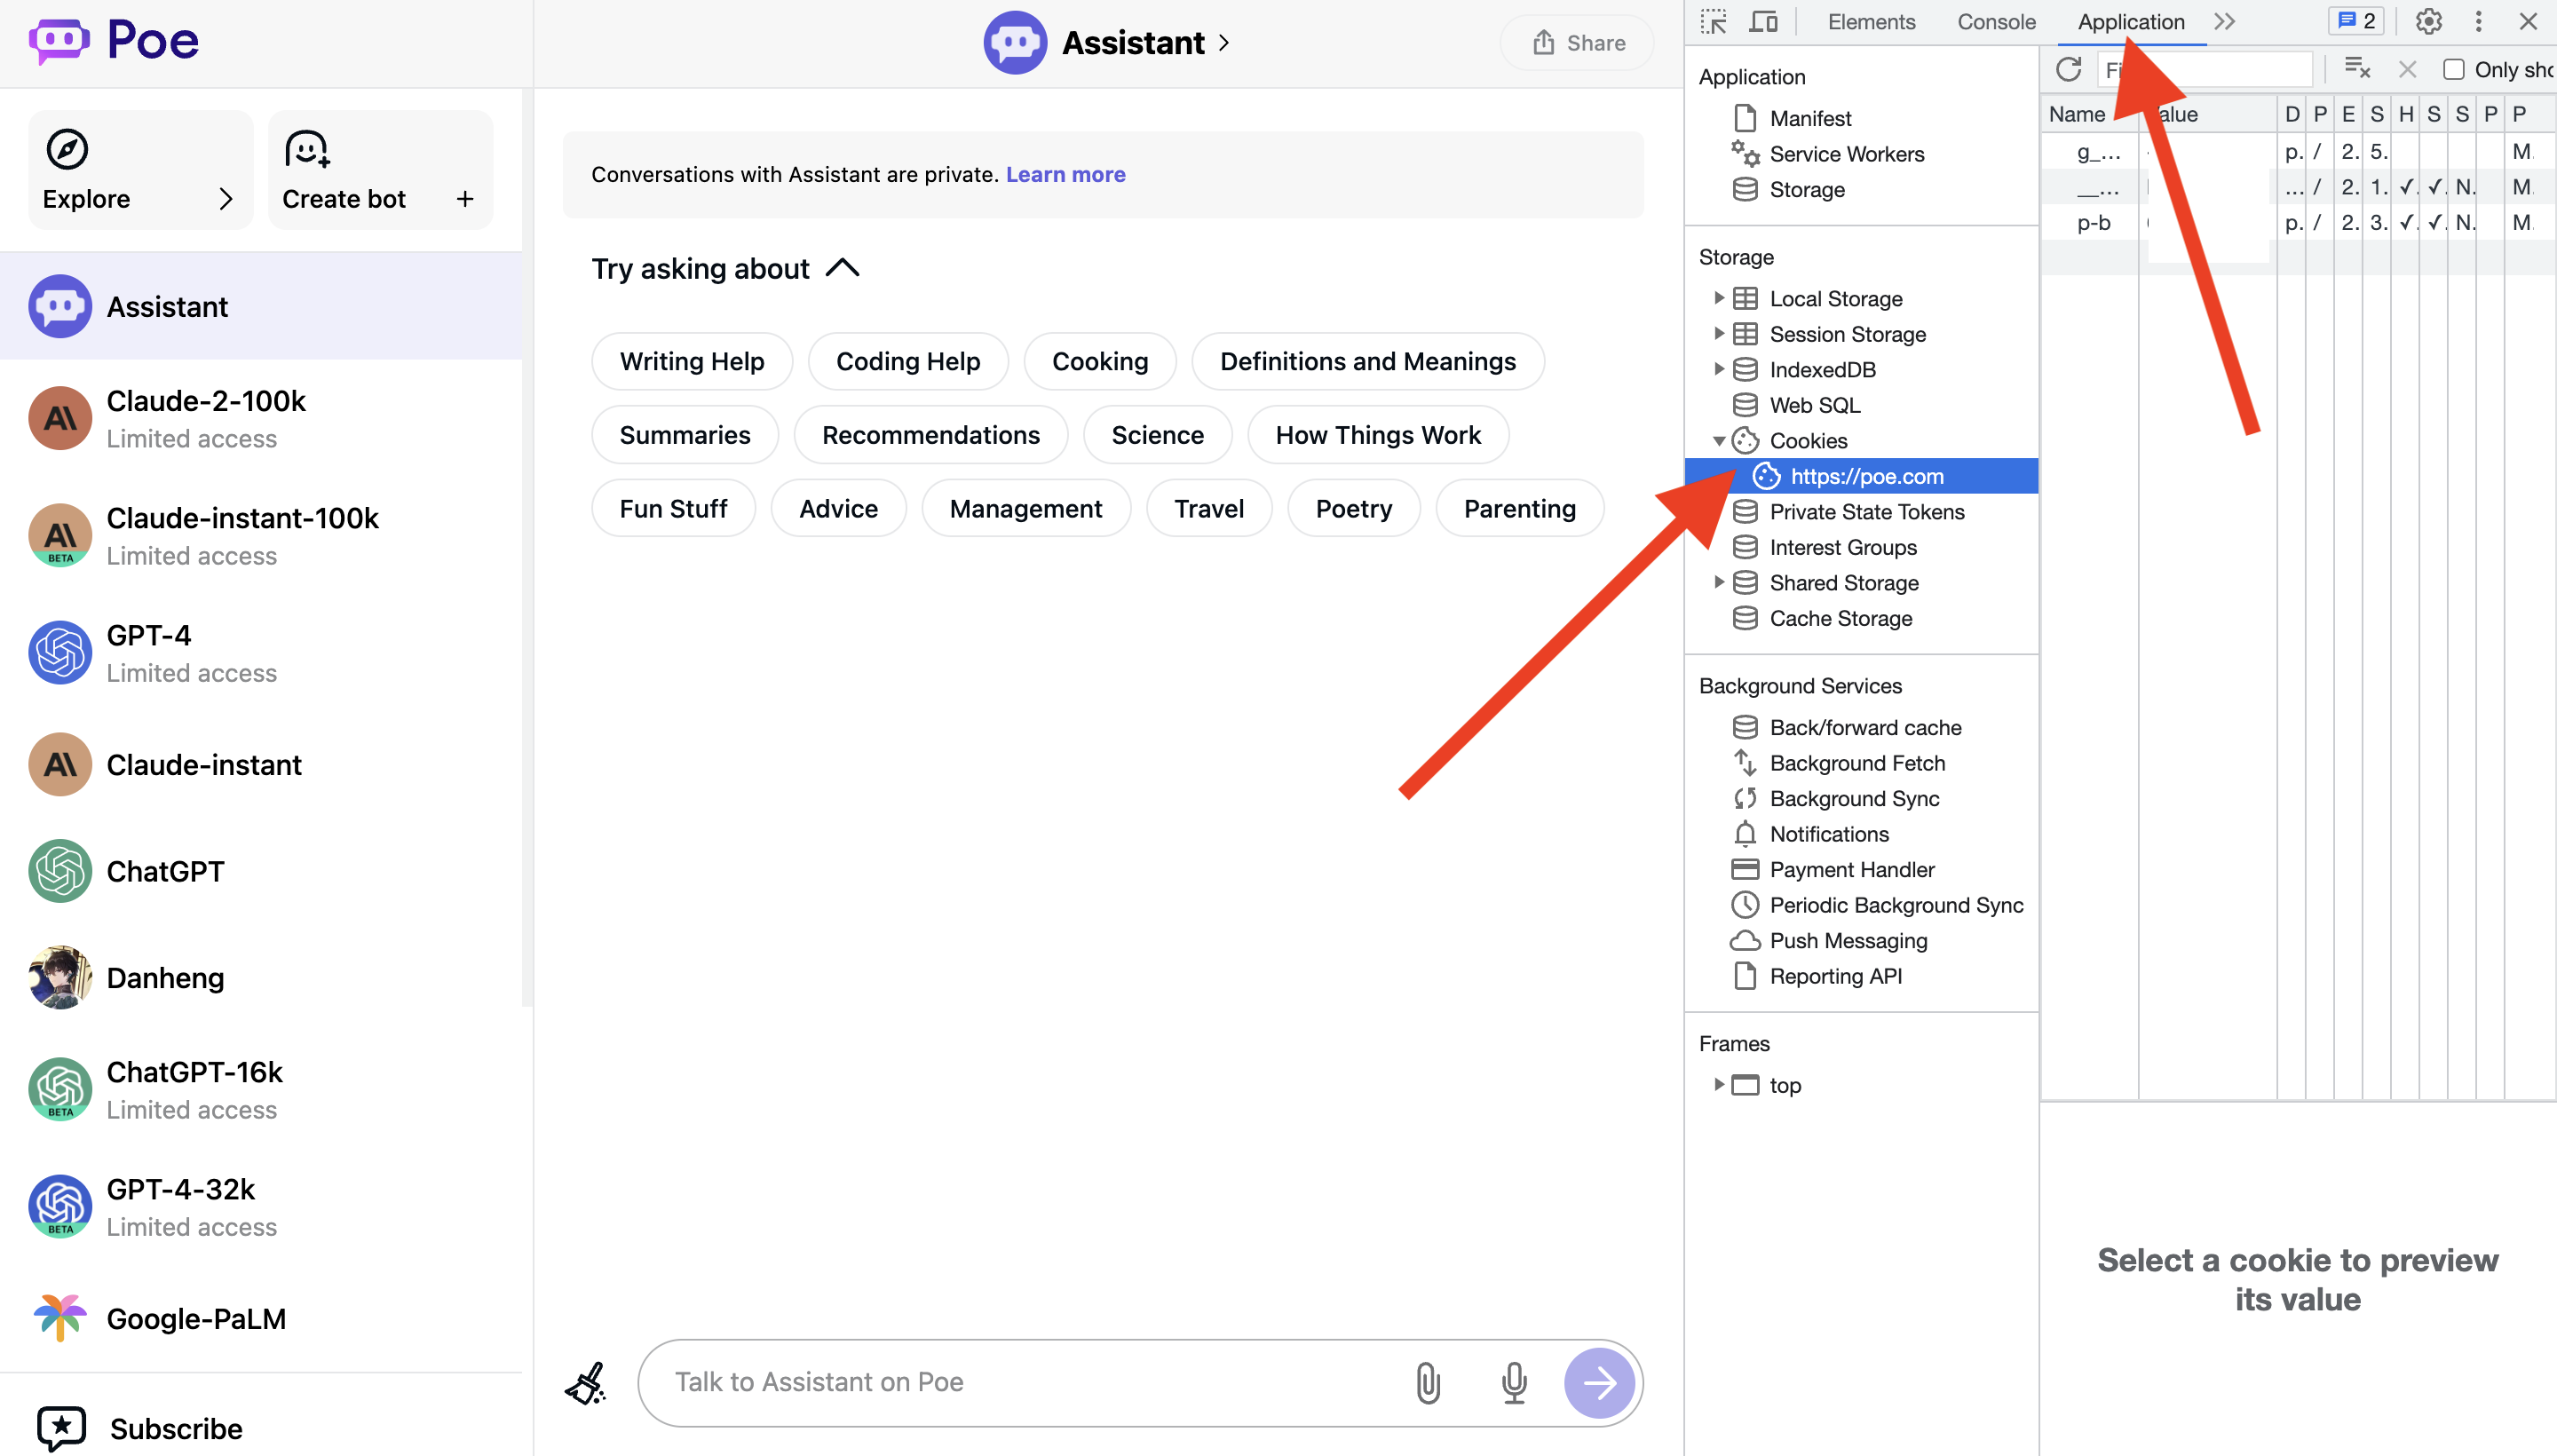
Step 4: Click on the cookie named p-b from the table, and copy the Cookie Value given below the table.
Once you have gotten the Poe AI API key, also known as the Access Token, make sure that you have noted it down somewhere secure, and do not share it with anybody else.
Once you have copied the API key from Poe AI, you will have to go back to the “config.example.toml” and enter this API key there.
To enter the API key from Poe AI into the configuration, follow the steps below:
Step 1: Scroll through the commands and look for a part that says “A list of poe tokens. You can get them from the cookies on poe.com, they look like this:”
Step 2: Enter the API key into the space between the quotations next to tokens =. Make sure it looks like this:
tokens = [“API KEY HERE”]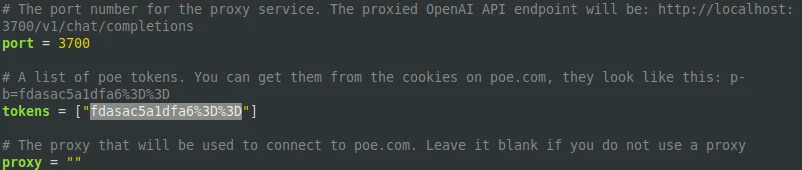
Step 3: Save the file and rename it as “config.toml” before closing the Notepad.
Step 4: On the original command prompt window, type the following command:
go buildStep 5: Open a new command prompt window and type the following command:
cd poe-openai-proxy/Step 6: In the first command prompt window, type the following command:
python external/api.pyStep 7: In the second command prompt window, type the following command:
poe-openai-proxy.exeStep 8: Run both the commands, and then open a new command prompt window and cd to the location on your device where you have downloaded Cloudflared, and then run the following command:
cloudflared-windows-amd64.exe tunnel --url 127.0.0.1:3700Step 9: Scroll through the output until you find a trycloudflare.com link, and copy it.
Congratulations!
You just got your OpenAI Proxy from Poe AI!
Now all that is left for you to do is enter this proxy link whenever you are prompted to set up your API.
Make sure that you store the link somewhere safe and secure.