Experiencing a beeping Reolink NVR can be both puzzling and bad for your health. This sound is the NVR’s way of signalling that something needs attention.
From motion-triggered alerts to technical hiccups, the reasons behind the beeping are varied. Understanding the root causes is the first step to silencing the noise.
In this guide, we’ll explore the reasons why Reolink NVR keeps beeping and exactly how you can solve it with ease.
what are the reasons For reolink NVR keeps beeping?
When a Reolink NVR keeps beeping, it can be an indicator of various issues, often related to system alerts or malfunctions as we have discussed in detail below.
1. Motion Detection Alerts
If your Reolink NVR keeps beeping, it might be due to motion detection alerts. The NVR is designed to beep when the cameras detect motion if the motion buzzer is enabled.
This serves as an audible alert to notify you of potential activity within the camera’s field of view.
2. Video Loss or Camera Disconnection
A beeping NVR can also indicate a video loss or camera disconnection. This happens when the NVR can no longer receive a video feed from one or more connected cameras, possibly due to issues like a disconnected cable, power loss, or camera failure.
3. Hard Drive Errors in NVR
Another common reason for beeping is a hard drive error within the NVR. This could be due to a hard drive failure, the need for formatting, or the drive reaching its storage capacity.
4. System Errors or Failures in NVR
System errors or failures can also trigger the NVR’s beeping alarm. These could include network failures, IP conflicts, or other internal errors.
Reviewing the NVR’s system logs may provide insight into the specific error, allowing for targeted troubleshooting.
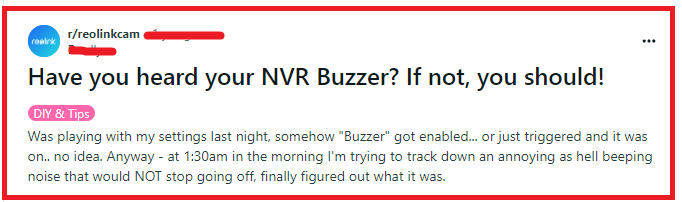
5. Incorrect Buzzer Settings in NVR
The NVR itself may have a buzzer setting that’s configured to alert for various conditions, such as system boots, errors, or specific alarm events.
If the beeping is frequent or unnecessary, you can access the buzzer settings through the NVR’s menu or the Reolink app to adjust which events trigger the alarm or to disable the buzzer entirely.
How to Fix reolink NVR keeps beeping?
To fix Reolink NVR keeps beeping issue, you can check for camera disconnection, inspect the cable and review the system logs of NVR. Additionally, you can check the hard drive to fix the issue in Reolink NVR.
1. Check for Video Loss or Camera Disconnection
The most common reason for an NVR to beep is a video loss from one or more cameras. This could be due to a disconnection or power loss.
Verify that all cameras are securely connected to the NVR. Ensure that each camera has power and is operational.
Check the status of each camera through the NVR interface to confirm they are online.
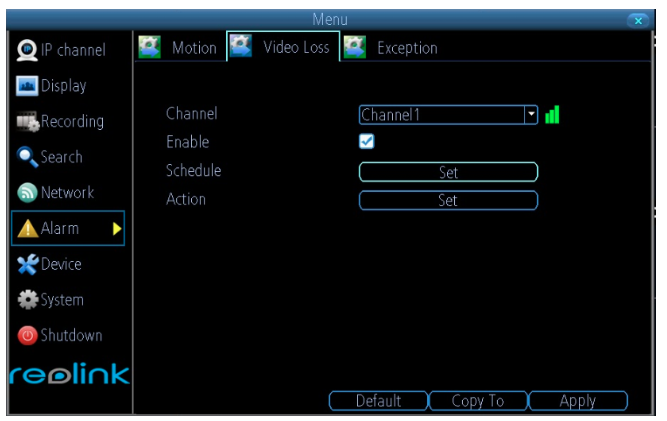
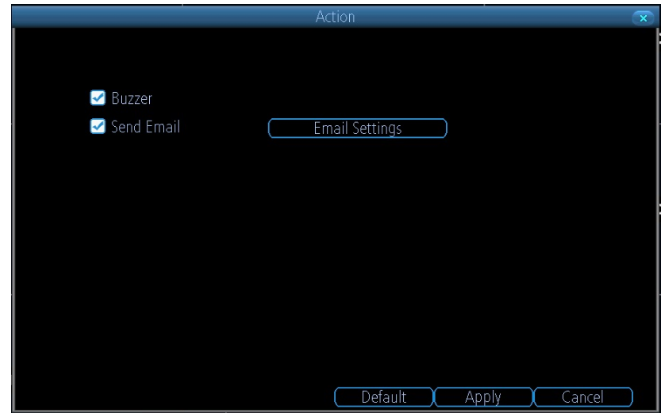
Go to Menu > Alarm > Video Loss > Action, and check Buzzer and then Apply.
2. Inspect Camera and Cable Integrity
A faulty camera or damaged cable can also cause the NVR to beep due to video loss or intermittent connection.
- Inspect the cables for any signs of damage or wear.
- Test the cameras individually to isolate the faulty one.
- Replace any damaged cables or malfunctioning cameras.
3. Review System Logs for Errors
The system logs can provide specific details about the cause of the beeping.
Access the NVR’s system logs through the menu. Look for any errors or warnings that could explain the beeping. Address the specific issues found in the logs.
steps to review system logs for errors on a beeping NVR:
- Log into the NVR locally or remotely using the client software.
- Access the main menu and select “Maintenance”.
- Click on “Log Search” in the maintenance menu.
- Set the log search period to cover the timeframe when the beeping occurs.
- Click on “Search” to view system logs during that period.
- Scroll through the log list looking for entries marked “Error” or “Warning”.
- Click on individual log entries to view details of that event.
- Identify any error messages related to hardware issues, connectivity problems, storage failures etc. that could be causing the beeping.
- Note down the specific error codes and messages.
- Search online or contact technical support using the error details to troubleshoot and resolve the problem.
- Confirm the beeping noise stops after addressing the underlying error or issue.
- Continue monitoring logs to ensure no recurring errors.
4. Check the Hard Drive
A failing or full hard drive can trigger the NVR’s beeping alarm. Check the NVR’s storage settings and status for any hard drive errors.
Ensure there is enough free space on the hard drive; delete old footage if necessary. Run a hard drive health check if available, and replace the hard drive if it’s failing.
Go to Menu > Alarm > Exception > Action and then select the reason > Check Buzzer and Apply.

5. Check for Overheating
If the NVR is overheating, it may beep to warn you so make sure that your NVR is not overheated.
- Ensure the NVR is in a well-ventilated area.
- Remove any obstructions that may block the NVR’s cooling vents.
- Clean any built-up dust inside the NVR with compressed air.
6. Disable or Adjust Buzzer Settings
If the beeping is due to non-critical alerts, you may choose to disable or adjust the buzzer settings.
- Connect a monitor and a mouse to your NVR.
- Right-click on the screen to bring up the main menu.
- From the main menu, select “Alarm” or “System” depending on your model.
- In the alarm settings, look for the ‘Buzzer’ or ‘Audio Warning‘ settings.
- Under the ‘Buzzer‘ or ‘Audio Warning‘ section, you will find options to enable or disable the buzzer for various alarms such as motion detection, video loss, or hard drive errors.
- Uncheck the boxes or switch the toggles to the off position for each alarm type you want to silence.
- After unchecking the boxes or toggling off the buzzer settings, make sure to apply the changes.
- Click “OK” or “Apply” to save the settings. You may be prompted to confirm the changes.
- Once you have saved the settings, you can exit out of the menu by right-clicking or using the ‘Back‘ or ‘Exit‘ option.
7. Reset the NVR
A factory reset can resolve unexplained or persistent beeping if it’s caused by a software glitch.
- Locate the Reset Button: Find the reset button on your Reolink NVR. It’s usually located on the back of the device, but the exact location can vary depending on the model.
- Power on the NVR: Ensure that your NVR is turned on and connected to a monitor or TV so you can navigate the menus after the reset.
- Press and Hold the Reset Button: Use a paperclip or a similar object to press and hold the reset button. The time you need to hold the button can vary, but for most Reolink NVRs, it’s around 10 seconds. You may need to check your specific model’s manual for the exact time.
- Wait for the NVR to Reboot: After holding the reset button for the necessary amount of time, release it. The NVR should reboot automatically.
- Initial Setup: Once the NVR has rebooted, it should start up with the factory default settings. You will need to go through the initial setup process again, just as you did when you first got the device.
- Reconfigure Your Settings: After the reset, you’ll need to reconfigure your NVR settings, including network settings, camera settings, recording schedules, and any other customized configurations if you had previously set up.
- Re-add Cameras: If your NVR was connected to cameras, you’ll need to re-add and configure them as well.
steps to re-add cameras to an NVR after a factory reset:
- Connect the cameras to the NVR using ethernet cables or PoE ports.
- On the NVR, go to the Cameras menu.
- Select “Add Cameras” or “Search” to detect connected cameras.
- The NVR will display detected cameras. Select each camera to add.
- For each camera, edit the name, ID, protocol, IP address, port number, username, and password to match the camera settings.
- Save the settings for each camera.
- Under Live View, arrange the camera channels in the desired display order.
- Open each camera’s Settings menu to configure resolution, frame rate, image settings, encoding, OSD, privacy masks, and other parameters as needed.
- Click Apply or Save after adjusting each camera’s settings.
- Right click on live view and select Main Stream or Sub Stream as needed.
- Test camera streams to ensure proper connectivity and picture quality.
steps for reconfiguring main NVR settings after a factory reset:
Network Settings:
- Go to System > Network > TCP/IP
- Set IP address type to Static or DHCP
- If Static, enter IP address, subnet mask, gateway, DNS servers
- Go to Port menu and configure HTTP, server, and RTSP ports
- Enable UPnP if desired
Camera Settings:
- Go to Camera > Camera > Add Camera
- Click search and select discovered cameras to add
- Double click each camera and edit name, ID, protocol, IP address, etc.
- Click Apply to save camera settings
- Right click camera in live view, set resolution and frame rate
- In Image settings, adjust brightness, contrast, saturation
Recording Settings:
- Go to Storage > Schedule > Recording Schedule
- Click Add to create recording schedule
- Select continuous, motion detection, or alarm recording type
- Set schedule time period and days to record
- Select cameras to include in schedule
- Set recording retention time in Storage > Disk Manager
8. Disable Motion Buzzer
You should disable the motion buzzer in case the buzzer is turned on due to that and your Reolink keeps beeping.

Go to Menu > Alarm > Motion > Action, select the buzzer for the camera and then choose Apply.

9. Disable Buzzer for NVR via Web Browser
You can also disable your NVR buzzer by using the browser. To do that follow the steps below.
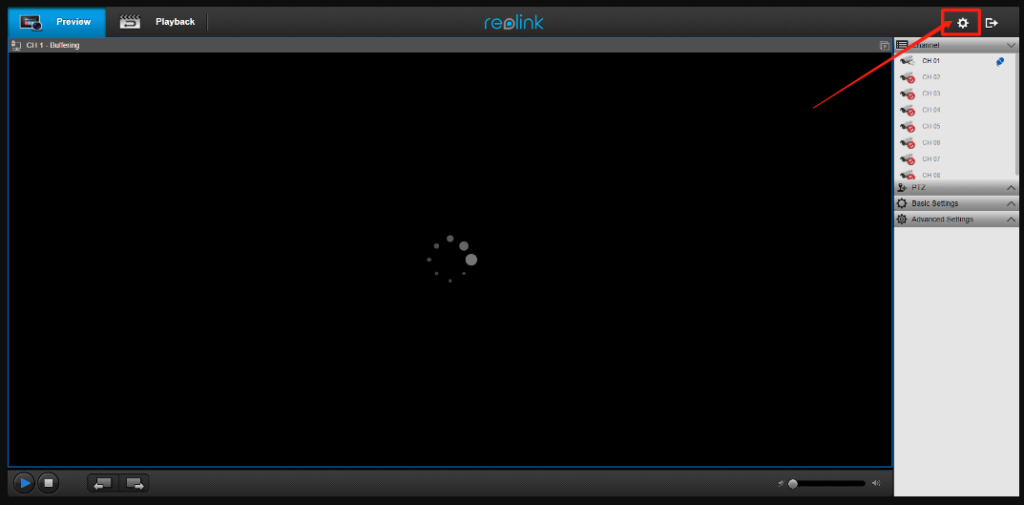
- Log in to Your NVR: Open a web browser on your computer and enter the IP address of your NVR to access the login page. Enter your username and password to log in to your NVR system.

- Access the Alarm Settings: Once logged in, navigate to the ‘Settings’ panel, and then click on the ‘Alarm‘ tab to access the alarm settings for your NVR.
- Go to the Buzzer Settings: Inside the ‘Alarm‘ tab, find and click on the ‘Buzzer’ option. This will take you to the buzzer settings where you can enable or disable the audio alarm for your NVR.

- Disable the Buzzer: You will see a list of events that can trigger the buzzer. Below the Alarm, you will see Motion, Video Loss and Exception. Uncheck the Audio Warning box for all.


- Save the Changes: After you have deselected the checkboxes for the events, make sure to save your settings by clicking on “OK”.
Note: This process applies to all Reolink NVRs.
10. Contact Reolink Support
If none of the above steps work, the beeping may be a hardware fault.
In this case, reach out to Reolink customer support for further assistance or to arrange for repair or replacement.
- Visit the Reolink support website and navigate to the ‘Contact Us‘ section.
- Provide a detailed description of the problem, the steps you’ve taken to troubleshoot, and the model number of your NVR.
- Follow any additional instructions provided by the support team or arrange for service if needed.