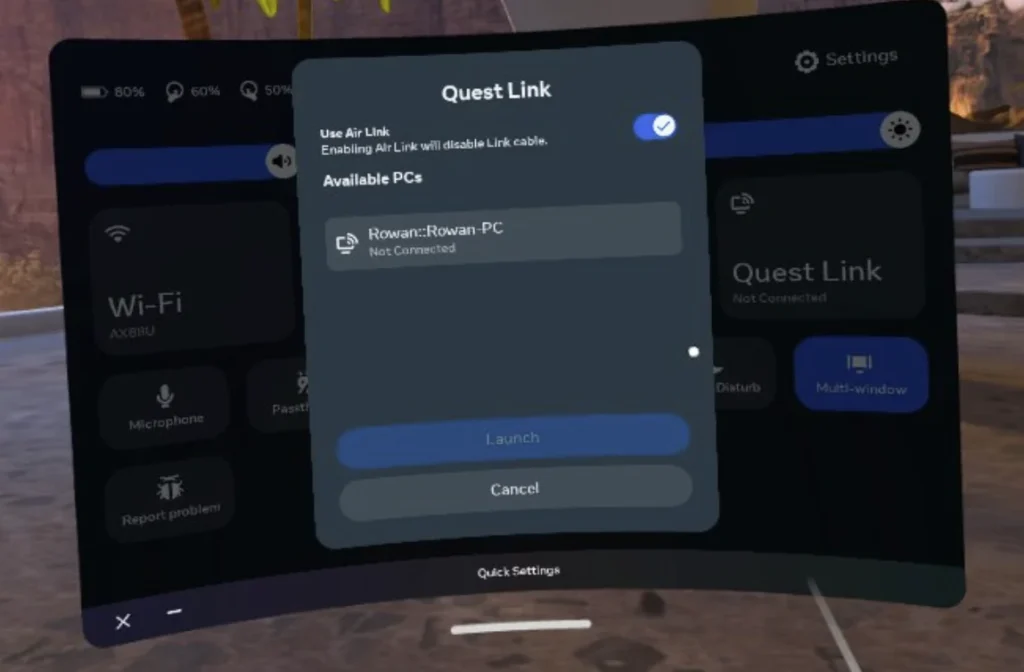
Meta Quest 3 is a popular standalone virtual reality headset that allows users to enjoy immersive VR experiences without the need for a PC.
However, for those who want to access more powerful VR content, Meta Quest 3 can be connected to a PC via a link cable, Airlink, or virtual desktop.
Unfortunately, some users have reported issues with getting their Meta Quest 3 to work with these methods.
In this guide, we will explore how to fix Meta Quest 3 when it won’t work via link cable, Airlink, or virtual desktop.
How to Fix Meta Quest 3 won’t work via link cable airlink and virtual desktop?
To resolve the issue of “Meta Quest 3 won’t work via link cable, AirLink, and Virtual Desktop,” you should uninstall and reinstall the Oculus App, turn off other headsets, enable OpenXR in Oculus App settings, make sure that the Link Cable is working fine, update your graphics card drivers, and lastly, try enabling beta features.

Down below, we have discussed the solution in step-by-step detail.
1. Uninstall and Reinstall the Oculus App
If you are experiencing connection issues, the first step is to uninstall and reinstall the Oculus app.
This process will ensure that you have the latest version of the app and that any corrupted files or settings are removed.
Here are the steps to uninstall and Reinstall the Oculus App:
- Open the Start menu and search for “Apps & Features.”
- Scroll down and find “Oculus.”
- Click on “Oculus” and select “Uninstall.”
- Once the app is uninstalled, go to the Oculus website and download the latest version of the app.
- Install the app and restart your computer.
2. Power Off Other Headsets
If you have multiple headsets connected to your PC, it can cause pairing issues with your Meta Quest 3.
This is because having multiple active headsets can cause interference and make it difficult for your Meta Quest 3 to pair with your PC.
If you are experiencing pairing issues, you should try powering off the other headsets and connecting your Meta Quest 3 again.
3. Enable Open XR in Oculus App Settings
If you are using Air Link and it is not working, you may need to enable Open XR in the Oculus app settings.
To Enable Open XR in Oculus App Settings, follow these steps:
- Open the Oculus app on your PC.
- Click on “Settings” in the bottom left-hand corner.
- Click on “Beta” in the left-hand menu.
- Scroll down and find “OpenXR Runtime.”
- Click on the drop-down menu and select “Oculus.”
- Restart your Oculus app and try using Air Link again.
4. Check Your Link Cable
If you are using a link cable and it is not working, you may need to check the cable itself.
Make sure the cable is plugged in securely on both ends and that it is not damaged or frayed.
You may also want to try using a different cable to see if that fixes the issue.
5. Update Your Graphics Card Drivers
If your Meta Quest 3 is still not connecting to your PC, you may need to update your graphics card drivers.
To Update Your Graphics Card Drivers, follow these steps:
- Open the Start menu and search for “Device Manager.”
- Click on “Display Adapters” to expand the menu.
- Right-click on your graphics card and select “Update Driver.”
- Follow the prompts to update your driver.
- Restart your computer and try connecting your Meta Quest 3 again.
6. Check Firewall Settings
Firewall settings can sometimes prevent the Oculus app from connecting to your Meta Quest 3 via Air Link or a link cable.
If you are experiencing connection issues, you should check your firewall settings to ensure that they are not blocking the Oculus app.
Here are the steps to check the firewall setting:
- Open the Start menu and search for “Windows Security.”
- Click on “Firewall & network protection.”
- Click on “Allow an app through firewall.”
- Scroll down and find “Oculus.”
- Ensure that the box next to “Private” is checked and that the box next to “Public” is unchecked.
7. Enable Beta Features
Enabling beta features in the Oculus app settings can sometimes resolve connectivity issues with your Meta Quest 3.
Beta features are experimental features that are not yet available to all users, but can be enabled to test new functionality.
Here’s how to enable beta features in the Oculus app settings:
- Open the Oculus app on your PC.
- Click on “Settings” in the bottom left-hand corner.
- Click on “Beta” in the left-hand menu.
- Toggle on the switch next to “Public Test Channel.”
- Restart your Oculus app and try connecting your Meta Quest 3 again.
8. Contact Customer Support

If none of the above solutions work, you may need to contact Meta Quest customer support for further assistance.
They may be able to diagnose the issue and provide a solution that works for your specific device and situation.