Virtual reality headsets like the Meta Quest 3 have revolutionized the gaming and entertainment industry, providing users with an immersive and interactive experience.
However, technical issues can arise, and one of the most common ones is the HDMI connection problem.
If you’re facing a similar issue with your Meta Quest 3, don’t worry, as there are several ways to fix it.
In this article, we’ll guide you through the troubleshooting process and provide you with actionable solutions to get your Meta Quest 3 up and running again.
How to Fix Meta Quest 3 HDMI Not Working?
To resolve the issue of Meta Quest 3 HDMI not working, you should check the cable and ports, make sure that the graphics card is up to date, and lastly, kill the Oculus server and restart it.
Down below, we have discussed the solution in step-by-step detail.
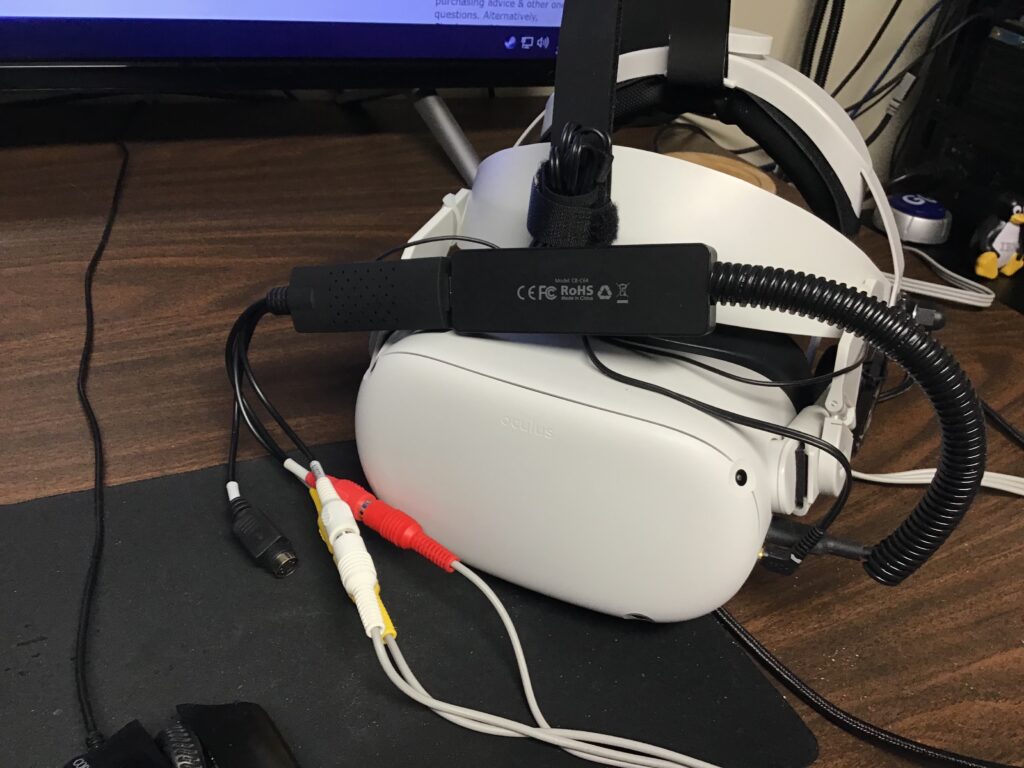
1. Check Cable and Ports
First, double-check that the HDMI cable is firmly plugged into both the Meta Quest 3 and your PC/TV.
Wiggle the cable at the ports to ensure a good connection.
Try a different HDMI cable if possible to rule out any issues with the cable itself.
Inspect the HDMI ports for any debris or damage. Use compressed air to clean out the port if needed.
A bent or damaged port could prevent a connection.
2. Update Graphics Card Drivers
Out-of-date graphics card drivers on your PC are a common cause of HDMI connection issues.
Check for and install any updates for your graphics card. This can resolve bugs affecting HDMI output.
Here are the typical steps to update your graphics card drivers:
- Go to the graphics card manufacturer’s website (e.g. NVIDIA, AMD, Intel) and search for your specific graphics card model.
- On the support page for your graphics card, look for the “Drivers & Software” or “Graphics Drivers” section.
- Download the latest driver software for your operating system (Windows, MacOS, Linux). Make sure to get the driver that corresponds to your OS version.
- Once the download is complete, double-click the file to launch the installation. You may need to exit out of any open programs first.
- Follow the on-screen prompts, accepting any license agreements. The installer will guide you through the process.
- When prompted, restart your computer to complete the driver installation. This may be required for the changes to take full effect.
3. Kill the Oculus server and restart it
Killing and restarting the Oculus server process can resolve issues like HDMI detection errors by clearing any bugs or glitches in the software.
Here are more detailed steps to kill the Oculus server process and restart it from the Task Manager:
- Press Ctrl + Shift + Esc on your keyboard to open the Task Manager.
- Go to the “Processes” tab at the top of the Task Manager window.
- Look for a process called “OVRServer_x64” or a similar Oculus-related process. It may have a different name depending on your version.
- Right-click on the Oculus server process and select “End task” to kill it.
- You may get a warning that the process is still running in the background. Click “End process” to fully terminate it.
- Once the process has ended, click the “File” menu at the top of Task Manager and select “Run new task“.
- Type “OVRServer” in the “Open” text box and hit Enter to manually restart the Oculus server process.
- Allow the process to fully restart. You should see it listed again in the Task Manager Processes tab.
- Close the Task Manager window. Your Oculus software should now be reset.
4. Contact customer support

If none of the above steps work, contact customer support for further assistance. You can find contact information on the Meta website or in the Meta Quest app.