
Airalo APN settings are essential for accessing mobile data on your device with Airalo eSIMs. APN stands for “Access Point Name,” which determines how your device connects to the internet through your mobile network.
By customizing your APN settings, you can ensure a smooth and reliable data connection with Airalo. Whether you’re using iOS or Android, updating your APN settings is straightforward.
Navigate to the settings menu on your device, locate the appropriate sections for cellular or mobile data, and enter the provided APN details accurately. These settings can be found on your Airalo account’s eSIM installation page.
By following these steps, you can optimize your data connectivity and enjoy a seamless mobile experience with Airalo.

How To Update APN Settings?
To update your APN settings for Airalo on iOS, go to Settings > Cellular > Select your Airalo eSIM > Cellular Data Network. On Android, go to Settings > Network & Internet > Mobile Networks > Access Point Names. Enter the new APN settings provided and save.
Below is a detailed explanation of how to update your APN settings for Airalo, you can follow these steps:
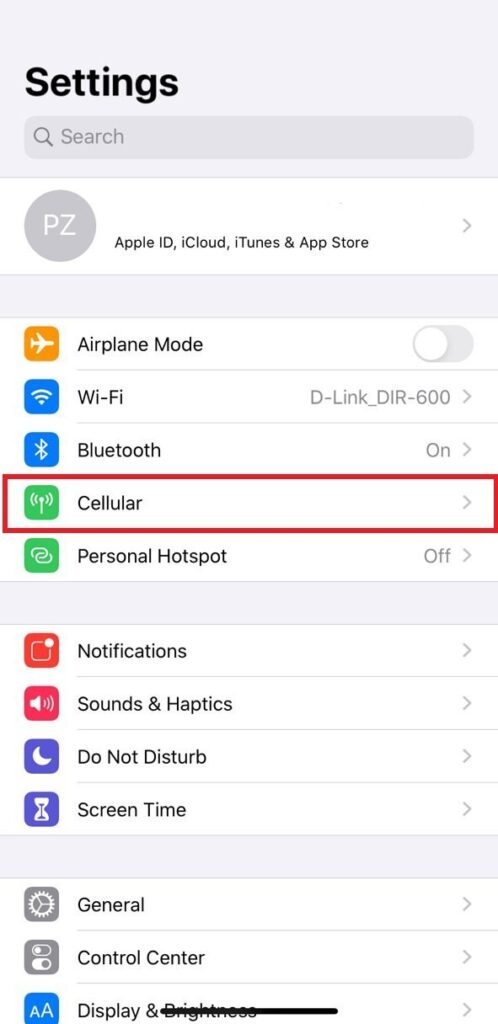
How To Update APN Settings on iOS

- Open the Settings app on your iOS device.
- Scroll down and tap on “Cellular” or “Mobile Data” (the wording may differ depending on your iOS version).
- Select your Airalo eSIM under the “Cellular Data/Mobile Data” section.

- Tap on “Cellular Data Network” or “Mobile Data Network”.

- In the “APN” field, enter the new APN settings provided in the eSIM installation details. Make sure to enter them exactly as specified, including lowercase and without spaces.

Note: The specific APN required may vary depending on your eSIM. You can find the correct APN details on your Airalo account’s “Install eSIM/Access Data” page.
- Leave the other fields blank.
- Press the Home button to exit the settings. Your updated APN settings should now be saved.
How To Update APN Settings on Android

- Open the Settings app on your Android device.
- Scroll down and tap on “Network & Internet” or “Connections” (the wording may vary depending on your Android version).
- Tap on “Mobile Networks” or “Cellular Networks”.

- Select “Access Point Names”.
- Tap the “+” or “Add” button to create a new APN.
- Enter the new APN settings provided in the eSIM installation details. Make sure to enter them exactly as specified, including lowercase and without spaces.

Note: The specific APN required may vary depending on your eSIM. The correct APN settings will be shared with you on your “Install eSIM/Access Data” page.
- Leave the other fields blank or as their default values.
- Save the APN settings by tapping on the “Save” button.
- Exit the settings. Your updated APN settings should now be applied.