
In the era of digital banking, depositing checks has never been easier. With the Chase Mobile® app, you can securely deposit your checks with just a few taps on your smartphone.
But before you can utilize this convenient feature, there’s one crucial step you must complete: endorsing your check.
Endorsing a check correctly is essential to ensure that your mobile deposit is accepted and processed without any hitches.
In this blog post, we’ll guide you through the process of endorsing a check for Chase Mobile Deposit, covering the dos and don’ts to make sure your funds are credited to your account promptly and safely.
How Do Endorse a Check To Chase Mobile Deposit
Endorsing a check for a mobile deposit at Chase is a straightforward process that allows you to deposit checks using the Chase Mobile® app without having to visit a branch.
Here’s a detailed step-by-step guide on how to properly endorse a check for Chase mobile deposit:
Step 1: Prepare Your Check for Endorsement
Before you do anything else, make sure your check is ready for endorsement:
- Verify that the check is addressed to you.
- Ensure the check is not damaged or altered.
- Confirm that the check has been filled out completely and correctly by the issuer.
Step 2: Sign the Back of the Check
On the back of the check, you’ll find a few lines or a box that’s typically located on one end of the check; this is the endorsement area. Sign your name on the top line as it appears on the front of the check. This is required to authorize the deposit.
Step 3: Add a Restrictive Endorsement (If Required)
Chase may require a restrictive endorsement on checks deposited using their mobile app. Below your signature, write “For electronic deposit at Chase only.” This indicates that the check is to be deposited exclusively into your Chase account via an electronic method and not to be cashed or deposited elsewhere.
Step 4: Log In to the Chase Mobile® App
With your check endorsed, open the Chase Mobile® app on your smartphone or tablet and log in using your Chase username and password.
Step 5: Start the Deposit Process
Once you’re logged in, navigate to the “Pay & Transfer” tab and select “Deposit checks.” Then choose the account where you want your deposit to go.
Step 6: Enter the Check Details
Enter the amount of the check when prompted. It’s important to ensure that this matches the written amount on the check itself.
Step 7: Capture Images of the Check
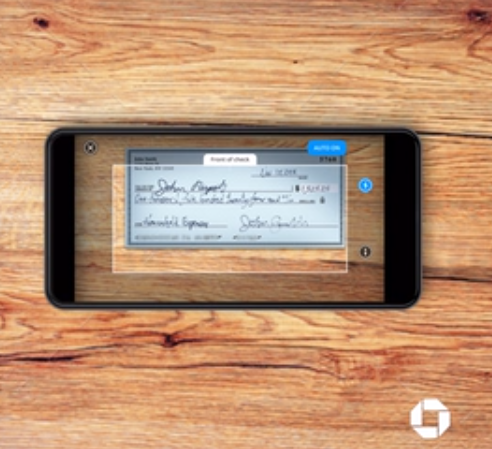
The app will prompt you to take pictures of both the front and back of the check.
Tap “Front” take a photo of the front of the check and follow the on-screen instructions to capture clear images:
- Place the check on a dark, flat surface in a well-lit area.
- Hold your device directly above the check.
- Make sure all four corners of the check are within the frame in the app.
- The app will usually take the photo automatically once the image is in focus.
Endorse your check, then tap “Next” and Take a photo of the back of the check.
Step 8: Review and Confirm
Once you have verified the details, Choose “Deposit,” and tap “Yes” to confirm.
Usually, the fund deposit will be available at 11 PM on the next business day. You will get emails with updates on fund availability.
Retention Period: It’s advisable to hold onto the endorsed check for at least two weeks, which allows ample time for the deposited funds to clear. During this period, write “Deposited” and the date of the mobile deposit on the front of the check to avoid re-depositing it mistakenly.
Do and Don’t: Endorse a Check To Chase Mobile Deposit
When endorsing a check for a mobile deposit with Chase, it’s important to follow specific guidelines to ensure that your deposit is successful. Here are some dos and don’ts to keep in mind:
Do:
- Sign the back of the check in the designated endorsement area. Your signature should match the name written on the front of the check.
- Use a restrictive endorsement for added security. Write “For electronic deposit at Chase only” beneath your signature.
- Ensure the check is correctly filled out, with no missing details such as the date, payee name, amount in numbers and words, and the payer’s signature.
- Verify the check is not expired. Most checks are valid for 6 months unless otherwise stated.
- Keep the check in a safe place until you confirm that it has been successfully deposited and cleared. Chase recommends holding onto the check for at least 7 days before destroying it.
- Double-check the deposit details you enter into the app, such as the deposit amount, to ensure they match the check.
Don’t:
- Don’t sign the check until you’re ready to deposit it to prevent potential misuse if it’s lost or stolen before you deposit it.
- Don’t use a pencil or erasable pen to endorse the check. Always use blue or black ink for better security.
- Don’t cover up any important information on the check when writing your endorsement.
- Don’t deposit the check more than once. Once you’ve submitted the check through the mobile app, you should not attempt to deposit it again or cash it elsewhere.
- Don’t forget to review and comply with Chase’s deposit limits and cut-off times for mobile deposits to ensure your funds are available when you need them.
- Don’t ignore errors or discrepancies on the check. If you notice anything amiss, contact the issuer of the check for a replacement or clarification before attempting to deposit it.
By following these dos and don’ts, you can help ensure that your experience with Chase Mobile Deposit is smooth and that your funds are deposited efficiently and securely.