The Apple Vision Pro is a revolutionary device that offers a range of features, including the ability to take screenshots and record what’s on your screen.
Whether you’re looking to capture a memorable moment or create a tutorial, knowing how to utilize these features can enhance your user experience.
In this article we will go through with the steps that will help you to take screenshots and screen recordings on your Apple Vision Pro.
How To Take Screenshot On Apple Vision Pro?
Press the Digital Crown and the top button simultaneously. Alternatively, you can say “Hey Siri, take a screenshot” if this feature is supported and enabled.
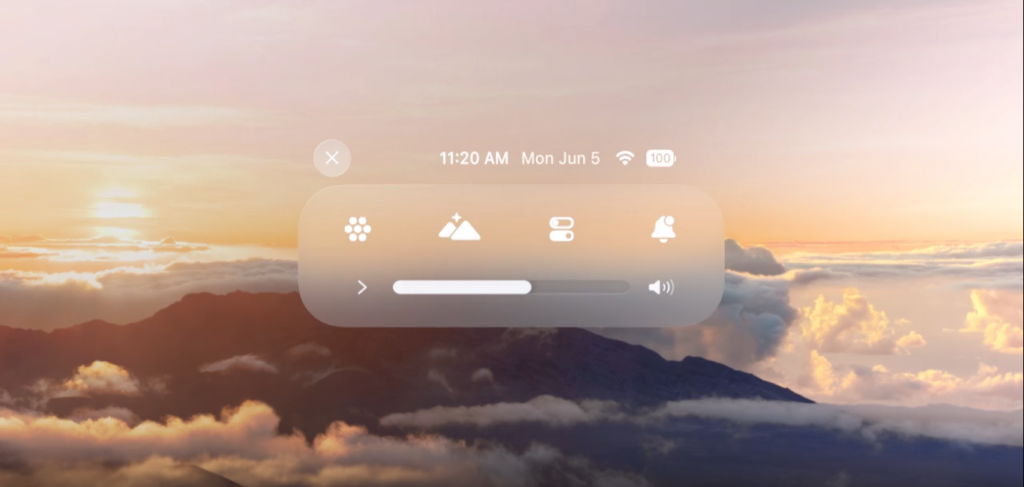
To take a screenshot in Apple Vison Pro you need to follow the steps below.
- Quick Capture: To take a screenshot quickly, simply press the Digital Crown and the top button simultaneously. This action will capture whatever is currently displayed on your screen.
- Using Siri: For a hands-free approach, you can also use voice commands. Say, “Siri, take a screenshot,” and the Apple Vision Pro will capture your screen without the need to press any buttons.
- Finding Your Screenshots: Once you’ve taken a screenshot, it will be saved automatically in your Photos app. You can view, edit, or share it from there just like any other photo.
How To Do Screen Record On Apple Vision Pro?
Open Control Center on your Apple Vision Pro. Tap the screen record button to start recording. To stop recording, open Control Center again and tap the screen record button. The recording will be saved to Photos.
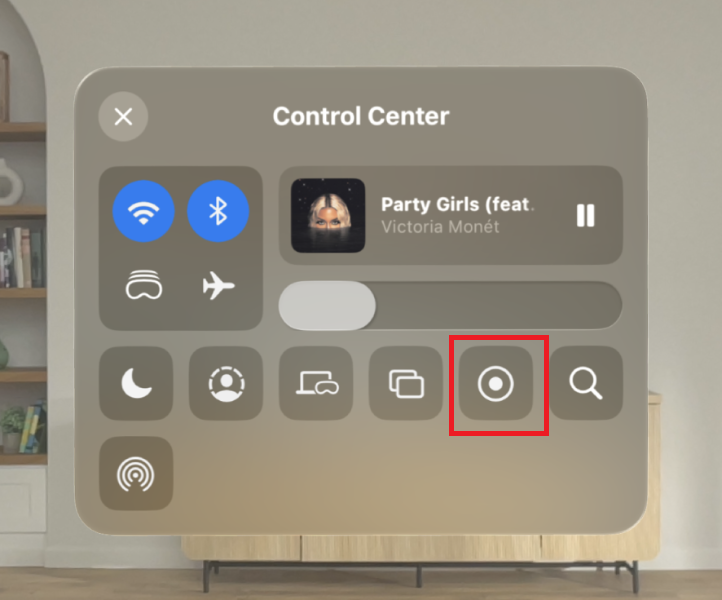
To record screen in Apple Vison Pro you need to follow the steps below:
- First Switch on your Apple Vision Pro and wait till the Home screen loads.
- Next, look up, and then tap the downward arrow.
- Now the Control Centre will open.
- Tap on the toggle button and then select the Record button.
- To stop recording, press on the stop recording button on your screen.
Note: Your screen recordings and screenshots are saved automatically in the Photos app. From there, you can watch, edit, or share your video as needed.
How to Take Better Screen Captures in Apple Vision Pro?
- Clearing the Clutter: Before taking a screenshot or starting a recording, close any unnecessary apps or notifications. This will help keep your captures clean and focused on the content you want to share.
- Battery Life: Screen recording, in particular, can consume more battery power. Make sure your device is sufficiently charged, or plug it in before starting a longer recording session.
- Privacy Considerations: Be mindful of personal information that might be visible on your screen when capturing or recording. Always ensure you have permission if you’re recording content that involves others or third-party apps.
