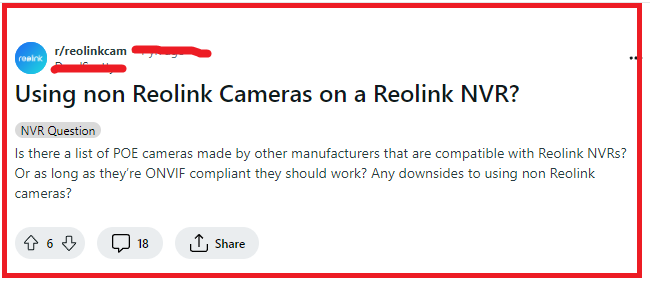
Adding a third-party camera to a Reolink NVR can be a bit challenging due to compatibility issues, as Reolink NVRs are designed to work best with Reolink cameras. However, it is possible if the third-party camera supports the ONVIF protocol.
In this article, we will be discussing all the prerequisites that you need to know to add 3rd party camera to Reolink NVR and the exact steps on how you can do that.
What are the Prequisites for adding 3rd party camera to reolink NVR?
Adding a third-party camera to a Reolink NVR requires meeting certain prerequisites to ensure compatibility and functionality as we have discussed below.

1. ONVIF Support
The third-party camera must support the ONVIF (Open Network Video Interface Forum) protocol, which allows for interoperability between IP security products regardless of the manufacturer.
2. Firmware Compatibility
Both the Reolink NVR and the third-party camera should have up-to-date firmware that supports ONVIF standards.
3. Network Access
The third-party camera must be connected to the same local network as the Reolink NVR to allow for network communication between the devices.
4. Static IP Address
It is recommended to assign a static IP address to the third-party camera to prevent IP conflicts and ensure consistent connectivity.
5. Proper Network Configuration
Ensure that the network settings, such as the subnet mask and gateway, are correctly configured so that the NVR and the third-party camera can communicate on the network.
6. ONVIF User Account
The third-party camera may require the setup of an ONVIF user account with a username and password that will be used to connect to the Reolink NVR.
7. Correct Port Settings
Knowledge of the correct ONVIF port used by the third-party camera is necessary for adding it to the Reolink NVR.
8. Compatible Resolution and Frame Rate
The camera’s video resolution and frame rate should be supported by the Reolink NVR. Check the NVR’s specifications to ensure compatibility.
9. Physical Connections
If the camera is not PoE (Power over Ethernet) enabled, it will require a separate power source. Additionally, a proper Ethernet cable is needed to connect the camera to the network.
10. Access to Camera’s Web Interface
You may need to access the third-party camera’s web interface to configure ONVIF settings, so having the default IP address, username, and password is important.
11. Reolink NVR Channel Availability
There must be an available channel on the Reolink NVR to add the new camera. If all channels are occupied, you may need to remove an existing camera or upgrade to an NVR with more channels.
How To Add 3rd Party Camera To Reolink NVR?
To add 3rd party camera to Reolink NVR, you have to confirm ONVIF compatibility, connect the camera to the network and configure the camera’s IP settings. Additionally, you will also have to enable the ONVIF on the third-party camera.
1. Confirm ONVIF Compatibility
Before attempting to add a third-party camera to your Reolink NVR, ensure that the camera supports the ONVIF protocol, which is a standard for network camera communication.
- Check the camera’s specifications or contact the manufacturer to confirm ONVIF support.
- Make sure the camera’s firmware is up to date, as this may affect ONVIF compatibility.

2. Connect the Camera to Your Network
The third-party camera needs to be connected to the same local network as your Reolink NVR.
- Connect the camera to your router or switch using an Ethernet cable.
- If the camera is Wi-Fi capable, connect it to your network wirelessly following the manufacturer’s instructions.
3. Configure the Camera’s IP Settings
Assign an IP address to the third-party camera that is in the same subnet as your Reolink NVR.
- Access the camera’s web interface by entering its default IP address into a web browser.
- Set the camera to use a static IP address that matches the IP range of your NVR’s network.
- Save the settings and ensure the camera is accessible on the network.
4. Enable ONVIF on the Third-Party Camera
ONVIF may need to be enabled manually on the third-party camera.
- Within the camera’s web interface, locate the ONVIF settings.
- Enable ONVIF and set a username and password for the ONVIF user account.
- Note down the ONVIF port, username, and password.
5. Add the Camera to the Reolink NVR
Access the NVR’s interface to add the third-party camera.
- Log in to your Reolink NVR using a monitor and mouse or via the Reolink Client software.
- Navigate to the ‘Camera’ or ‘IP Channel’ settings.
- Select the option to add or edit a camera channel.
- Choose ‘Manual Add’ or ‘Add by ONVIF’ depending on your NVR’s options.
6. Input the Camera’s ONVIF Details
Enter the third-party camera’s ONVIF details into the NVR.
- Input the camera’s IP address, ONVIF port, username, and password.
- Adjust the video format and resolution settings if necessary.
- Click ‘OK’ or ‘Add’ to save the camera’s details to the NVR.
7. Confirm the Camera is Streaming
After adding the camera, check to see if the video stream is working.
- Look for the video feed from the third-party camera in the NVR’s live view.
- If there is no video, double-check the camera’s settings and the details entered into the NVR.
- Ensure there are no IP conflicts or network issues preventing the camera from connecting.
