
When settling in for a movie night or your favorite show, encountering a non-responsive Xfinity Flex remote can be a significant inconvenience.
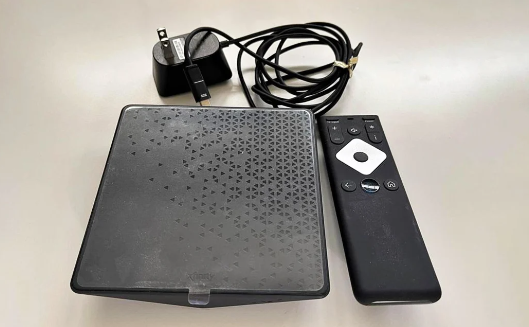
The Xfinity Flex remote is an essential tool for navigating your entertainment experience, and when it stops working, it’s important to get it back in action quickly.
The Xfinity remote not working because there might be an issue with the batteries, a pairing hiccup, or the issue with the device itself.
In this guide, we’ll walk you through the common issues that can cause your Xfinity Flex remote to malfunction and provide clear, step-by-step instructions on how to fix them, ensuring you can return to your viewing with minimal disruption.
What Causes The Xfinity Flex Remote Not Working Issue?
Several factors can cause an Xfinity Flex remote to stop working properly. Common causes include:
1. Dead Batteries
The most frequent culprit is drained batteries. If the remote’s batteries are low or dead, it won’t function.
2. Pairing Issues
The remote may have lost its connection to the Flex box and needs to be re-paired.
3. Remote May Be In Out Of Range
The remote may be too far from the Flex box, or out of the remote’s effective range. Also, Other electronic devices can cause interference with the remote’s signal.
4. Remote Damage
Physical damage to the remote from drops or spills can affect its functionality.
5. Software Glitches
The Flex box or remote may have encountered a software error that is preventing the remote from working. Outdated firmware on the Flex box can also result in compatibility problems with the remote.
How To Fix Xfinity Flex Remote Not Working
First check the battery, remove and repair to flex box, and reset it. If it doesn’t help, reset the flex box and check with an alternate remote. Finally, consider replacing the remote.
1. Check the Batteries
The most common reason for a remote to stop working is dead batteries. Replace the old batteries with new ones, ensuring they are inserted correctly according to the polarity markings inside the battery compartment.
2. Re-Pair the Remote to Your Flex Box
If the remote has lost its pairing with the Flex box, you might face the issue. Try repairing it.
- Turn on your TV and Flex Box.
- Put the remote into pairing mode by pressing and holding the ‘Xfinity’ and ‘Info’ buttons together for five seconds.
- Wait for the LED at the top of the remote to change from red to green.
- Follow the on-screen instructions to complete the pairing process.
3. Check For Signal Interference
Ensure there are no obstructions between the remote and the Flex box, and move any electronic devices that could be causing interference away from the remote and Flex box.
Make sure the remote is within the signal range and check by moving the remote front and forth.
4. Check With Alternative Remote
Test the remote’s basic functions, such as volume control or channel changing, to determine if the issue is with specific buttons or the entire remote.
If it doesn’t, try with an alternate remote and consider replacing it.
5. Hard Reset Your Xfinity Flex TV Box
Consider resetting your Flexbox to factory settings, which will erase all data and settings and restore your device to a clean state by deleting all technical glitches. Additionally, the resetting will also update the firmware to its latest version.
To Hard Reset:
- Find the Reset button on your Flex TV box.
- Press and hold it for about 10 seconds until the LED starts blinking.
- Release the button and allow the box to reset.
6. Reset The Remote
Resetting the remote will fix any technical and electrical glitches inside the circuit and help it to start in a clean state.
For Remotes with the ‘i’ and Home Button

- Press “i button “and the “Home button” for 5 seconds.
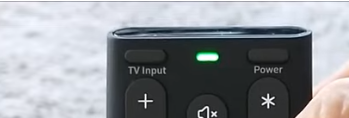
- Let go of both buttons when the status light on the remote blinks. This light is found near the top of the remote between the Power and TV Input buttons.
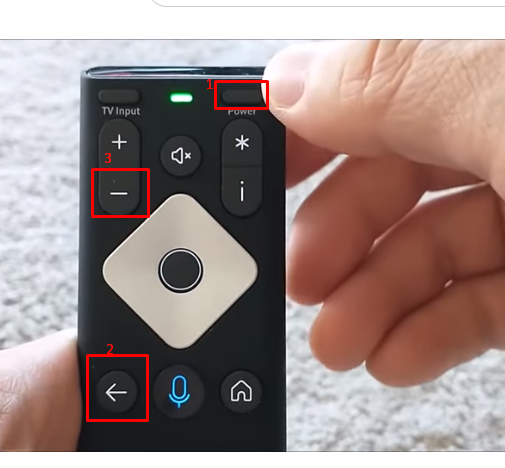
- Press the “Power button” located in the top right corner of your remote.
- Press the “Last button,” which looks like an arrow pointing backwards, to the left of the microphone button.
- Finally, press the “Volume down button“, which is located near the top-left of your remote, below a “+” icon. This completes the reset process, and you can now pair your remote.
Remotes Without the Setup Button
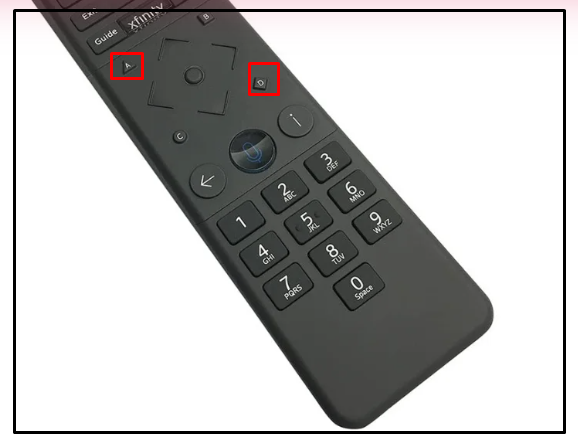
- Press and hold the A button and D button for five seconds.
- Release both buttons when the status light on your remote changes from red to green.
- Press the buttons 9, 8, and 1 in sequence to complete the reset process, and you can proceed to pair your remote.
Remotes With the Setup Button
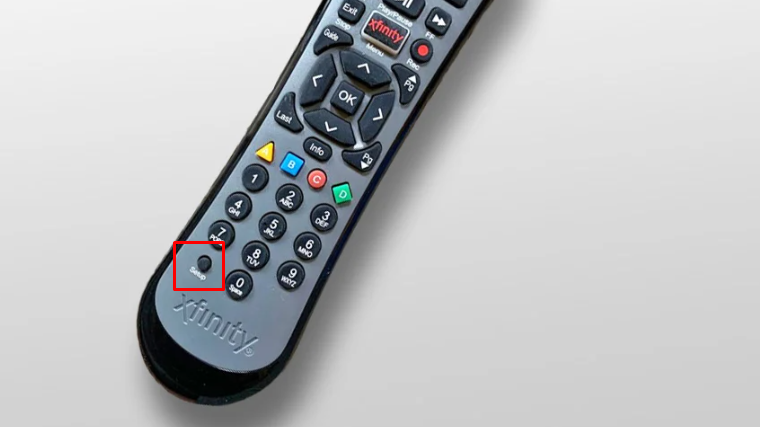
- Press and hold the “Setup“ button until the status light changes from red to green. The status light is at the very top of the remote, and the Setup button is at the very bottom, to the left.
- Press the buttons “9, 8, and 1” in sequence. The status LED will blink green twice to indicate that the remote has been successfully reset.