When using a Reolink NVR (Network Video Recorder), encountering an issue with the hard drive can be frustrating.
The NVR relies on the HDD (Hard Disk Drive) to store video footage, and any problems with the HDD can lead to a loss of recording capabilities.
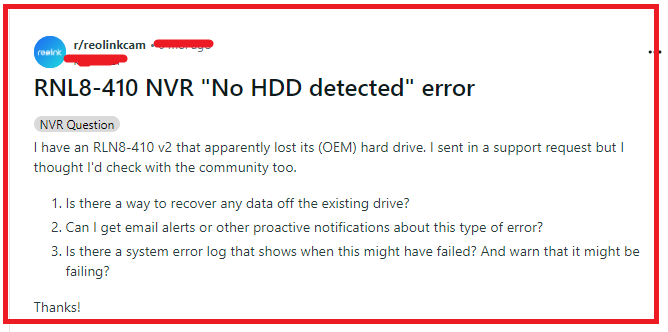
Many people have reported seeing the error “No HDD Detected” or HDD blinking red but you don’t need to worry anymore.
In this article, we will discuss in detail what are the reasons why you are encountering “No HDD Detected” error or HDD blinking red in Reolink NVR.
What are the Reasons for Reolink NVR No HDD Detected Error Or HDD Blinking Red?
When encountering a “No HDD detected” error or observing a blinking red HDD light on a Reolink NVR, there are several potential reasons for these issues as we have discussed below.
1. Improper HDD Installation
If the hard drive is not correctly installed within the NVR, it may not be detected.
This could be due to loose connections, incorrect seating of the HDD, or not using the proper mounting screws or brackets that ensure a stable connection to the NVR’s mainboard.
2. HDD Compatibility Issues
Not all hard drives are compatible with every NVR system. Reolink NVRs require specific types of HDDs to function correctly.
Using an incompatible HDD, such as one with an unsupported storage capacity or one that’s not designed for surveillance purposes, can lead to detection issues.
3. Insufficient Power Supply
An insufficient power supply to the NVR can prevent the HDD from being detected.
This can happen if the power supply unit (PSU) is faulty, if there’s an issue with the power outlet, or if there’s a surge that has damaged the power input, leading to inadequate power for the HDD.
4. Outdated NVR Firmware
Running outdated firmware on the NVR can cause various operational issues, including HDD detection problems.
Firmware updates often contain fixes and improvements that can resolve compatibility and functionality issues with connected hardware like HDD.
5. Defective HDD
The HDD itself may be defective. This could be due to physical damage, prolonged use leading to wear and tear, or a manufacturing defect.
A faulty HDD may not be recognized by the NVR, or it may intermittently connect and disconnect, causing the red light to blink.
6. NVR’s Hardware Fault
There could be an issue with the NVR’s internal hardware. Problems with the SATA port, the mainboard, or other components within the NVR can prevent it from detecting the HDD.
This could manifest as a no HDD detected error or a blinking red light if the NVR intermittently recognizes the HDD before losing connection again.

How To Fix Reolink NVR No HDD Detected Error Or HDD Blinking Red?
You can check the HDD connection, inspect the HDD status LED, and format it. Additionally, you can update the NVR firmware to fix the issue.
1. Check the HDD Connection
The first step should always be to ensure that the HDD is properly connected to the NVR. Power off the NVR, open the housing and check the SATA cable and power connection to the HDD.
Unplug and then replug the cables to ensure a secure connection. After reconnecting, power on the NVR and check if the HDD is detected.
- Power off the NVR and unplug it from the power source.
- Open the NVR’s housing by unscrewing the cover.
- Locate the HDD and check both the data cable (SATA) and the power cable are firmly connected.
- Disconnect and reconnect both cables to ensure a good connection.
- Replace the cover, plug in the NVR, and power it on to see if the HDD is detected.
2. Inspect the HDD Status LED
The status LED on the NVR provides important information. A solid red HDD light indicates that the NVR has detected the HDD but is not recording, whereas a blinking red light signifies that the cameras are recording to the HDD.
If the HDD LED is off, it means no HDD is detected at all.
- Look at the HDD LED indicator on the front panel of the NVR.
- A solid red light indicates detection without recording, and blinking signifies active recording.
- If the LED is off, the NVR does not detect the HDD, and further troubleshooting is needed.
3. Format the HDD
If the HDD is detected but not working correctly, it may need to be formatted. This can be done through the NVR’s interface.
Navigate to the HDD settings and select the option to format the HDD. Keep in mind that formatting will erase all data on the drive.
- Access the NVR menu using a connected monitor and mouse.
- Navigate to the ‘HDD‘ or ‘Storage’ settings.
- Select the HDD in question and choose the ‘Format’ option.
- Confirm the action and wait for the process to complete.
4. Check HDD Compatibility
Ensure that the HDD you’re using is compatible with the Reolink NVR. Some NVRs have specific requirements for HDDs in terms of capacity and brand.

- Consult the Reolink NVR user manual or the official Reolink website for a list of compatible HDDs.
- Ensure the HDD in use meets the specifications for size and brand.
5. Update NVR Firmware
Outdated firmware can sometimes cause issues with HDD detection. Check for firmware updates on the Reolink NVR by accessing the system settings.
If an update is available, follow the on-screen instructions to download and install the latest firmware version.
- Navigate to the ‘System‘ settings on the NVR menu.
- Select ‘System Update’ or ‘Firmware Update.’
- Follow the on-screen instructions to check for and install firmware updates.
6. Test with Another HDD
To rule out the possibility of a faulty HDD, try connecting a different, known-to-be-working HDD to the NVR.
If the new HDD is detected and operates without issues, the original HDD may be failing or damaged.
- Power off the NVR and unplug it.
- Open the housing and disconnect the current HDD.
- Connect a different HDD that is known to work.
- Close the housing, power on the NVR, and check for detection.
7. Check for Overheating
If the NVR or the HDD is overheating, it could lead to detection issues or erratic behavior.
Ensure that the NVR is in a well-ventilated area and that the fans (if present) are working properly. Overheating can cause the system to shut down or the HDD to malfunction.
- Ensure the NVR is placed in a cool, ventilated area away from direct sunlight.
- Check that internal fans (if present) are free of dust and operational.
- Consider adding external fans or moving the NVR to a cooler location if overheating persists.
8. Factory Reset the NVR
As a last resort, performing a factory reset on the NVR can resolve underlying software issues that might be causing the HDD detection problem.
Be aware that this will erase all settings and data, so it should only be done if all other troubleshooting steps have failed.
- Back up any important data before proceeding, as this will erase all settings.
- Access the NVR’s menu and navigate to ‘System’ settings.
- Select ‘Factory Reset‘ or ‘Default Settings.’
- Confirm the reset and wait for the NVR to reboot with factory settings.
9. Contact the Reolink Support Team

Suppose after trying these steps the HDD is still not detected or the red light continues to blink without proper functioning.
In that case, it may be time to contact Reolink support for further assistance or consider replacing the HDD or NVR unit.
Always remember to keep backups of your video footage to prevent data loss in such scenarios.