When your Reolink camera system encounters a live viewing failure, it can be a cause for concern. Live viewing is a crucial component of any security system, allowing for real-time monitoring.
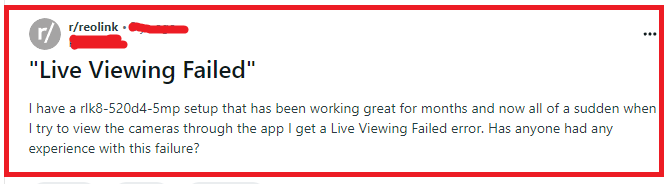
The full error message will read “Live Viewing Failed“.
If you’re experiencing issues with live viewing on your Reolink cameras then we are here to help you!
In this article, we will be discussing all the reasons why Reolink live viewing failed and exactly how you can fix it with ease.
What are the reasons for Reolink Live Viewing failed?
Reolink live viewing failures can be attributed to a range of issues that impact the camera’s ability to stream video as we have discussed below.
1. Network Connectivity Issues
The most common reason for live viewing failure is a problem with the network connection. If the camera cannot connect to the network or the internet, it won’t be able to stream video.
This could be due to weak Wi-Fi signals, incorrect network settings, or a problem with the networking hardware such as the router or modem. Network congestion or bandwidth limitations can also impact streaming quality and lead to failures.
2. Power Supply Interruptions
Cameras need a consistent power supply to operate. Interruptions or fluctuations in the power supply can cause the camera to reboot or shut down, disrupting the live view.
This could be due to a faulty power adapter, power outages, or issues with battery-powered cameras not being charged.
3. Software Glitches or Outdated Firmware of Reolink
Software problems within the camera or the viewing application can lead to live viewing issues.
Glitches can cause the camera to freeze or the app to crash. Outdated firmware on the camera can also lead to compatibility problems or bugs that affect live streaming.
4. Incorrect Camera Configuration in Reolink
If the camera settings are not configured correctly, it may not stream video as expected.
This can include incorrect date and time settings, which can affect the ability to initiate live view, or misconfigured streaming settings such as the resolution or bitrate that are too high for the available bandwidth.
5. Hardware Malfunctions in Reolink Camera
Physical damage to the camera or wear and tear over time can lead to hardware malfunctions that affect live viewing.
This could be due to lens damage, sensor issues, or internal component failure.
How to Fix Reolink Live Viewing Failed?
Check the network connection, verify the power supply and Update Reolink firmware. Additionally, you can try to adjust the bitrate setting to fix the Live Viewing issue in Reolink.
1. Check Network Connection
Ensure that your Reolink camera is connected to the internet. If you’re using a WiFi-connected camera, check the signal strength and stability.
If the camera is connected via Ethernet, ensure that the cables are securely plugged in and that the router is functioning correctly.
You can also try rebooting your router and camera to refresh the network connection.
2. Verify Camera Power Supply
A disrupted power supply can cause live viewing to fail. Check if the camera’s power adapter is plugged in and if the outlet is supplying power. For battery-operated cameras, ensure that the battery is charged.
If the camera has been powered off, turn it back on and wait for it to initialize before attempting to view the live feed again.
3. Update Reolink App and Firmware
Outdated software can lead to compatibility issues and bugs. Ensure that you have the latest version of the Reolink app installed on your smartphone or tablet through the App Store or Play Store.
Additionally, check for firmware updates for your camera through the app or Reolink website. Updating to the latest firmware can fix known issues and improve camera performance.
- Access the NVR’s main menu by connecting a monitor and using a mouse or by logging into the NVR’s interface via the Reolink Client on your computer.
- Navigate to the ‘System‘ settings to find the ‘Information’ or ‘System Info’ section, which should display the current firmware version.
- Visit the Reolink official website and go to the ‘Support‘ or ‘Download Center‘ section.
- Find your NVR model and check for the latest firmware version available for download.
- Download the firmware file to your computer. It should be in a compressed format.
- Once downloaded, extract the firmware file, if compressed, to a folder on your computer. You should now have a .bin or .pak file, which is the actual firmware file.
- Format a USB flash drive to FAT32 (this is usually the default format for most USB drives).
- Copy the extracted firmware file to the root directory of the USB flash drive.
- Safely eject the USB drive from your computer.
- Insert the USB flash drive into the USB port of your Reolink NVR.
- Access the NVR’s main menu and navigate to the ‘System’ settings.
- Select ‘System Upgrade‘ or ‘Firmware Upgrade‘ from the menu.
- The NVR should detect the firmware file on the USB drive. Select the file and confirm that you want to upgrade the firmware.
- The NVR will begin the firmware update process. Do not unplug the USB drive or power off the NVR during this process, as it could cause the device to malfunction.
- Once the upgrade is complete, the NVR will usually reboot automatically.
- After rebooting, log back into the NVR and navigate to the ‘System Info’ section to confirm that the firmware version has been updated to the new version.
- After updating, ensure that all cameras are connected and functioning properly.
- Verify that settings have been maintained or reconfigure them as needed.
4. Adjust Bitrate Settings
If the bitrate is set too high for your network’s bandwidth, it can cause live viewing to fail. Access your camera’s settings through the Reolink app or client and lower the bitrate.
You can also switch from a higher resolution to a lower one to reduce the amount of data being transmitted.
- Open the Reolink app on your smartphone or tablet.
- Ensure your device is connected to the same network as the camera or that you have remote access set up.
- Tap on the camera you want to adjust to access the live view screen.
- Tap on the “gear” icon in the top right corner of the live view screen to enter the camera settings menu.
- In the settings menu, look for an option labelled “Display” or “Quality.” This may vary depending on your Reolink app version and camera model.
- Tap on this option to access the video quality settings.
- Once in the quality settings, you will see options to adjust the stream quality, including resolution, frame rate, and bitrate.
- To adjust the bitrate, look for the “Bitrate” setting. You will typically see a slider or a field where you can input a numerical value.
- Move the slider or enter a lower bitrate value to decrease the bitrate, which can help if your network is struggling to handle the higher data load.
- After adjusting the bitrate to the desired level, make sure to save the changes. There should be a “Save” or “OK” button to confirm the new settings.
5. Check for IP Conflicts
IP conflicts on your network can disrupt the connection between your camera and the viewing device. Make sure that each device on your network, including your Reolink camera, has a unique IP address.
You can assign a static IP to your camera through your router’s settings to avoid conflicts.
- Connect your Reolink camera to your network and ensure it’s powered on.
- Find the current IP address of your camera. You can usually find this in your router’s DHCP client list, or by using the Reolink Client software to identify the camera on the network.
- Open a web browser on a computer that’s connected to the same network as the camera.
- Enter the camera’s current IP address into the browser’s address bar to access the camera’s web interface.
- You will be prompted to enter the username and password for the camera. By default, the username is “admin” with no password, unless you have changed these details during the initial setup.
- Once logged in, look for the “Network” or “Device Settings” menu.
- Within the network settings, find the section for “TCP/IP” or “IP Configuration.”
- By default, the camera is likely set to obtain an IP address automatically via DHCP.
- Change this setting to “Static” or “Manual” to enable manual IP address configuration.
- Enter the IP address you want to assign to your camera. Ensure that it is within the same subnet as your router but outside the range of the DHCP pool to avoid conflicts with other devices.
- Input the subnet mask, which is typically 255.255.255.0 for home networks.
- Enter the gateway address, which is usually the IP address of your router.
- Set the preferred DNS server. This can often be the same as the gateway address or a public DNS server like Google’s (8.8.8.8).
- After entering all the necessary information, save the settings. There should be a “Save” or “Apply” button in the interface.
- The camera may require a reboot to apply the new settings. This can usually be done through the web interface, or you can manually power cycle the camera by unplugging it and plugging it back in.
- After the camera reboots, try to access it using the new static IP address you assigned. If you can view the live stream and access the camera’s settings, the static IP configuration is successful.
6. Check for Physical Obstructions
Physical obstructions can interfere with the signal of WiFi cameras. Make sure there are no thick walls, large metal objects, or other significant obstructions between your camera and router.
Relocating the camera or router can improve signal strength and stability.
7. Contact Reolink Support

If you’ve tried all the above fixes and still encounter live viewing issues, it may be time to contact Reo link support.
They can provide further troubleshooting steps and, if necessary, repair or replace your camera. Have your camera model and purchase details ready to expedite the support process.