Today, AT&T offers a wide range of services including wireless communications, internet services, satellite television through DIRECTV, and more.
However, sometimes, users experiencing disruptions with your AT&T mobile phone service can be a significant inconvenience, hindering your ability to make calls, send texts, or use data. Whether it’s an unexpected outage, a technical glitch, or a problem with your device settings, there are multiple factors that can lead to service interruptions.
In this article, we’ll explore the possible reasons why your AT&T mobile phone service might not be working and provide you with a comprehensive guide to diagnose and fix the issue.
Why AT&T Mobile Phone Service Not Working?
There are several reasons why an AT&T phone might not be working properly. Here are some common issues that could be affecting your device:
1. Network Issues
Service outages or weak signal strength can prevent your phone from connecting to the AT&T network.
2. Account Problems
If your account is not in good standing, such as due to unpaid bills or suspension, services may be interrupted.
3. Device Errors
Software glitches, outdated operating systems, or corrupted data can cause your phone to malfunction.
4. SIM Card Issues
A damaged or improperly inserted SIM card may result in connectivity problems.
5. Hardware Damage
Physical damage from drops, water exposure, or other accidents can lead to a variety of phone issues.
How To Fix AT&T Mobile Phone Service Not Working?

First, restart your phone, check for service outage and reset your network settings. If all in place try updating your device software and check for any physical damage on sim and device.
Step 1: Restart Your Phone
The first and simplest step is to restart your device. This can resolve many basic issues by refreshing the system. To do this, power off your device and then turn it back on.
To turn your phone off and back on, follow these very simple steps:
- Press and hold the power button on your phone until the power off option appears on the screen.
- Tap the ‘‘Power off’‘ option or slide the power off slider, if applicable, and wait for your phone to turn off completely.
- After the phone is off, press and hold the power button again until the manufacturer’s logo appears, indicating the phone is turning back on.
Wait for the device to boot up, and you should be back to the home screen ready to use your phone.
Step 2: Check For Service Outages
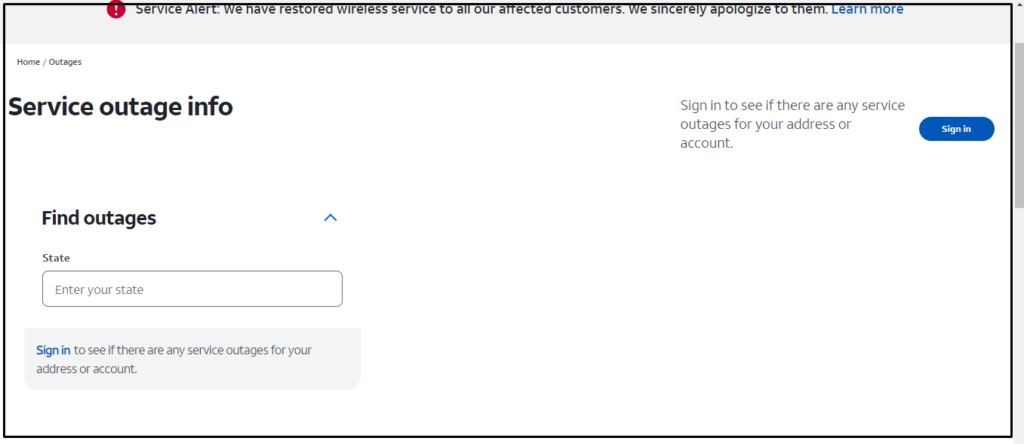
Before diving into more complex troubleshooting, check if there are any known service outages in your area that could be affecting your phone’s functionality. You can do this by visiting the AT&T website or contacting their customer support.
To check for service outages on AT&T, follow these simple steps:
- Visit the AT&T Service Outage Information page.
- Sign in with your “AT&T account” credentials if necessary.
- Follow the prompts to check if there are any reported outages in your area.
Alternatively, you can also use the AT&T mobile app to check for outages or contact AT&T customer service for assistance.
To check for a service outage using the AT&T mobile app, follow these steps:
- Open the “AT&T mobile app” on your smartphone.
- Log in with your AT&T “user ID and password” if you’re not already logged in.
- Navigate to the support or account section of the app.
- Look for an option labeled ‘‘Check for Outages’‘ or similar.
- Follow the prompts to see if there are any service outages in your area that may be affecting your service.
If you don’t have the AT&T mobile app, you can download it from the App Store for iOS devices or Google Play Store for Android devices.
Step 3: Ensure Software is Up-to-Date
Outdated software can cause connectivity issues. Make sure your phone’s software is updated to the latest version.
To update the Android OS on your device, follow these steps:
- Connect your device to Wi-Fi.
- Open the” Settings “app.
- Scroll down and tap on “About”
- You’ll see your update status. Follow any on-screen prompts to download and install the update.
For updating iOS on your iPhone or iPad:
- Connect your device to Wi-Fi.
- Go to the “Settings“ app.
- Tap “General,” then “Software Update.”
- Tap “Download and Install” for any available update.
- If asked, enter your passcode.
Remember to keep your device connected to Wi-Fi and plugged into power during the update process.
Step 4: Verify Your Account Status
Sometimes, service interruptions can be due to billing issues or suspended services. Log into your AT&T account online or contact customer service to ensure your account is in good standing.
To verify your account status with AT&T, you can follow these steps:
- Go to the AT&T website.
- Click on “Sign in” and enter your AT&T user ID and password.
- Once logged in, navigate to the “Account Overview” section.
- Here, you can view your account status, including any notifications about your account, billing information, and whether your services are active.
If you have any issues or questions regarding your account status, you can contact AT&T customer service for assistance.
Step 5: Turning Off Call Forwarding on AT&T
If call forwarding enabled, you will not get any call to our number. Ensure your call forwarding status and turn off if it is enabled.
To disable call forwarding on your AT&T phone, follow this simple step:
- Dial
#21#on your phone’s keypad. - Press the “Call,” “Send,” “Talk,” or “Receiver” key, depending on your phone model.
Wait for the confirmation message or beep indicating that call forwarding has been turned off.
Step 6: Examine Your SIM Card
A faulty or improperly seated SIM card can also cause service issues.
- Power off your phone, remove the SIM card, inspect it for any visible damage, and then reinsert it carefully.
Make sure it’s securely in place before turning your phone back on.
Step 7: Test Network Settings
Network settings can sometimes become corrupted, which can affect your phone’s ability to connect to AT&T’s network. Try resetting your network settings. Be aware that this will erase all current saved settings including Wi-Fi passwords, VPN connections, and preferred networks.
To reset network settings on an AT&T Android device:
- Open the “Settings” app on your device.
- Scroll down and select “System” or “General Management,” depending on your device.
- Tap on “Network and Connections”
- Choose “Reset network settings.”
- Confirm your selection by tapping “Reset Settings”
For an AT&T Apple (iOS) device:
- Open the “Settings” app.
- Tap “General.”
- Scroll down and select “Transfer or Reset iPhone” or “Reset.”
- Choose “Reset Network Settings.”
- Enter your passcode if prompted and confirm that you want to reset network settings.
Remember, resetting network settings will erase all Wi-Fi networks and passwords, cellular settings, and VPN and APN settings.
Step 8: Check for Physical Damage
Physical damage to your phone, such as water exposure or a drop, can cause functionality issues. Examine your phone for any signs of damage that might be affecting its operation.
Step 9: Contact AT&T Support or Visit a Store
If none of the above steps resolve the issue, it may be time to seek professional help. Contact AT&T customer support for further assistance. You can also visit an AT&T store where a representative can help diagnose and fix the issue.