Experiencing issues with your Starlink WiFi network not appearing on your list of available connections can be frustrating. This common problem can occur for a variety of reasons, ranging from simple software glitches to more complex hardware issues.
Whether you’re trying to connect a new device to the internet, or you’ve suddenly lost connection on a device that was previously connected, the absence of the Starlink WiFi network can disrupt your online activities.
In this guide, we’ll explore practical steps you can take to troubleshoot and resolve the issue of Starlink WiFi not showing up, ensuring you can get back to enjoying the high-speed satellite internet service that Starlink provides.
Why Starlink WiFi Not Showing Up
Starlink WiFi might not show up for several reasons, including:
1. Obstructions
Physical barriers such as trees, buildings, or any other obstructions that block the line of sight between the Starlink dish and the satellites can cause signal issues, resulting in the WiFi network not appearing.
2. Dish Alignment
If the Starlink dish is misaligned, it may not have a strong connection to the satellite network, which can prevent the WiFi network from being broadcast effectively.
3. Router Issues
The Starlink router itself might be experiencing problems, such as a software glitch, firmware needing an update, or a hardware malfunction that affects its ability to broadcast the WiFi signal.
4. Network Settings
Incorrect network settings, such as the WiFi being disabled in the router settings, the SSID being hidden, or the router being in bypass mode, can cause the network not to show up.
How To Fix Starlink WiFi Not Showing Up
If you cannot see the Starlink WiFi, first reboot the router and restart the WiFi setting in the PC. Then verify the connections and dish realignment. Then factory reset the Starlink.

1. Ensure The Default Starlink WiFi Name
If you are new to Starlink, you may not be aware of the Starlink default WiFi name. The Default WiFi name is “STINKY“. Search for the name and connect to it.
To change the Default WiFi name
- Open the “Starlink App” and Go to “Settings“
- Click on “WiFi configuration” and Click on “Network name” to change the name.
2. Check for loose or broken connections
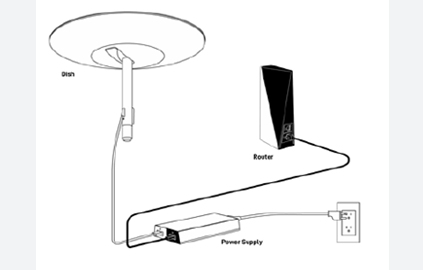
A faulty Starlink cable is a common issue. The cable may get damaged or worn out over time, leading to a weak or no connection. Check all the connections and cables to ensure they are secure and undamaged.
- Check the connections between the router and the dish
- Check for adopters and lines between the router on the ethernet node.
3. Satrlink Dish Realignment
Make sure your Starlink dish is properly aligned. Obstructions or misalignment can prevent it from connecting to the satellite network.
Finding a spot with a clear line of sight to the nearest satellite is crucial for a strong connection. After choosing the ideal location, install the equipment and turn on the power to allow the dish to automatically align itself.
Monitor the signal strength; if poor signal was the main issue, adjusting the dish’s position should establish a better connection.
4. Restart the WiFi Connection On Your Computer
There might be an issue with your device or mobile and it is unable to find the Starlink WiFi signal. Restarting the WiFi connection will remove the temporary glitches and detect the WiFi signal within the range.
Windows:
- Click on the “WiFi icon” in the system tray at the bottom right of the screen.
- Click on “Network & Internet settings” > Toggle the WiFi option to “OFF” > Wait “2 sec” > Toggle “On” the WiFi option.
Mac:
- Click on the “WiFi icon” in the menu bar > Select “Turn Wi-Fi off.” > Wait 2 sec >Select “Turn Wi-Fi On“
Android:
- Open the Settings app > “Connections” or “Network & Internet.” > “Wi-Fi.”
- Toggle the switch to the “Off” position.
- Restart your Phone and Toggle “ON” the WiFi
iOS:
- Open the Settings app > “WiFi” > Toggle the switch to the “OFF” position.
- Restart the Phone and Toggle “ON” WiFi
If the above method doesn’t work restart your device and again follow the above step.
5. Power cycle the Starlink router
Power cycling can clear any temporary glitches and issues related to connections.
- Turn off and unplug the router and dish.
- Wait 15-30 minutes to allow the router and dish to power down completely.
- Then plug them back in and turn them on.
- Also, turn off your connected devices. Unplug them if needed. Wait for 1 minute. Then power them back on.
- Rebooting the system fresh can resolve bugs and get your Starlink working again.
You can also Reboot the Router Via App

- Open the Starlink App and click on “Settings“
- Click on the “ROUTER” tab and swipe the arrow mark to the right on “SLIDE TO REBOOT“
- Again Click on “STARLINK” and repeat the previous step.
6. Update the Starlink firmware
Starlink will update the firmware automatically and there is no option to update it manually. Also, note that not all Starlink devices will get the update same time. The Starlink pushes the update in batches and the devices get updated overnight.
To find out the current firmware or software version of your Starlink dish,
- Open the Starlink App and scroll down to the bottom to access the “Advanced” section.
- Here, you’ll see the software version detailed under the Starlink section, specifically marked as “Software.“
- To determine when the last firmware update took place, check the Uptime statistic. Since the Uptime counter resets with each firmware update, this will indicate the last update time
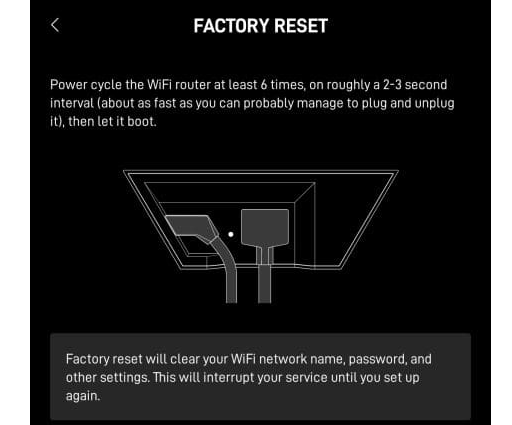
7. Factory reset the Firmware router And Dish
There might be an error during the installation hence the error occurs. The factory setting will return the device to a clean state and fix any issues that occurred during installation. This process clears the cache and can potentially improve the router’s performance
To factory reset your Starlink router, follow the instructions in the Starlink app:
- Open the “Starlink App” and make sure you are online
- Go to “Settings“
- Scroll down and Select “Factory Reset“
- Swipe the “SLIDE TO FACTORY RESET” arrow to the right.
- Click “OK” to confirm the action.
- Now unplug and plug the power cord six times continuously with a time interval of 2 to 3 sec. The action will reset the power flow inside the router.
- Click on “Starlink Wifi” and click on “Starlink Network” on the app. Configure the WiFI by setting the name and Password.
To reset the Starlink Circular Dish
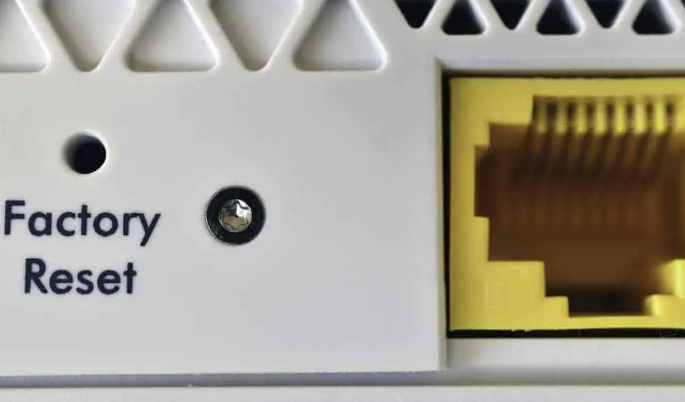
- You will find a Reset button at the bottom of the dish.
- Press and hold the button on the bottom of the router until the adjacent light turns blue, then release the button.
- Wait some time, until the process to complete and boot up again.
- Now open the app and set up the new connection.
To reset the Starlink Mesh Node
If you are using a mesh node as well, follow the steps to factory reset the mesh node.
- Unplug the power cable from your Starlink router.
- Wait for about 10 seconds.
- Plug the power cable back into the router.
- Repeat steps 3 more times, for a total of six power cycles.
- After the final cycle, leave the router unplugged for 15 minutes.
- Reconnect the power cable and allow the router to boot up, which may take a few minutes.
- On your phone, go to WiFi settings and connect to the network named as “STARLINK.“
- Open the Starlink app and use it to set your preferred WiFi name and password.
8. Contact Starlink Support

If you’ve tried all troubleshooting steps and still have no internet, contact Starlink support through the app for further assistance