When you encounter the “input temporarily not working” message on your Apple Vision Pro, it can be a frustrating interruption to your workflow or entertainment.
This issue typically indicates a temporary disconnect or communication error between the Apple Vision Pro and the input device you’re using.
Fortunately, there are several troubleshooting steps you can take to resolve this problem and restore functionality. In this guide, we’ll walk through a series of methods to fix the input issue on your Apple Vision Pro, ensuring you can get back to using your device with minimal disruption.
Why Input Temporarily Not Working On Apple vision Pro
The “Input Temporarily Not Working” error on Apple Vision Pro can occur due to various reasons, including:
1. Bluetooth Connectivity Issues
Interference or obstructions between the Vision Pro and the input device may disrupt the Bluetooth connection.
2. Software Glitches
The Vision Pro’s software may encounter a temporary glitch affecting input recognition.
3. Compatibility Problems
Certain input devices, especially older models that use removable batteries, may not be compatible with the Vision Pro.
4. Battery Issues
Low battery levels in wireless input devices can lead to intermittent connectivity and functionality.
5. Range Limitations
Being outside the effective range of Bluetooth (typically around 20 feet) can cause temporary input failures.
6. Multiple Connected Devices
Having too many Bluetooth devices connected at once can lead to conflicts and connectivity issues.
7. Firmware or Software Outdated
The Vision Pro or the input device may require a firmware or software update to ensure stable connections.
How to Fix Input Temporarily Not Working On Apple Vision Pro

Step 1: Check Bluetooth Signal Strength and Interference
- Ensure that there are no sources of interference between the AVP and the MS. Common sources of interference include other wireless devices, large metal objects, and microwave ovens.
- Try to minimize the distance between the AVP and the MS when initially establishing the Bluetooth connection to ensure a strong signal.
Step 2: Restart Your Apple Vision Pro And Keyboard
A good first step in troubleshooting is to restart your device. This can often clear up minor software glitches that may be causing the problem.
To turn off the device, you can:
- Press and hold the “top button” and the “Digital Crown” simultaneously, then drag the slider when it appears.
- Navigate to “Settings“, select “General“, choose “Shut Down“.
- You can also use voice command and say, “Siri, turn off my Apple Vision Pro.”
- Remove the Apple Vision Pro, place it securely on a surface like a table or desk, and then disconnect the power cable from the Audio Strap.
To turn on your Apple Vision Pro, you can:
- Press and hold the “top button” for a few seconds until you see the Apple logo on the front display.
- If the battery was disconnected, reconnect it, and your Apple Vision Pro will power on automatically.
To Force Restart Apple Vision Pro
- Press and hold both the “top button and the Digital Crown” simultaneously.
- Continue holding both buttons even when the Force Quit Applications window and the power slider appear.
- Keep holding until the displays turn black.
- You may remove the Apple Vision Pro while it restarts.
- Watch for the Apple logo to appear on the front display.
- If the Apple logo doesn’t appear, press and hold the “top button” for a few seconds until it does.
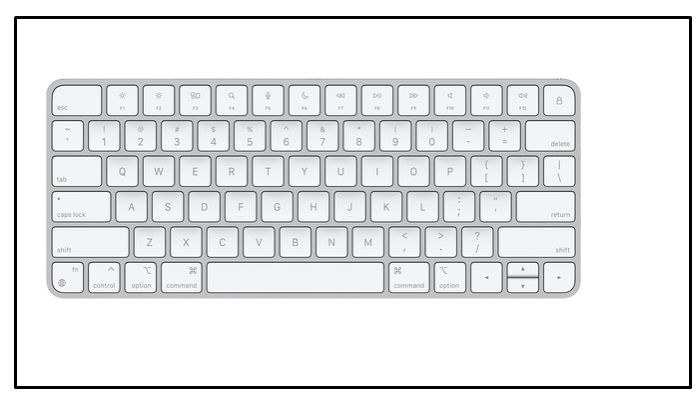
To restart your keyboard and reconnect it, follow these steps:
- Locate the “tiny switch” on the upper right side of the keyboard.
- Slide the switch to “turn off “the keyboard.
- Slide the switch back to turn on the keyboard.
- Wait for the keyboard to automatically connect to your device without the need to go into Bluetooth settings.
Step 3: Reset Bluetooth Connections
Resetting Bluetooth connections eliminates the week signal and re-establish the connection with the devices.
- On the AVP, go to “Settings” and turn Bluetooth off and then back on.
- On the MS, navigate to “System Preferences” > Bluetooth and disconnect then reconnect the AVP.
Step 4: Re-pair Devices
Apple Vision Pro does not support older models of Apple keyboards and trackpads that rely on removable batteries. Also, is not compatible with Bluetooth mice
Unpair the keyboard and trackpad from both the AVP and the MS, then pair them again, starting with the device you want to control first.
First Pair with Apple Vision Pro, then Pair with Mac Studio.
Step 5: Check Battery Levels
Low battery levels in your Bluetooth keyboard and trackpad can cause connectivity issues. Ensure they are fully charged or have fresh batteries.
The light indicators provide immediate feedback about the current charge level of the battery.
This helps you know when the battery is fully charged, when it’s charging, and when it needs to be charged, ensuring that you can use your Apple Vision Pro without unexpected interruptions.
- If you see “Pulsing Amber, the battery is below 10%” and you need to connect the battery to power source immediately.
- If you see “Solid Amber” colour light, then the headset battery is between 10% – 50 % and plan your work accordingly to avoid interruptions.
Step 6: Check for Obstructions
To maintain optimal input functionality with the Apple Vision Pro, it’s crucial to ensure an unobstructed Bluetooth signal. Physical barriers can adversely affect signal strength and input recognition. Disconnect any extraneous Bluetooth devices, such as mobile phones or controllers, that may be paired with the Apple Vision Pro, leaving only the Mac Studio and the keyboard connected.
Additionally, verify that the Apple Vision Pro is within the standard Bluetooth operational range of approximately 20 feet to prevent connection issues due to excessive distance.
Step 7: Test with Different Peripherals
There might be an issue with the Bluetooth accessories and the error occurs. If possible, test with a different Bluetooth keyboard and trackpad to rule out hardware issues with the peripherals themselves.
Step 8: Use Wi-Fi for RVD Connection
- If the AVP and MS support Wi-Fi for RVD, try using Wi-Fi instead of Bluetooth to establish the connection, as Wi-Fi generally offers a more stable and broader range.
Step 9: Check for Vision and iOS Software Updates
Updating OS will resolves any bug in software and removes corrupted files. Running outdated software can lead to various issues with your device ( Vision pro and iOS):
To Update Apple Vision Pro,
Automatic Update Steps:
- Press “Crown button” to enter into home view
- Click on “App icon ” from the Tab bar to go to app list
- Open “Settings” on your Apple Vision Pro at the left side panel.
- Tap “General,” then “Software Update.“
- Select Automatic Updates.
- Turn on ‘Download visionOS Updates’ and ‘Install visionOS Updates’.
- Ensure your device is charging and connected to Wi-Fi to automatically update overnight, and await a notification before installation.
Manual Update Steps:
- Press “Crown Button” to go to Home view
- Go to “Settings” on your Apple Vision Pro at the left side bar.
- Choose “General,” then tap on “Software Update.“
- Check if an update is available.
- If an update is available, start the update process.
- Remove the Apple Vision Pro while it updates and monitor the update progress on the front display.
- Click on the “Apple icon” in the top-left corner of your screen.
- Choose “System Preferences” from the dropdown menu.
- Select “Software Update” to check for available updates.
- If an update is available, click “Update Now” or “Upgrade Now.”
- Follow the on-screen instructions to complete the installation.
- Your Mac Studio may restart several times during the update.
Step 9: Contact Apple Support

If the issue persists, reach out to Apple Support , scroll down and click on “Contact Apple support” for further assistance. They may have additional insights or steps for troubleshooting specific to the AVP and MS.
