The Apple ecosystem is designed to be both personal and shareable, but when it comes to Apple IDs, the rule is one person per profile. Unlike some digital services that allow multiple profiles under one account, Apple IDs are intended to be used individually.
However, the Apple Vision Pro offers an innovative approach to device sharing with its Guest User feature, allowing multiple individuals to use the device while maintaining the privacy and personal preferences of the primary user.
This feature is particularly useful in scenarios where friends, family, or colleagues need to use the Vision Pro without altering the owner’s settings or accessing their personal information.
In this blog post, lets learn step by step guide to create multiple user accounts on the Apple Vision Pro
How To Create Multiple User Accounts On The Apple Vision Pro
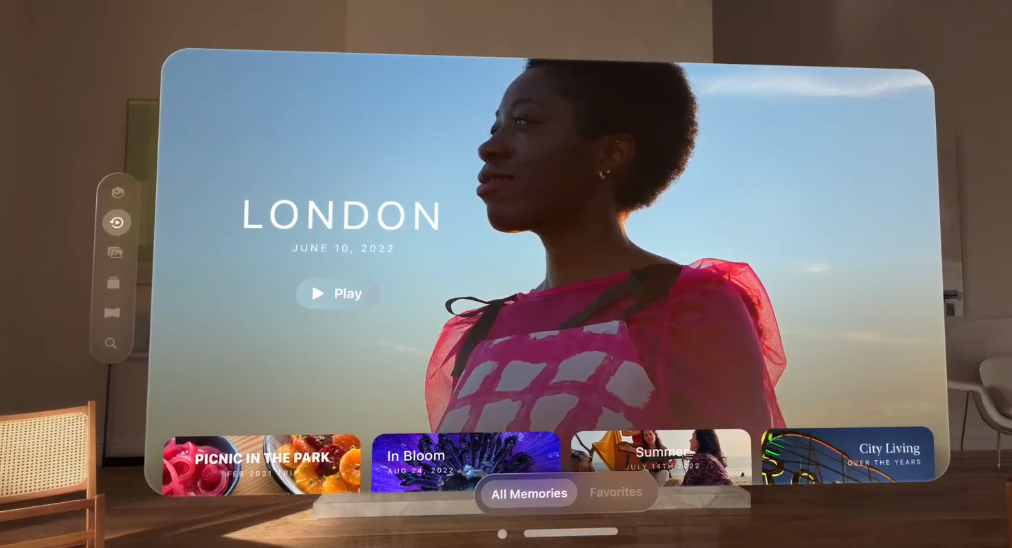
Apple IDs are single-user only, but with Family Sharing, up to six people can share subscriptions using their own IDs, keeping accounts private. Alternatively, you can create a guest account to share your device without compromising personal data.
1. Create User Account Using Guest Feature On Apple Vision Pro
Go to “Control Centre” > “Guest User Button” > Grant required permissions to Apps > “Start“
Step 1: Open Control Centre
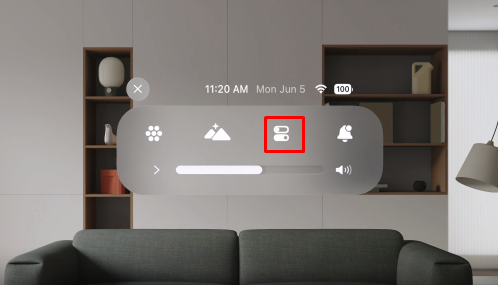
- With your Apple Vision Pro on, look up and tap the “Downward arrow” to open “Control Center.“
Step 2: Initiate Guest User Mode
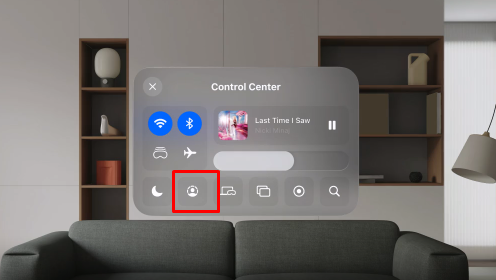
- In the Control Center, tap the “Guest User button “to enter the guest mode settings.
Step 3: Set Allowed Apps
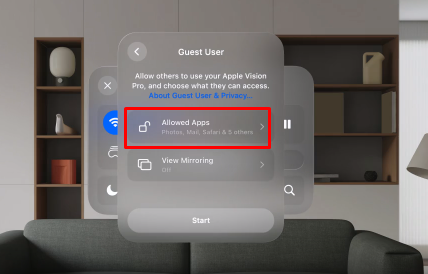
- Choose which apps the guest user is allowed to access by tapping Allowed Apps. You can select either “Open Apps Only” or “All Apps.”
- Note: Granting access to all apps may expose your information in certain apps. However, sensitive features like Optic ID, Apple Pay, EyeSight, and Persona will remain private.
Step 4: Configure a Passcode (if required)
- Some options might necessitate setting up a passcode for additional security. Follow the instructions to set or change the passcode as needed.
Step 5: Enable View Mirroring (optional)
- If you wish to see the guest’s activity, tap “View Mirroring” and select a compatible device from those available on the same Wi-Fi network.
Step 6: Start the Session
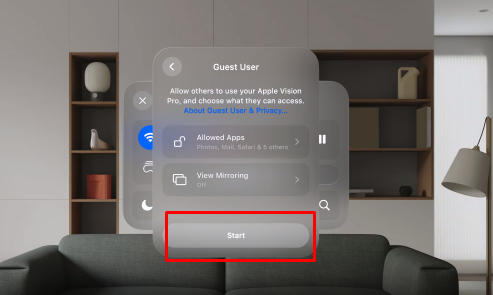
- Tap “Start” to begin the Guest User session. Then remove the Apple Vision Pro and hand it over to the guest.
Step 7: Automatic Session Timeout
- If the Apple Vision Pro is not worn within 5 minutes, the session will automatically end. Additionally, if a passcode is set, the device will lock itself.
Step 8: Ending a Guest User Session
- Remove the Headset: The guest can simply take off the Apple Vision Pro to end their session.
- Manual Session Termination: Alternatively, the guest user can open Control Center, tap the Guest User button, and then select End Session to conclude their use.
2. Family Sharing On Apple Vision Pro
To take advantage of Family Sharing on your Apple devices, including the Apple Vision Pro, follow these steps to set up and manage your Family Sharing group. This feature allows you and up to five other family members to share Apple services, purchases, and an iCloud storage plan.
To share your Apple subscriptions with your family members through the Family Sharing feature on your Apple Vision Pro headset, please follow these detailed steps:
Step 1: Enter Home View
- “Press the Crown button” at the top of the Headset. This will take you to the Home View, which is the main navigation interface of the Apple Vision Pro.
Step 2: Access Apple Menu
- In the Home View, direct your gaze to the “Tab bar” located at the right side of the screen. Here, you should see an “App icon” and tap on it.
Step 3: Open Settings App
- Within the Apple menu, locate the “Settings App” icon, which usually looks like a gear. Perform a pinch gesture to select and open the “Settings App“.
Step 4: Access iCloud Settings
- In the Settings App, tap on “Your Name “which is present at the right panel of the interface. This will take you to your Apple ID settings.
- From there, navigate to and select “iCloud Settings” to adjust your iCloud preferences and manage features related to your Apple ID.
Step 5: Manage Subscriptions
- Look for the option labelled “Manage Subscriptions” within the Family Sharing settings and click on it using a hand gesture.
Step 7: Share Subscriptions
- You will now see a list of your active subscriptions. Locate the “Share with Family” toggle next to the subscriptions you want to share. Use a hand gesture to toggle this option on for each subscription you wish to share with your family members.
If you don’t see the option Share with Family, it means the subscription cannot be shared with family members.
3. Switching Apple ID On Apple Vision Pro
Alternatively you can switch your ID if you don’t want to use guest feature.
To switch between different Apple ID accounts on your Apple Vision Pro, follow these steps:
Step 1: Sign Out of Your Current Apple ID
- Press “Crown button” at the top of the headset and click on “Tab bar” at the left side of the screen,
- Look and Open the “Settings app” on your Apple Vision Pro.
- Select your name at the top of the left-hand sidebar to access your Apple ID settings.
- Scroll down to the bottom of the “Apple ID” settings page.
- Choose to “sign out” of your main Apple ID account. You may be prompted to enter your password to confirm the sign-out process.
Step 2: Sign In with a Different Apple ID
- Once signed out, you will be taken back to the main Settings page, or you may see a sign-in prompt.
- Tab on “Input box” , the virtual keyboard appears automatically.
- Enter the email address and password associated with the different Apple ID that you want to use.
- Follow the on-screen instructions to complete the sign-in process for your new Apple ID.
Step 3: Troubleshoot App Store Issues
If you encounter issues with the Vision Pro App Store, such as not seeing apps associated with your new account, you may need to sign in to the App Store with the second Apple ID.
- Go to Home view by pressing “Crown button” at the top of the headset.
- Click on “App icon” and open the “App Store app” on your Apple Vision Pro.
- If you’re still signed in with the previous Apple ID, sign out by going to the account settings within the App Store.
- Sign in with the new Apple ID credentials.
- After signing in, check if the apps associated with the new account now appear correctly.
Remember that when you sign in with a different Apple ID, the data and purchases associated with the previous account will no longer be accessible, and the device will now sync with the data from the new Apple ID.
